If you’re building mechanical assemblies with 3D printed parts, you’ll quickly realize that driving machine screws into thermoplastic isn’t exactly an ideal solution. It can work in a pinch, but you can easily strip the threads if you crank down too hard. The plastic holes can also get worn down from repeated use, which is a problem if you’re working on something that needs to be taken apart and reassembled frequently. In those situations, using brass heat set inserts gives the fasteners something stronger to bite into.
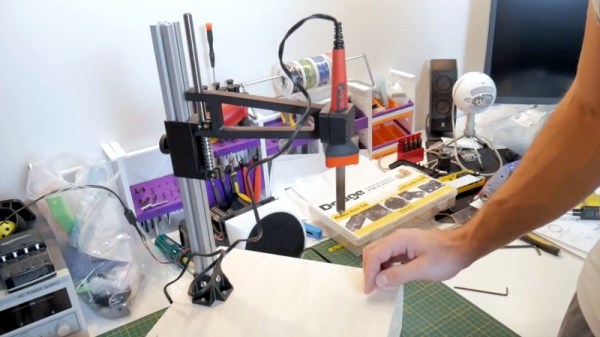
You can install these inserts by hand, but if you plan on doing a lot of them, a dedicated press station like the one [Chris Chimienti] recently put together will save you a lot of aggravation in the long run. In the video after the break he walks viewers through the design and use of the device, which itself relies on a number of 3D printed parts using the very same inserts it’s designed to install.
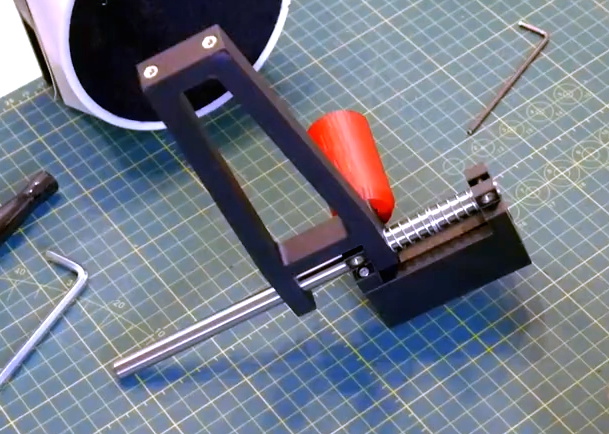
To build this tool you’ll need a piece of aluminum extrusion, some smooth rod, a couple springs, and an assortment of fasteners. Nothing that wouldn’t likely be in the parts bin of anyone who’s been tinkering with 3D printers for awhile, though even if you had to buy everything, the Bill of Materials will hardly break the bank. For the base you can use a piece of scrap wood, though [Chris] has opted to make it a storage compartment where he can store the inserts themselves. We really like this approach, but obviously you’ll need to have access to woodworking tools in that case.
Clearly shopping on the top shelf, [Chris] purchased a kit that actually came with a Weller soldering iron and the appropriate tips for the various sized inserts. If you’re like us and just buy the inserts that come in a plastic baggie, you may need to adapt the arm to fit your iron of choice. That said, the idea of having a dedicated iron that you can leave mounted in the press makes a lot of sense to us if you can swing it.
[Joshua Vasquez] wrote up a phenomenal guide to getting started with heat set inserts last year that’s an absolute must-read for anyone interested in the concept. Whether you build a dedicated press or just push them in freehand, his tips and tricks will help insure you get the best result possible.
Continue reading “Building An Affordable Press For Heat Set Inserts”