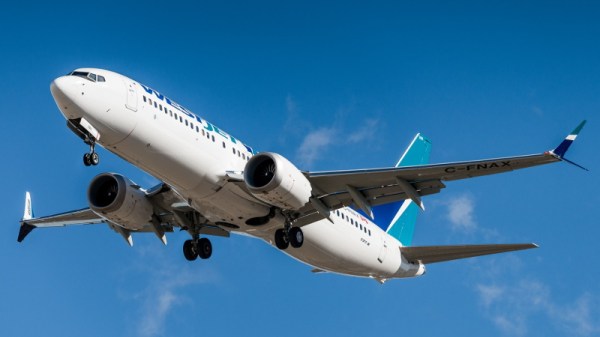
No, Your 3D Printer Doesn’t Have A Fingerprint

Hackers and makers see the desktop 3D printer as something close to a dream come true, a device that enables automated small-scale manufacturing for a few hundred dollars. But it’s not unreasonable to say that most of us are idealists; we see the rise of 3D printing as a positive development because we have positive intentions for the technology. But what of those who would use 3D printers to produce objects of more questionable intent?

We’ve already seen 3D printed credit card skimmers in the wild, and if you have a clear enough picture of a key its been demonstrated that you can print a functional copy. Following this logic, it’s reasonable to conclude that the forensic identification of 3D printed objects could one day become a valuable tool for law enforcement. If a printed credit card skimmer is recovered by authorities, being able to tell how and when it was printed could provide valuable clues as to who put it there.

This precise line of thinking is how the paper “PrinTracker: Fingerprinting 3D Printers using Commodity Scanners” (PDF link) came to be. This research, led by the University at Buffalo, aims to develop a system which would allow investigators to scan a 3D printed object recovered from a crime scene and identify which printer was used to produce it. The document claims that microscopic inconsistencies in the object are distinctive enough that they’re analogous to the human fingerprint.

But like many of you, I had considerable doubts about this proposal when it was recently featured here on Hackaday. Those of us who use 3D printers on a regular basis know how many variables are involved in getting consistent prints, and how introducing even the smallest change can have a huge impact on the final product. The idea that a visual inspection could make any useful identification with all of these parameters in play was exceptionally difficult to believe.

In light of my own doubts, and some of the excellent points brought up by reader comments, I thought a closer examination of the PrinTracker concept was in order. How exactly is this identification system supposed to work? How well does it adapt to the highly dynamic nature of 3D printing? But perhaps most importantly, could these techniques really be trusted in a criminal investigation?

Continue reading “No, Your 3D Printer Doesn’t Have A Fingerprint”

ESP8266 Gets Its Game On With Open Source Engine

This is likely not to come as much of a shock to you, but the ESP8266 is pretty popular. At this point, we’re more surprised when a project that hits the tip line doesn’t utilize this incredibly cheap WiFi-enabled microcontroller. If you’re making a gadget that needs to connect to the Internet, there’s a good chance some member of the ESP family is going to be a good choice. But is it a one-trick MCU?

ESP Little Game Engine Logo

Well, judging by software frameworks like the “Little Game Engine” created by [Igor], it looks like the ESP is expanding its reach into offline projects as well. While it might not turn the ESP8266 into a next-gen gaming powerhouse, we’ve got to admit that the demos shown off so far are pretty impressive. When paired with a couple of buttons and a TFT display such as the ILI9341, the ESP could make for a particularly pocket-friendly game system.

The game engine that [Igor] has developed provides the programmer with a virtual screen resolution of 128×128, a background layer, and 32 sprites which offer built-in tricks like collision detection and rotation. All while running at a respectable 20 frames per second. This environment is ideal for the sort of 2D scrolling games that dominated the 8 and 16-bit era of gaming, and as seen in the video after the break, it can even pull off a fairly decent clone of “Flappy Bird”.

In addition, [Igor] created an online emulator and compiler which allows you to develop games using his engine right in your web browser. You can load up a selection of example programs and execute them to see what the engine is capable of, then try your hand at developing your own game before ever having to put the hardware together. Incidentally, the performance of this online development environment is fantastic; with even the fairly complex “Flappy Bird” example code compiling and starting in the emulator nearly instantaneously.

This isn’t the first handheld game we’ve seen powered by the ESP8266, but it would be fair to say this one is a generational leap over its predecessors. Of course, if you really want to start throwing around some pixels, you might want to make the leap to the ESP32; which is the heart of the incredibly awesome (and tiny) PocketSprite.

Continue reading “ESP8266 Gets Its Game On With Open Source Engine”

The Fine Art Of Restoring Matchbox Cars

Did you have anything planned for the next hour or so? No? That’s good because if you’re anything like us, watching even one of the restorations performed on [Marty’s Matchbox Makeovers] is likely to send you down a deep dark rabbit hole that you never knew existed. Even if you can’t tell the difference between Hot Wheels and Matchbox (seriously, that’s a big deal in the community), there’s something absolutely fascinating about seeing all the little tips and tricks used to bring these decades-old toy cars back into like new condition.

Sketching a replacement part to be 3D printed.

You might think that all it takes to restore a Matchbox car is striping the paint off, buffing up the windows, and respraying the thing; and indeed you wouldn’t be too far off the mark in some cases. But you’ve got to remember that these little cars have often been through decades of some of the worst operating conditions imaginable. That is, being the plaything of a human child. While some of the cars that [Marty] rebuilds are in fairly good condition to begin with, many of them look like they’ve just come back from a miniature demolition derby.

The ones which have had the hardest lives are invariably the most interesting. Some of the fixes, like heating up the interior and manually bending the steering wheel back into shape, are fairly simple. But what do you do when a big chunk of the vehicle is simply gone? In those cases, [Marty] will combine cyanoacrylate “super glue” with baking powder to fill in voids; and after filing, sanding, and painting, you’d never know it was ever damaged.

When a car needs more than just paint to finish it off, [Marty] will research the original toy and make new water slide decals to match what it would have looked like originally. If it’s missing accessories, such as the case with trucks which were meant to carry scale cargo, he’ll take careful measurements so he can design and print new parts. With some sanding and a touch of paint, you’d never know they weren’t original.

There’s plenty of arcane knowledge to be gained from folks like [Marty] who have experience with scale models. We don’t often see much of that come our way, but when we do, we’re always impressed at the lengths individuals will go to get that perfect end result. Whether or not you think you’ll find yourself rebuilding a pocket-sized school bus anytime soon, we think there are lessons to be learned from those who might. Continue reading “The Fine Art Of Restoring Matchbox Cars”

RGB Word Clock Doesn’t Skimp On The Features

Like most pieces of technology, word clocks seem to be getting better and better every year. As hackers get their hands on better microcontrollers and more capable LED controllers, these builds not only look more polished, but get improved features and functions. Luckily for us, the rise of these advanced modular components means they’re getting easier to build too. For an example of these parallel traits, look no further than VERBIS by [Andrei Erdei].

This colorful word clock is powered by an ESP8266, a 8×8 RGB LED matrix, and a WS2812 RGB LED controller module. [Andrei] used the diminutive ESP-01 which can plug right into the LED controller, and just needs a 3.3 VDC regulator board to complete the very compact electronics package.

To keep the LEDs from interfering with each other, [Andrei] has designed a 3D printed grid which fits over the matrix board. On top of that goes a piece of paper that has the letters printed on it. He mentions that he was able to get good results printing this “stencil” out on an inkjet printer by simply running the same piece of paper through a few times; picking up more black ink each time it went through. Judging by the sharp characters seen in the video after the break, the trick worked well.

With his hardware put together, [Andrei] turned his attention to the software. We really think the project shines here, as his clock not only supports NTP for automatically setting the time over the Internet, but offers a full web interface to control various functions such as the LED colors. You can even change the NTP server and network configuration right from the UI, which is a nice touch compared to just hard coding the values into the code. Even if you don’t use the same hardware, the open source control software is definitely something you should look into if you’re building your own word clock.

We recently covered another easy to build word clock that used an LED matrix and not a whole lot else, but it was quite tiny. This build is a much more reasonable size for a desk, but you’ll probably need to break out the laser cutter if you want to get much bigger.

Continue reading “RGB Word Clock Doesn’t Skimp On The Features”

SVG Rendering Comes To 8-bit Atari Computers

Bringing modern protocols and techniques to vintage computers is a favorite pastime for hackers, and over the years we’ve seen some absolutely incredible hardware and software projects designed specifically to do what most people would consider impossible. They’re very rarely practical projects, of course. But that’s never really the point.

The product of 45 minutes of work.

Today we present another excellent entry into this niche avenue of hacking: Renderific, a tool to render SVGs on 8-bit Atari computers by [Kevin Savetz]. The MIT licensed program is written in Turbo-BASIC XL and allows computers such the 1200XL and 800XL to not only render the image on screen but output it to an attached plotter. There are a few niggling issues with some files, and apparently the plotter draws the image upside-down for some reason, but on the whole we can now add “SVG Rendering” to the list of things you can do with a nearly 40-year-old computer.

Of course, those who are familiar with these 1980’s machines might wonder how their limited CPUs can possibly cope with such a task. Well, that’s where the impracticality comes in. According to [Kevin], you can be in for quite a wait depending on the complexity of the image. In his tests, some SVGs took up to 45 minutes to fully render on the screen, so you might want to have a snack handy.

If you’re interested in lending a hand with the project, it sounds as though [Kevin] could use some assistance in figuring out why the Atari 1020 plotter doesn’t like the output of his program. There’s also a few SVG functions and forms of Bézier curves that need some work if you’ve got your Turbo-BASIC XL programming books handy.

Will you ever have a need to view SVG files on an Atari 1200XL? No, probably not. You might not have a desire to play Spotify on the Macintosh SE/30 either, but that hasn’t stopped hackers from figuring out how you can do it. As long as these old machines are still up and running, we’re confident that the community will continue to teach them new tricks.

The Heat Is On With This ESP8266 Controlled Sauna

We’ll be perfectly honest: sitting inside a heated box sounds just a bit too much like torture for our tastes. But if we did somehow find ourselves in possession of a fancy new sauna, we’d more than likely follow in the footsteps of [Al Betschart] and make the thing controllable with the ESP8266. After all, if you’re going to be cooked alive, you might as well do it on your own terms.

The sauna itself was purchased as a kit, and included an electric heater controlled by a thermostat. As explained in his detailed documentation, [Al] integrated a Sonoff TH16 into the original heater circuit so he could control power to the coils remotely. The TH16 also includes support for a thermal sensor, which allowed him to get a reading on the sauna’s internal temperature. The new electronics were mounted in a weather-proof box on the back of the sauna, complete with an external WiFi antenna to help get a good signal back to the house.

At this point the project could technically be done if all you wanted was remote control, but [Al] wanted to create a replacement firmware for the Sonoff that was specifically geared towards the sauna. So he came up with some code that uses MQTT to connect the heater to his home automation system, and allows configuring things like the maximum temperature and how long the sauna will run before turning itself off.

Interestingly, the company who makes these saunas thought the work [Al] did to integrate their product into his home automation system was so impressive they actually interviewed him about it and put it up on their site for others who might be inspired by his work. We’ve covered a lot of hacks to consumer devices here at Hackaday, and it’s exceedingly rare for a company to be so supportive of customers fiddling around with their products (especially in a case like this where there’s a real chance of burning your house down), so credit where credit is due.

The last time we brought you a sauna hack it was quite literally in a van down by the river, so the addition of an ESP8266 certainly brings this more into our comfort zone. Figuratively, if not literally.

[Thanks to Jon for the tip.]

Fueled By Jealousy, This Smart Lamp Really Shines

As a lover of lava lamps, [Julian Butler] knew when he saw a coworker’s modern LED incarnation of the classic piece of illuminated decor that he had to have one for himself. The only problem was that the Kickstarter for it had long since ended, and they were no longer available. So he did what any good hacker would do: he studied it closely, took a bunch of notes, and built his own version that ended up being even better than the original.

In the three part series on his blog, [Julian] takes us through the design and construction of his take on the Ion Mood Light, which raised over $72,000 back in 2014. The details in the Kickstarter campaign plus his own first-hand observations of the device were enough to give him the high-level summary: the device has a core of RGB LEDs behind a diffuser, and uses some software trickery to pulse out some pleasing effects and patterns. He wasn’t concerned about the Bluetooth or the smartphone application, so all he really needed to do was put some NeoPixel LEDs inside a glass cylinder and he’d be done. Of course, it always sounds easy…

The actual journey to get there, as you might have guessed from the three part series, took awhile. Sourcing the LEDs was easy enough, and using a Fadecandy controller made getting the LEDs to blink out some cool patterns fairly straightforward. But it took [Julian] a bit of experimentation and a few trips to the crafts store before he found a material which would diffuse the LEDs enough for his tastes. Though in the end, he thinks the multiple layers of acrylic he ended up going with actually do a better job of blending the light from the individual LEDs than in the original Ion.

Using the Fadecandy made it easy to drive the LEDs, but he still needed something to provide it with the commands. To that end, he added a decorative base to his LED column that hides a Raspberry Pi and all the lamp’s associated electronics. This includes a microphone which gives his lamp the same sort of sound reactive features that made the Ion so popular. The base does make his lamp a bit bulkier than the original version, but the metallic mesh construction is attractive enough the overall look works.

Of course, you might be wondering how [Julian] got the LEDs to react to sound, or do any of the other gorgeous effects shown off in the video after the break. The software which makes this possible makes up the third and final post in the series, and is really a whole project in itself. The short version of the story is that he used Python and Processing to do real-time computational fluid dynamics, but not before making the necessary adjustments to speed up the simulation on ARM hardware. You know, normal lamp stuff.

This isn’t the first time we’ve seen projects using the Fadecandy board. From creating a Tron inspired desk to building the 5,760 LED “Space Tunnel”, it looks like a great choice if you’ve got a problem that can be solved by the application of a ridiculous number of LEDS.

Continue reading “Fueled By Jealousy, This Smart Lamp Really Shines”