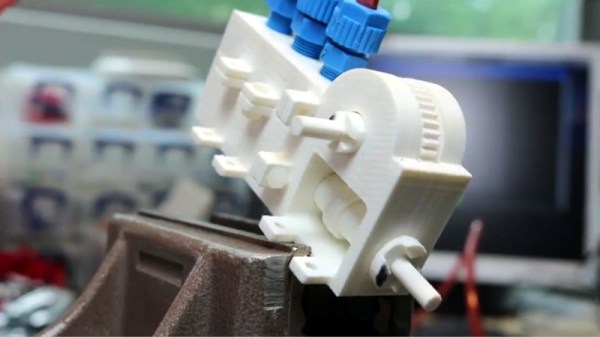
An MRI-Safe 3D Printed Pneumatic Stepper Motor

You will no doubt have seen those videos where MRI machines suck up all sorts of metallic objects with hilariously disastrous results. The magnetic field in one of these machines can easily pull in metal objects from across the room, exerting a force of several hundred pounds on any ferrous object unlucky enough to wander too close. As you can probably imagine, designing mechanical devices that can operate in such an intense magnetic field is exceptionally difficult.

But this fully 3D printed pneumatic stepper motor designed by [Foad Sojoodi Farimani] might one day change that. The PneuAct, which he presented at the recent International Conference on Robotics and Automation (ICRA) in Brisbane, Australia, manages to run at up to 850 RPM with full position control using bursts of air rather than electronic pulses. Made entirely of plastic and without any electronic components, the PneuAct can not only operate in intense magnetic fields but also areas with flammable gases where sparks could potentially cause an explosion.

We often say that a design is “fully” 3D printable, even though it might require screws or other bits of hardware. But in the case of the PneuAct, it’s truly all printed. It has to be, or else the whole thing would be ripped apart when it got to close to the MRI machine. Each and every piece of the motor is printed in ABS, and can be used without any additional machining or cleanup. No lubrication is required, and [Foad] mentions that the whole thing is so cheap that it can be disposable. Which is a huge advantage in medical environments where contamination could be a concern.

Design-wise the PneuAct is essentially an expanded version of the 3D printed air motors we’ve seen previously, but it would be fair to say that none has ever been studied so closely before.

Continue reading “An MRI-Safe 3D Printed Pneumatic Stepper Motor”
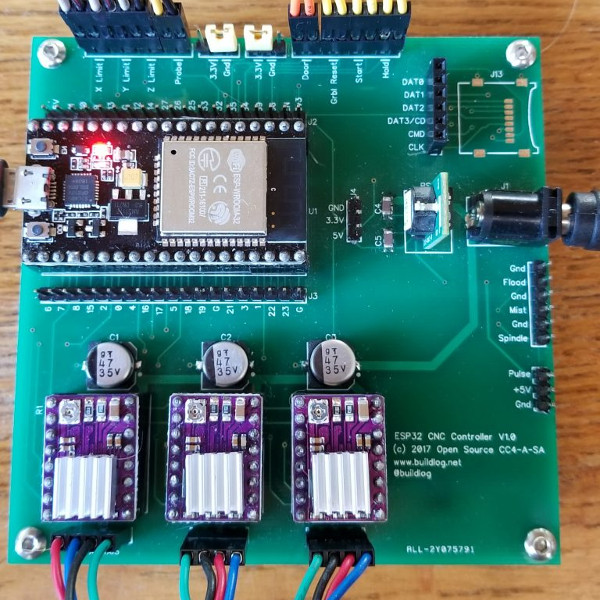
Grbl Ported To The ESP32

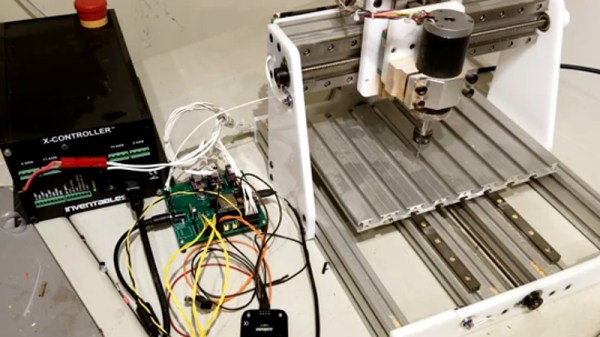
If you’re building a CNC or laser, there’s an excellent chance you’ll be using Grbl to get moving. It’s also a pretty safe bet you’d end up running it on some variation of the Arduino sitting in a motor controller breakout board. It’s cheap, easy to setup and use, and effectively the “industry” standard for DIY machines so there’s no shortage of information out there. What’s not to love?

Well, quite a few things in fact. As [bdring] explains, Grbl pushes the capability of the Arduino to the very limit; making it something of a dead-end for future development. Plus the Arduino needs to be plugged into the host computer via USB to function, a rather quaint idea to many in 2018. These were just some of the reasons he decided to port Grbl to the ESP32 board.

Price wise the Arduino and ESP32 are around the same, but the ESP does have the advantage of being much more powerful than the 8-bit Italian Stallion. Its got way more flash and RAM as well, and perhaps most importantly, includes Wi-Fi and Bluetooth out of the box. It still needs to be plugged into a board to hold the motor drivers like the Arduino, but beyond that [bdring] opines the ESP32 is about as close to the perfect Grbl platform as you can get.

[bdring] reports that porting the code over to the ESP32 wasn’t terrible, but it wasn’t exactly a walk in the park either. The bulk of the code went by without too much trouble, but when it came to the parts that needed precise timing things got tricky. The ESP32 makes use of a Real Time Operating System (RTOS) that’s not too happy about giving up control of the hardware. Turning off the RTOS was an option, but that would nuke Bluetooth and Wi-Fi so obviously not an ideal solution. Eventually he figured out how to get interrupts more or less playing nicely with the RTOS, but mentions there’s still some more work to be done before he’s ready to release the firmware to the public.

If you’ve been browsing Hackaday for a while you may remember [bdring]. He’s got a real knack for making things move, and has created a number of fantastic little CNC machines recently which have definitely caught our eye.

[Thanks to Jon and Craig for the tip.]

Continue reading “Grbl Ported To The ESP32”

ESP8266 Zelda Heart Responds To Tweets

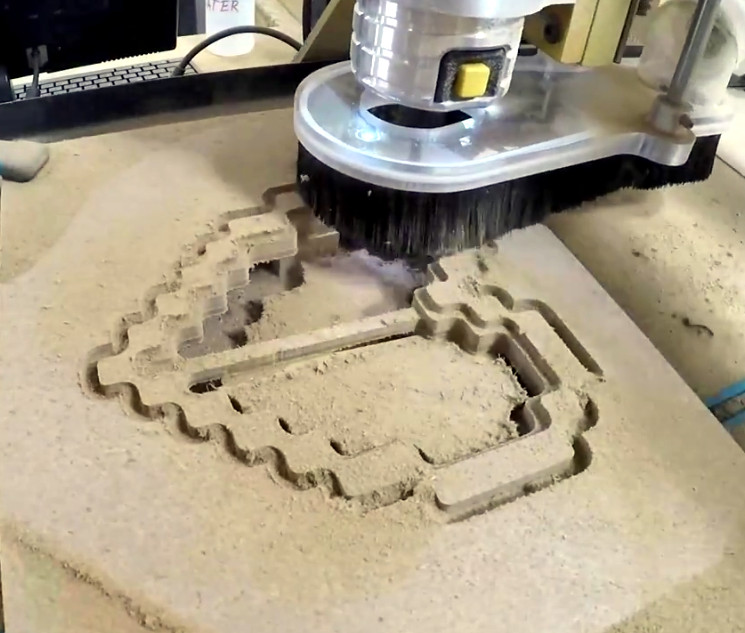
It might not be enough to make you the Hero of Time, but this piece of Hylian interactive art would still be a worthy addition to your game room. [Jeremy Cook] writes in to tell us about how he put together this 8-bit style heart display, and goes into enough detail on the hardware and software sides of things that you shouldn’t have any problem adapting his design for your own purposes.

The build is pretty simple overall but it does assume you have a CNC to cut the basic shape out of MDF. You could cut the shape by hand if you had to, but if you don’t have a CNC the next best thing might be to 3D print the case. You’d potentially have to print it in two parts right down the center though, depending on how big your bed is. Whichever way you create the case, you’ll then need to cut the shape out of a piece of acrylic to make the face.

In any event, once the pieces are cut out [Jeremy] adds in a Wemos D1 Mini, a power supply, and some red LED strips. He provides a wiring diagram, but it’s fairly straightforward stuff. With a couple of 2N2222 transistors he controls the LED strips right from the digital pins of the ESP8266.

The software side is setup to be controlled via IFTTT by way of Adafruit.io. When IFTTT sees one of the keywords on Twitter, it passes a message to Adafruit.io which ultimately talks to the ESP8266 and gets the heart going. The software supports three states (on, off, and half) and gives a good example of a basic IoT implementation on the ESP8266 if you’re looking for some inspiration.

This hack seems like it would fit in perfectly with the Zelda home automation project we covered last year.

HOPE XII: A FOSS Operating System For E-Readers

Free and open source software (FOSS) was a recurring theme during many of the talks during the HOPE XII conference, which should probably come as no surprise. Hackers aren’t big fans of being monitored by faceless corporate overlords or being told what they can and cannot do on the hardware they purchased. Replacing proprietary software with FOSS alternatives is a way to put control back into the hands of the user, so naturally many of the talks pushed the idea.

In most cases that took the form of advising you to move your Windows or Mac OS computer over to a more open operating system such as GNU/Linux. Sound advice if you’re looking for software freedom, but it’s a bit quaint to limit such thinking to the desktop in 2018. We increasingly depend on mobile computing devices, and more often than not those are locked down hard with not only a closed proprietary operating system but also a “Walled Garden” style content delivery system. What’s the point of running all FOSS software at home on your desktop if you’re carrying a proprietary mobile device around?

That’s precisely the thinking that got Marc Juul interested in the possibility of bringing a FOSS operating system to e-reader devices. During his talk “Liberate Your E-book Reader with fread.ink!”, he gave examples such as Amazon’s infamous remote deletion of 1984 off of users’ Kindles as a perfect example of the sort of control these companies exert on our personal devices. Marc believes the goal should be to completely replace the operating system on these devices with a free software alternative that still retains the ability to open electronic book formats. Not only would this keep the likes of Amazon or Barnes and Noble out of our reading habits, but turn these cheap readers into more capable devices in the bargain.

Continue reading “HOPE XII: A FOSS Operating System For E-Readers”

Monoprice Mini Converted To Pick And Place (Kinda)

Would you believe that you can take a cheap 3D printer and easily convert it into a full function pick and place machine to help assemble your PCBs? No? Well good, because you can’t. A real pick and place needs all kinds of sensors and logic to identify parts, rotate them, make sure everything is aligned, etc, etc. There’s no way you could just bolt all that onto a cheap 3D printer, and let’s not even talk about the lack of closed loop control.

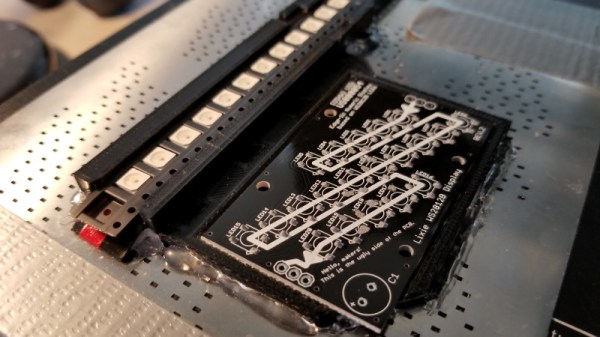
But if you have a very specific use case, namely a PCB that only has a relatively large single part that doesn’t need to be rotated, [Connor Nishijima] might have a solution for you. He bought a $150 USD Monoprice Mini, and with the addition of a few printed parts, was able to build a machine that drastically cuts down the time it takes for him to build his LED boards. Best of all the modification doesn’t involve any permanent changes to the printer, he can just pop off the vacuum attachment when he wants to print something.

Beyond the 3D printed parts (which were made on the printer itself), the only thing you need to make the modification is the vacuum pump. [Connor] is using a hot air station that includes a vacuum pump for picking up SMD components, but he mentions that you’d probably better off just modifying an aquarium pump and using that. A printed holder snaps over the cooling fan of the Monoprice Mini to hold the vacuum pickup tool, and another printed piece holds the strip of LEDs and the PCB. It’s worth noting that the machine has no ability to control the vacuum pump, and doesn’t need to. The pickup tool is so weak that when the LED lands in the solder paste it sticks to the board well enough that the tool can’t lift it back off.

The real genius in this build comes from the manually written G-Code. You load it from the printer’s built in menu system as if it was a normal 3D print, and it instructs the printer to move the vacuum tool over the line of LEDs, pick one up, and drop it in place on the PCB. It then uses a small peg built into the vacuum tool holder to advance the line of LEDs before starting the cycle all over again. Incredibly, it does this whole complex dance 20 times for each PCB without ever having any kind of feedback or alignment check. It only works because [Connor] was willing to go through the trial and error of getting the calibration and G-Code down as close to perfect as can be expected for such a cheap machine.

This isn’t the first time we’ve seen the Monoprice Mini converted into something a bit more impressive than a cheapo 3D printer. Seems that for whatever the machine lacks in the printing department, it more than makes up for in hackability.

Continue reading “Monoprice Mini Converted To Pick And Place (Kinda)”

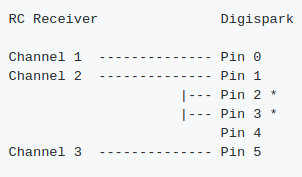
Simple RC To USB Interface

With the radio control hobby arguably larger now than it ever has been in the past, there’s a growing demand for high-fidelity PC simulators. Whether you want to be able to “fly” when it’s raining out or you just want to practice your moves before taking that expensive quadcopter up for real, a good simulator on your computer is the next best thing. But the simulator won’t do you much good if it doesn’t feel the same; you really need to hook your normal RC transmitter up to the computer for the best experience.

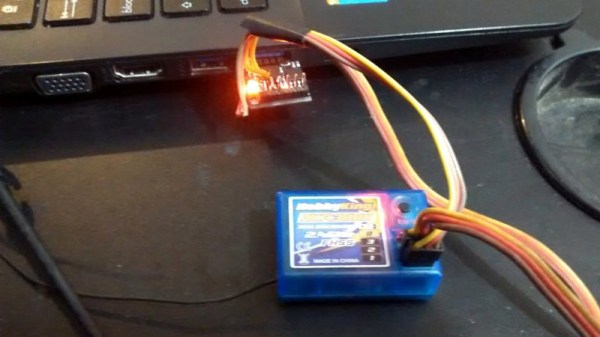
[Patricio] writes in to share with us his simple hack for interfacing his RC hardware to his computer over USB. Rather than plugging the transmitter into the computer, his approach allows the receiver to mimic a USB joystick. Not only is this more convenient since you can use the simulator without wires, but it will make sure that the minutiae of your radio hardware (such as response lag) is represented in the simulation.

The setup is actually very simple. [Patricio] used the ATtiny85 based Digispark development board because it’s what he had on hand, but the principle would be the same on other microcontrollers. Simply connect the various channels from the RC receiver to the digital input pins. RC receivers are 5 VDC and draw very little current, so it’s even possible to power the whole arrangement from the USB port.

On the software side, the Arduino sketch does about what you expect. It loops through listening for PWM signals on the input pins, and maps that to USB joystick position information. The current code only supports three channels for a simple airplane setup (X and Y for joystick, plus throttle), but it should be easy enough to follow along and add more channels if you needed them for more complex aircraft.

For more information on the intricacies of RC transmitter and receiver interaction, check out this fascinating research on receiver latency.

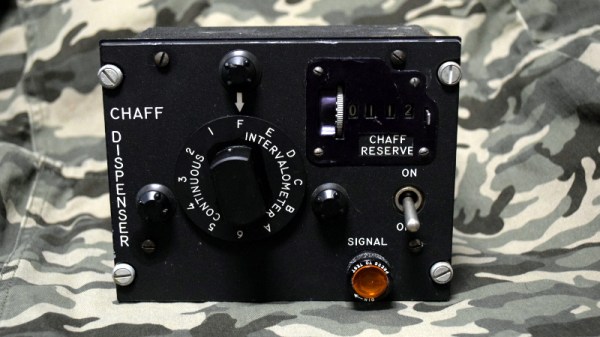
Milspec Teardown: C-1282 Chaff Controller

A B-52 bomber is approaching its primary target: rail yards in the Beloostrov district of Leningrad. Intel reports the area is likely defended by S-25 Berkut and S-75 Dvinia surface to air missiles (SAMs), but this close to the target the gigantic bomber can’t afford to make the evasive maneuvers, known as combat turns, which would help shake off enemy air defenses. From his position behind the co-pilot, the electronic warfare officer (EWO) reaches over and sets the C-1282 for continuous chaff ejection. Hundreds of thin metallic strips are jettisoned from the B-52, confusing tracking radar and allowing the bomber and her crew to slip through the Soviet air defenses and drop 50,000 lbs of ordnance directly onto the target.

Luckily for all of us, this event never actually occurred. But it was a possibility that the United States and Soviet Union had prepared for extensively. Both sides developed ever more capable weapons, and for each new weapon, a new countermeasure was invariably created. The C-1282 is a component of one such countermeasure, a device that allowed the B-52’s EWO to configure and monitor the bomber’s automatic chaff dispenser. With the C-1282 handling the anti-radar countermeasures, the bomber’s crew could focus their attention on completing their mission.

Of course, as is the case with technology (military or otherwise), the C-1282 was eventually phased out for something new. These old units, now largely worthless, were destroyed or sentenced to a lifetime collecting dust on a storeroom shelf. But through the magic of the Internet, one of these devices is now ready to be laid bare for your viewing pleasure. Dust off your Joseph McCarthy Junior Detective badge and come along as we take a look at a state of the art piece of Anti-Ruskie technology, circa 1960.

Continue reading “Milspec Teardown: C-1282 Chaff Controller”