3D Printing With Mussels And Beets

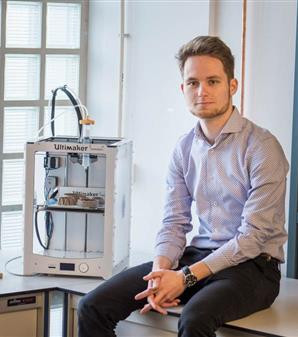
What do you get when you combine oven-baked mussels and sugar beets in a kitchen blender? No, it isn’t some new smoothie cleanse or fad diet. It’s an experimental new recyclable 3D printing material developed by [Joost Vette], an Industrial Design Engineering student at Delft University of Technology in the Netherlands. While some of the limitations of the material mean it’s fairly unlikely you’ll be passing over PLA for ground-up shellfish anytime soon, it does have a few compelling features worth looking into.

Joost Vette

For one thing, it’s completely biodegradable. PLA is technically biodegradable as it’s usually made primarily of cornstarch, but in reality, it can be rather difficult to break down. Depending on the conditions, PLA could last years exposed to the elements and not degrade to any significant degree. But [Joost] says his creation degrades readily when exposed to moisture; so much so that he theorizes it could have applications as a water-soluble support material when printing with a multiple extruder machine.

What’s more, after the material has been dissolved into the water, it can be reconstituted and put back into the printer. Failed prints could be recycled directly back into fresh printing material without any special hardware. According to [Joost], this process can be repeated indefinitely with no degradation to the material itself, “A lot of materials become weaker when recycled, this one does not.

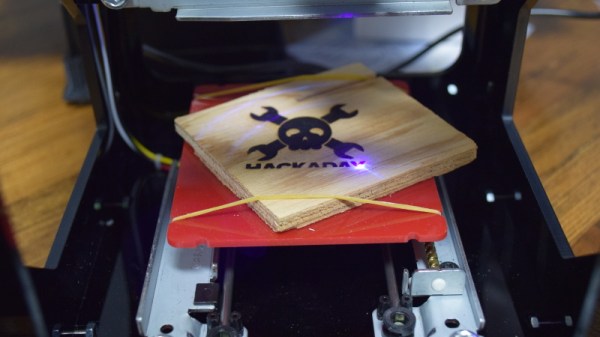
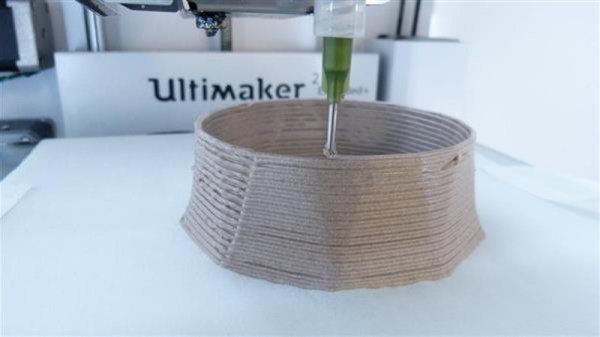
So how can you play along at home? The first challenge is finding the proper ratio between water, sugar, and the powder created by grinding up mussel shells necessary to create a smooth paste. It needs to be liquid enough to be extruded by the printer, but firm enough to remain structurally sound until it dries out and takes its final ceramic-like form. As for the 3D printer, it looks like [Joost] is using a paste extruder add-on for the Ultimaker 2, though the printer and extruder combo itself isn’t going to be critical as long as it can push out a material of the same viscosity.

We’ve seen a number of DIY paste extruder mods for 3D printers, which is a good starting point if you’re getting sick of boring old plastic. Before long you might find yourself printing with living tissue.

[Thanks to Mynasru for the tip]

Graphing Calculator Dual Boots With Pi Zero

The nearly limitless array of consumer gadgets hackers have shoved the Raspberry Pi into should really come as no surprise. The Pi is cheap, well documented, and in the case of the Pi Zero, incredibly compact. It’s like the thing is begging to get grafted into toys, game systems, or anything else that could use a penguin-flavored infusion.

But this particular project takes it to the next level. Rather than just cramming the Pi and a cheap LCD into his Numworks graphing calculator, [Zardam] integrated it into the device so well that you’d swear it was a feature from the factory. By exploiting the fact that the calculator has some convenient solder pads connected to its SPI bus, he was able to create an application which switches the display between the Pi and the calculator at will. With just a press of a button, he’s able to switch between using the stock calculator software and having full access to the internal Pi Zero.

In a very detailed write-up on his site, [Zardam] explains the process of getting the Pi Zero to output video over SPI. The first part of the battle was re-configuring the GPIO pins and DMA controller. After that, there was the small issue of writing a Linux SPI framebuffer driver. Luckily he was able to find some work done previously by [Sprite_TM] which helped him get on the right track. His final driver is able to push 320×240 video at 50 FPS via GPIO, more than enough to kick back with some DOOM.

With video sorted out, he still needed a way to interface the calculator’s keyboard with the Pi. For this, he added a function in his calculator application that echoed the keys pressed to the calculator’s UART port. This is connected to the Pi, where a daemon is listening for key presses. The daemon then generates the appropriate keycodes for the kernel via uinput. [Zardam] acknowledges this part of the system could do with some refinement, but judging by the video after the break, it works well enough for a first version.

We’ve seen the Pi Zero get transplanted into everything from a 56K modem to the venerated Game Boy, and figured nothing would surprise us at this point. But we’ve got to say, this is one of the cleanest and most practical builds we’ve seen yet.

[Thanks to EdS for the tip]

Continue reading “Graphing Calculator Dual Boots With Pi Zero”

Automated Syrup System Is Sweet Sweet Madness

Here at Hackaday we are big fans of the TV show, “How It’s Made”. It’s not much of a stretch to assume that, as somebody who is currently reading this site, you’ve probably seen it yourself. While it’s always interesting to see the behind the scenes process to create everyday products, one of the most fascinating aspects of the show is seeing how hard it is to make things. Seriously, it’s enough to make you wonder how companies are turning a profit on some of these products when you see just how much technology and manual work is required to produce them.

That’s precisely the feeling we got when browsing through this absolutely incredible overview of how [HDC3] makes his maple syrup. If that’s not a sentence you ever thought you’d see on Hackaday, you aren’t alone. But this isn’t a rusty old pail hanging off of a tap, this is a high-tech automated system that’s capable of draining 100’s of gallons of sap from whole groves of trees. We’ll never look at a bottle of syrup in the store the same away again.

It all starts with hundreds of tiny taps that are drilled into the trees and connected to a network of flexible hoses. The plumbing arrangement is so complex that, in certain, areas high tension support wires are necessary to hold up the weight of the hoses and their sweet contents. The main hose leads to an Arduino-powered collection station which maintains a 100 kPa (29 inHg) vacuum throughout the entire system.

The sap is temporarily held in a 250 gallon container, but at this point it’s still just that: sap. It needs to be refined into something suitable for putting on your pancakes. The first step of that process utilizes a reverse osmosis filtration system to pull the water out of the sap and increase its sugar concentration. [HDC3] says the filtration system is built from eBay scores and parts from the home improvement store, and it certainly looks the part of something that would be under a kitchen sink. This system is able to increase the sugar concentration of the sap from around 2% as it comes out of the trees to 8%. But it’s still a far way off from being ready to use.

Interestingly enough, the last steps of the process are about as old-school as they come. The semi-concentrated sap is placed in a long low metal pan, and heated over a wood fire to drive off more of the water. This process continues until the sap is roughly 60% sugar, at which point it is filtered and moved into the house to finish boiling on the stove.

All told, the syrup is boiled for eight hours to bring its sugar content up to 66%. Even with the improvements [HDC3] has made to the system, he reveals that all this hard work only results in slightly more than a half-gallon of final syrup. Talk about dedication.

It probably comes as no surprise that this is the first time Hackaday has ever run a story about producing maple syrup. However we’ve seen a number of automated beer brewing systems that seem to have been tackled with similar zeal. There’s probably a conclusion to be drawn there about the average hacker’s diet, but that’s a bit outside our wheelhouse.

[via /r/DIY]

Printed It: Custom Enclosure Generator

You’ve written your firmware code, etched your own PCB, and now it’s time to put that awesome new project of yours into an enclosure. Unfortunately, all you have is a generic Radio Shack project box that you picked up when they were clearing out their inventory. If you put your project in that, it’ll have all the style and grace of a kid wearing hand-me-down clothes. Your project deserves a tailor-made enclosure, but the prices and lead time on custom plastic enclosures are prohibitive for one-off projects.

In Ye Olde Olden Days, the next step might have been to start bending some sheet metal. But it’s the 21st century, and we’ve got mechanization on our side. The “Ultimate Box Maker” by [Heartman] is a fully parametric OpenSCAD design which allows you to generate professional looking enclosures by simply providing your desired dimensions and selecting from a few optional features. In a couple of hours, you’ll have a custom one-of-a-kind enclosure for your project for a few cents worth of filament.

That’s the idea, at least. For this edition of “Printed It”, I’ll be taking a look at the “Ultimate Box Maker” by generating and printing a basic enclosure. As somebody whose Radio Shack was out of enclosures by the time I got there and who doesn’t want to slice his hand open folding sheet metal, I’m very interested in seeing how well this design works.

Continue reading “Printed It: Custom Enclosure Generator”

Review: NEJE DK-8-KZ Laser Engraver

When I got my first 3D printer I was excited, but now that I’m contemplating adding a forth to my collection, I have to come to the terms with the fact that these machines have all the novelty of a screwdriver at this point. Which is fine; getting the cost down and availability up is the key to turning a niche piece of technology into a mainstream tool, and the more people with 3D printers at home or in their workshop the better, as far as I’m concerned. But still, there’s a certain thrill in exploring the cutting edge, and I’ve been looking for something new to get excited about as of late.

NEJE DK-8-KZ

Lasers seem like an interesting next step in my quest towards complete in-house fabrication capability, so I started researching cheap setups to get my feet wet. In the course of looking up diode-powered laser cutters, I came across the NEJE DK-8-KZ. At only 1W, there’s no question this device isn’t going to be cutting a whole lot. In fact, it’s specifically sold as an engraver. But given the fact that you can get one of these little guys for around $70 USD shipped, it’s hard to complain.

Now I wasn’t 100% sure what I would do with a laser engraver, but I thought it would be a good way to test the waters before putting serious money (and time) into something more powerful. Plus, if I’m being totally honest, I wanted to start on something on the lower end of the power spectrum because I’m terrified of blinding myself.

So what kind of laser do you get for $70? Let’s find out… Continue reading “Review: NEJE DK-8-KZ Laser Engraver”

Investigating The World’s Rarest Game Boy

Early last year, a very unique Game Boy Color showed up on Chinese shopping site Taobao. Rather than the rather anemic-looking display of the original GBC, this version was modified with a modern IPS LCD. Even in the pictures shown on the product page, it was clear the display on this unit was far more advanced than anything Nintendo ever packed into a Game Boy. The retro gaming community went wild, and soon the site was overwhelmed with orders. The majority of the sales were canceled by the seller, and it’s believed as few as 75 of these hacked GBCs were actually shipped out.

Thanks to one of his viewers, [Colin] was able to get his hands on one of these extremely rare customized handhelds. Clearly a man after our own heart, his first inclination was to tear the thing apart and see how they built it. While he had a fairly good idea of how they managed this hybrid of modern and classic technology, there were a couple of surprises inside.

The device has a completely stock main board, and as such works and plays like a normal GBC. But upon flipping the main board over, [Colin] found a nest of thin magnet wire connecting the new display controller to individual buttons on the front panel. As he later confirmed when he reassembled the system, this allows the user to adjust the display’s brightness by holding “Select” and using the directional pad.

As for the screen itself, the big surprise was that it’s clearly pulled out of a relatively recent smartphone. The screen is physically much larger than the opening in the GBC’s front panel, but through some software trickery the image is displayed only in the area that’s visible to the player. [Colin] managed to get a hold of a few contacts “in the know” who confirmed to him that both the hardware and software for the display controller were specifically created for this application, and are unlikely to be duplicated by anyone else.

Considering most of the Game Boy hacks we cover are about somebody jamming modern hardware into them, it’s an interesting change of pace to see a group that was so adamant about retaining as much original hardware as possible while still managing to improve the user experience.

[Thanks to Doc Oct for the tip]

Continue reading “Investigating The World’s Rarest Game Boy”

Quantifying Latency In Cheap RC Transmitters

For those just starting out in the world of RC, a low cost transmitter like the Flysky FS-i6S can be very compelling. But is buying a cheap transmitter setting yourself up for failure down the line? The general feel in the RC community has been that cheaper transmitters have higher latency or “lag” on their inputs, which is precisely the kind of thing you want to avoid when flying along at 40+ MPH. As such, the general wisdom has been that your transmitter is one area where you don’t want to cheap out.

Wanting to put that theory to the test, [Marek Baczynski] set out to compare the response time between the Flysky FS-i6S and the more established Taranis X9D. In the video after the break, he uses his Saleae logic analyzer to time how long it takes movement on the transmitter sticks to get interpreted as servo commands at the receiver.

[Marek] connects the logic analyzer directly to the gimbals of both transmitters, allowing him to see user input before any processing is done by the electronics. It’s particularly interesting to see how the smooth analog curves of the gimbals are converted to a “staircase” digital output.

The final results of the latency test end up being fairly surprising. To put it simply: the cheaper Flysky radio not only more accurately interprets the user’s input, but does it considerably faster than the Taranis. [Marek] says he was so surprised by these results that he re-ran the test three times to verify.

But even taking into account the apparently higher fidelity of the cheap radio, he cautions you shouldn’t swap out your gear just yet. Higher end transmitters have a number of other features which make them worth hanging on to, even if the newer generation of radios is slightly faster. The real takeaway from this video is that if you’re just getting into the RC game, these cheaper transmitters aren’t necessarily the kiss of death the community makes them out to be.

Experiments like this and the recent detailed analysis of common hobby motors show just how seriously people take the world of RC. It’s unlikely this single experiment will quell the debate about “cheap” RC transmitters, but perhaps it’s a start.

Continue reading “Quantifying Latency In Cheap RC Transmitters”