Review: NEJE DK-8-KZ Laser Engraver

When I got my first 3D printer I was excited, but now that I’m contemplating adding a forth to my collection, I have to come to the terms with the fact that these machines have all the novelty of a screwdriver at this point. Which is fine; getting the cost down and availability up is the key to turning a niche piece of technology into a mainstream tool, and the more people with 3D printers at home or in their workshop the better, as far as I’m concerned. But still, there’s a certain thrill in exploring the cutting edge, and I’ve been looking for something new to get excited about as of late.

NEJE DK-8-KZ

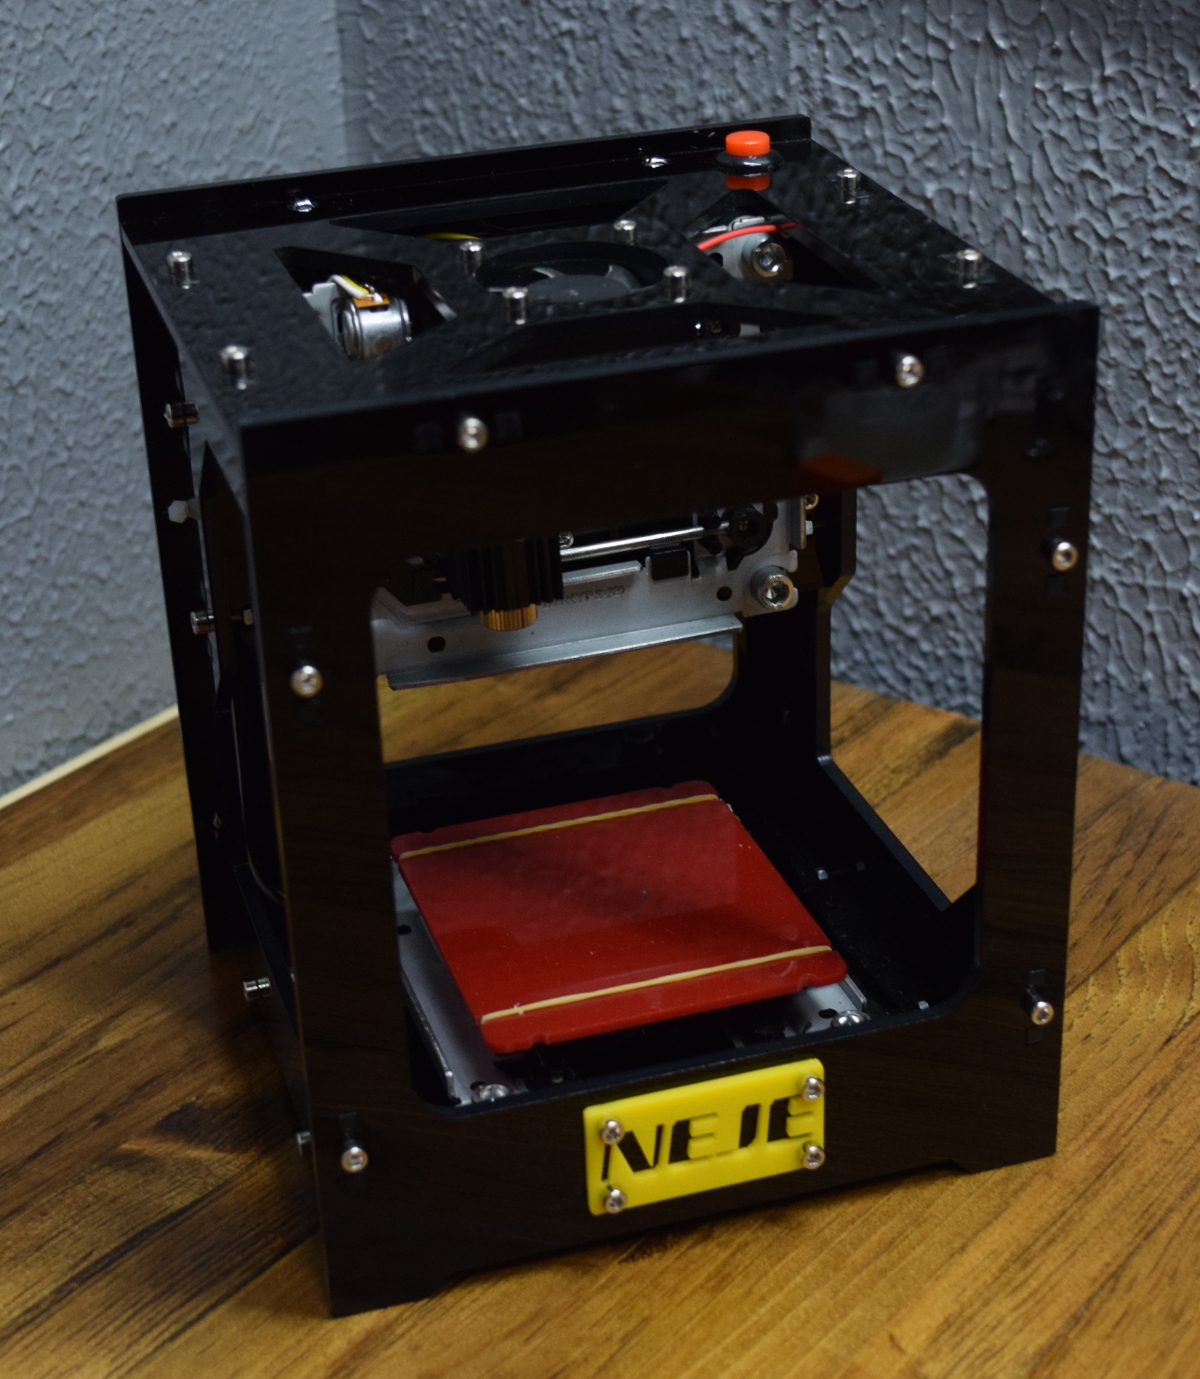
Lasers seem like an interesting next step in my quest towards complete in-house fabrication capability, so I started researching cheap setups to get my feet wet. In the course of looking up diode-powered laser cutters, I came across the NEJE DK-8-KZ. At only 1W, there’s no question this device isn’t going to be cutting a whole lot. In fact, it’s specifically sold as an engraver. But given the fact that you can get one of these little guys for around $70 USD shipped, it’s hard to complain.

Now I wasn’t 100% sure what I would do with a laser engraver, but I thought it would be a good way to test the waters before putting serious money (and time) into something more powerful. Plus, if I’m being totally honest, I wanted to start on something on the lower end of the power spectrum because I’m terrified of blinding myself.

So what kind of laser do you get for $70? Let’s find out… Continue reading “Review: NEJE DK-8-KZ Laser Engraver”

Investigating The World’s Rarest Game Boy

Early last year, a very unique Game Boy Color showed up on Chinese shopping site Taobao. Rather than the rather anemic-looking display of the original GBC, this version was modified with a modern IPS LCD. Even in the pictures shown on the product page, it was clear the display on this unit was far more advanced than anything Nintendo ever packed into a Game Boy. The retro gaming community went wild, and soon the site was overwhelmed with orders. The majority of the sales were canceled by the seller, and it’s believed as few as 75 of these hacked GBCs were actually shipped out.

Thanks to one of his viewers, [Colin] was able to get his hands on one of these extremely rare customized handhelds. Clearly a man after our own heart, his first inclination was to tear the thing apart and see how they built it. While he had a fairly good idea of how they managed this hybrid of modern and classic technology, there were a couple of surprises inside.

The device has a completely stock main board, and as such works and plays like a normal GBC. But upon flipping the main board over, [Colin] found a nest of thin magnet wire connecting the new display controller to individual buttons on the front panel. As he later confirmed when he reassembled the system, this allows the user to adjust the display’s brightness by holding “Select” and using the directional pad.

As for the screen itself, the big surprise was that it’s clearly pulled out of a relatively recent smartphone. The screen is physically much larger than the opening in the GBC’s front panel, but through some software trickery the image is displayed only in the area that’s visible to the player. [Colin] managed to get a hold of a few contacts “in the know” who confirmed to him that both the hardware and software for the display controller were specifically created for this application, and are unlikely to be duplicated by anyone else.

Considering most of the Game Boy hacks we cover are about somebody jamming modern hardware into them, it’s an interesting change of pace to see a group that was so adamant about retaining as much original hardware as possible while still managing to improve the user experience.

[Thanks to Doc Oct for the tip]

Continue reading “Investigating The World’s Rarest Game Boy”

Quantifying Latency In Cheap RC Transmitters

For those just starting out in the world of RC, a low cost transmitter like the Flysky FS-i6S can be very compelling. But is buying a cheap transmitter setting yourself up for failure down the line? The general feel in the RC community has been that cheaper transmitters have higher latency or “lag” on their inputs, which is precisely the kind of thing you want to avoid when flying along at 40+ MPH. As such, the general wisdom has been that your transmitter is one area where you don’t want to cheap out.

Wanting to put that theory to the test, [Marek Baczynski] set out to compare the response time between the Flysky FS-i6S and the more established Taranis X9D. In the video after the break, he uses his Saleae logic analyzer to time how long it takes movement on the transmitter sticks to get interpreted as servo commands at the receiver.

[Marek] connects the logic analyzer directly to the gimbals of both transmitters, allowing him to see user input before any processing is done by the electronics. It’s particularly interesting to see how the smooth analog curves of the gimbals are converted to a “staircase” digital output.

The final results of the latency test end up being fairly surprising. To put it simply: the cheaper Flysky radio not only more accurately interprets the user’s input, but does it considerably faster than the Taranis. [Marek] says he was so surprised by these results that he re-ran the test three times to verify.

But even taking into account the apparently higher fidelity of the cheap radio, he cautions you shouldn’t swap out your gear just yet. Higher end transmitters have a number of other features which make them worth hanging on to, even if the newer generation of radios is slightly faster. The real takeaway from this video is that if you’re just getting into the RC game, these cheaper transmitters aren’t necessarily the kiss of death the community makes them out to be.

Experiments like this and the recent detailed analysis of common hobby motors show just how seriously people take the world of RC. It’s unlikely this single experiment will quell the debate about “cheap” RC transmitters, but perhaps it’s a start.

Continue reading “Quantifying Latency In Cheap RC Transmitters”

Arduino BabyTV Is Big Fun At Low Resolution

What kind of TV do you have? An older 720p model, or the now standard 1080p? Perhaps you’ve made the leap to the next generation, and are rocking a 4K display in the living room. All those are are fine and dandy if you just want to watch the local sportball contest, but where’s the challenge in that? With all the technology and modular components we have access to anymore, nowadays all the real hackers are making their own TVs.

Of course, when [Nikolai] built his very own LED TV, he did have to make a few concessions. For one thing, there’s no tuner on this model. Oh, and there’s the small issue of only having a 16×16 resolution. It might not be your idea of the perfect display, but it’s just perfect for his newborn son.

That’s right, [Nikolai] got his entry for the “Hacker Parent of the Year” award in early, and built an LED display for his son that he’s calling “BabyTV”.

Rather than the shows, trash, advertisements that they play on the kid channels, this TV only shows animated characters from retro games. We’ll concede that this project might be an elaborate Clockwork Orange style attempt at hypnotizing his son to instill an appreciation for classic gaming. But we’ll allow it.

To make his BabyTV go, [Nikolai] used a 16×16 WS2812B LED panel and an Arduino Nano. Two rotary encoders are used to allow adjusting brightness and change the character currently being shown on the screen. As a particularly clever hack, the Arduino has an IR sensor attached and is constantly watching for any signals. If an IR signal is detected, the BabyTV switches to the next image. So if Junior has a standard IR remote in his hands, any button he presses will cause the display to change to the next “channel”.

Historically speaking we haven’t seen much stuff for children here at Hackaday, but 2018 seems to be changing that. Recent projects like the incredible scratch built mini excavator and gorgeous AT-ST high chair would seem to indicate we’re currently witnessing a generation of hackers become parents. Don’t panic folks, but we might be getting old.

Continue reading “Arduino BabyTV Is Big Fun At Low Resolution”

SpaceX Joins In The Long History Of Catching Stuff From Space

On February 22nd, a Falcon 9 rocket lifted off from Vandenberg Air Force Base in California and successfully delivered into orbit an Earth-observation satellite operated by the Spanish company Hisdesat. Compared to the media coverage received by the launch of the Tesla-laden Falcon Heavy earlier in the month, this mission got very little attention. But that’s hardly surprising. With respect to Hisdesat, the payload this time around was not terribly exciting, and even the normally dramatic landing of the Falcon 9’s first stage was skipped in favor of simply allowing the booster to crash into the ocean.

As far as SpaceX launches go, this one was about as low-key as they come. It wouldn’t be a surprise if this is the first time some readers are even hearing about it. But while it didn’t invoke the same media circus as the images of a spacesuit-wearing mannequin traveling into deep space, there was still a historic “first” performed during this mission.

In an effort to increase the re-usability of the Falcon 9 booster, SpaceX attempted to catch the payload fairing (essentially a large protective nose cone) with a huge net as it fell from space. The most interesting thing about this new chapter in the quest for a fully reusable rocket system is that while SpaceX is generally considered to be pioneers in the world of bringing hardware back from space, this particular trick dates all the way back to the 1960’s.

Continue reading “SpaceX Joins In The Long History Of Catching Stuff From Space”

This 3D-Printed Robotic Vacuum Sucks

After you’ve taken a moment to ponder the turn of phrase used in the title, take a look at this scratch-built robotic vacuum created by [theking3737]. The entire body of the vacuum was 3D printed, and all of the internal electronics are off-the-shelf modular components. We can’t say how well it stacks up against the commercial equivalents from iRobot and the like, but it doesn’t look like it would be too hard to build one yourself to find out.

The body of this rather concerned-looking robot was printed on a DMS DP5 printer, which is a neat trick as it only has a build platform of 200 mm x 200 mm. Once all the pieces were printed, a 3D pen was used to “weld” the sections together. The final result looks a bit rough, but should give a bond that’s just as strong as the printed parts themselves.

The robot has four sets of ultrasonic range finders to detect walls and obstacles, though probably not in the positions you would expect. The right side of the robot has two sets of sensors, while the left side only gets one. We aren’t sure the reasoning behind the asymmetrical layout, but presumably the machine prefers making right turns.

Control is provided by an Arduino Mega and the ever-reliable HC-05 Bluetooth module. A companion Android application was written which allows configuring the robot without having to plug into the Arduino every time you want to tweak a setting.

We can’t say we’ve seen that many DIY robotic vacuums here at Hackaday, but we’ve certainly featured our fair share of hacks for the commercially available models.

Fully 3D Printed Nerf Thirst Zapper

In case you weren’t aware, there is a whole community out there that revolves around customizing NERF guns. In that community is a subculture that builds their own NERF guns, and within that group is a sub-subculture that 3D prints NERF guns. So next time you are contemplating how esoteric your little corner of the hacking world is, keep that in mind.

Anyway, [Wekster] is currently making his way in the world of 3D printed one-off NERF guns, and has unveiled his latest creation: a fully 3D printed “Thirst Zapper” from Fallout 4. Except for the springs, each and every piece of this gun was printed on his CR-10 printer. You could even wind your own springs if you really wanted to, and keep the whole thing in-house. Because if you’re going to do something this niche, you might as well go all in.

Even if you aren’t a member of the NERF-elite, the video [Wekster] has put together for this project is a fantastic look at what it takes to design, print, and finish a custom build. From creating the model to mixing the paint to match the in-game model, this video has a little something for everyone.

This isn’t the first time we’ve covered 3D printed NERF guns, but it’s surely the most ornate we’ve ever seen. Interestingly, the bar is set pretty high for Fallout-themed builds in general, so perhaps there’s some unwritten rule out there in regards to Fallout prop builds.

Continue reading “Fully 3D Printed Nerf Thirst Zapper”