Join Hackaday Editors Elliot Williams and Tom Nardi as they review some of their favorite hacks and projects of the past week. The episode starts with a discussion about the recently announced Artemis II crew, and how their mission compares to the Apollo program of the 1960s and 70s.
From there, the pair theorize as to why Amazon’s family of Echo devices have managed to evade eager hardware hackers, take a look at a very impressive SMD soldering jig created with some fascinating OpenSCAD code, marvel at the intersection of art and electronic design, and wonder aloud where all the cheap motorized satellite dishes are hiding. Stick around for some questionable PCB design ideas, a Raspberry Pi expansion that can read your mind, and the first flight of a (semi) hydrogen-powered aircraft.
Check out the links below if you want to follow along, and as always, tell us what you think about this episode in the comments!
One day in the future, we may interact with our electronic devices not with physical input or even voice commands, but simply by thinking about what we want to do. Such brain–computer interfaces (BCIs), combined with machine learning, could allow us to turn our ideas into reality faster and with less effort than ever before — imagine being able to produce a PCB design simply by thinking about how the completed circuit would work. Of course as an assistive technology, BCIs would be nothing less than life-changing for many.
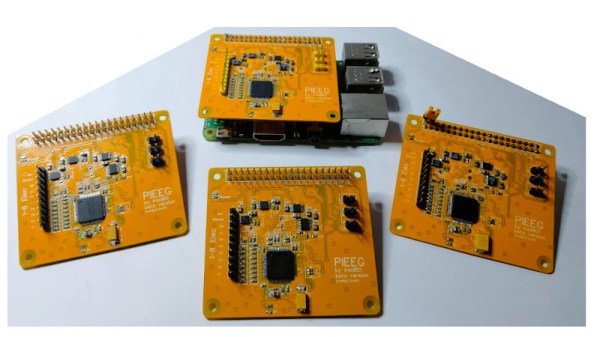
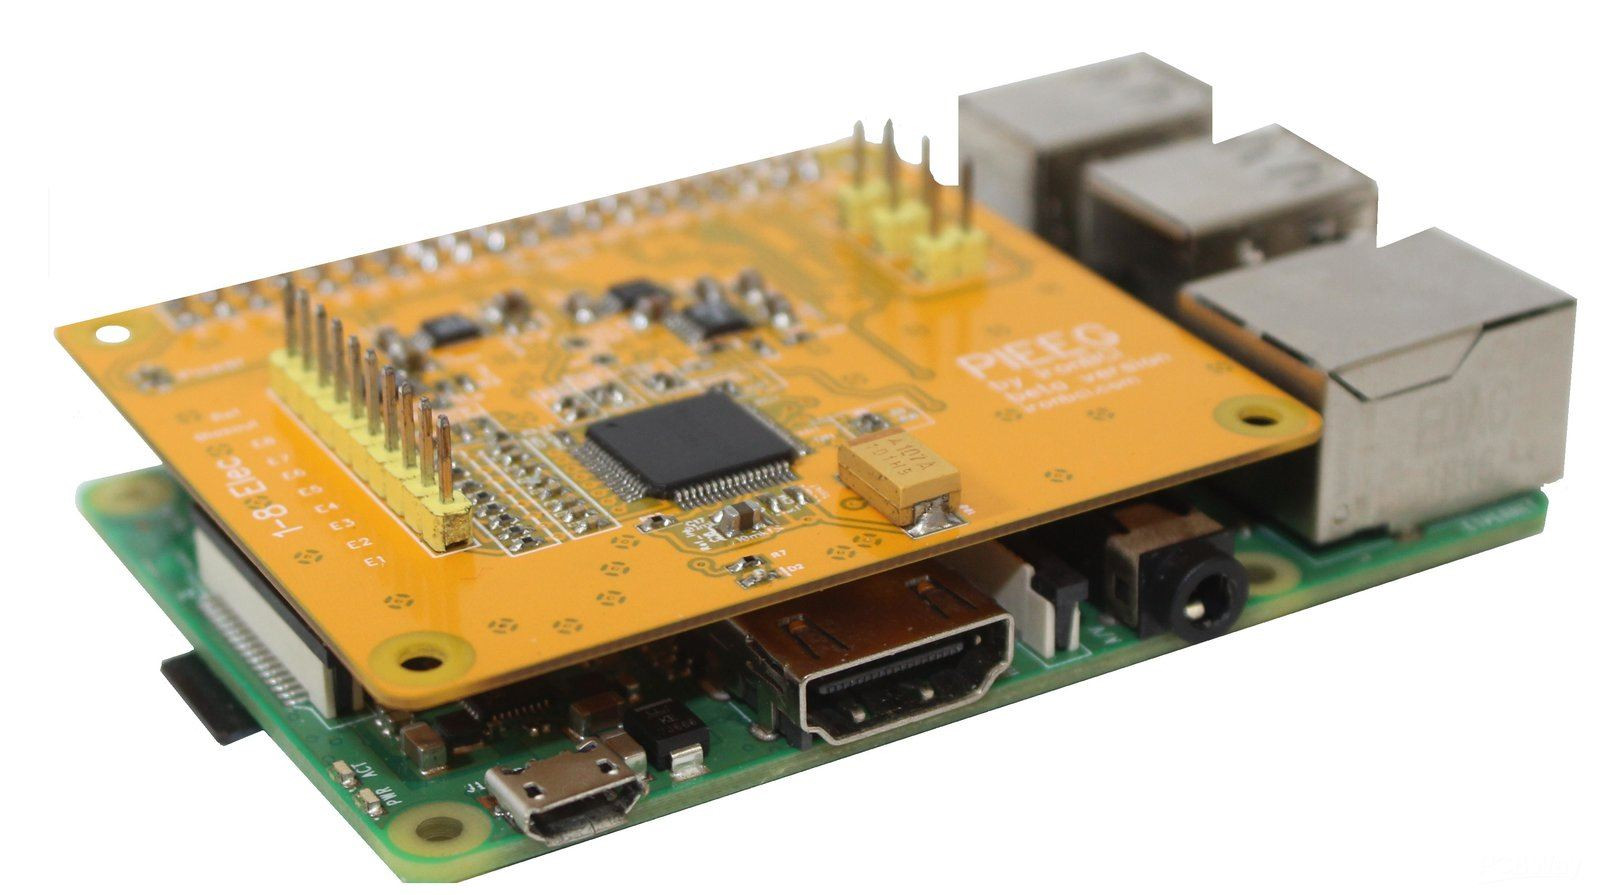
Today BCIs are in their infancy, but that doesn’t mean there isn’t room for hackers and makers to experiment with the concept. [Ildar Rakhmatulin] has been working on low-cost open source BCIs for years, and with the recent release of his PiEEG on Crowd Supply, thinks he’s finally found an affordable solution that will let individuals experiment with this cutting edge technology.
Implemented as a shield that can be connected to a Raspberry Pi 3 or 4, the PiEEG features 8 channels for connecting wet or dry electrodes that can measure biosignals such as those used in electroencephalography (EEG), electromyography (EMG), and electrocardiography (ECG). With the electrodes connected, reading these biosignals is as easy as running a Python script. While primarily designed for neuroscience experimentation, [Ildar] says the device is also useful for learning more about signal processing, filters, and machine learning.
When [Jay Bowles] demoed his first-generation ion thruster on Plasma Channel, the resulting video picked up millions of views and got hobbyists and professionals alike talking. While ionic lifters are nothing new, this robust multi-stage thruster looked (and sounded) more like a miniature jet engine than anything that had come before it. Optimizations would need to be made if there was even a chance to put the high-voltage powerplant to use, but [Jay] was clearly onto something.
Fast forward six months, and he’s back with his Mark II thruster. It operates under the same core principles as the earlier build, but swaps out the open-frame design and acrylic construction for a rigid 3D printed structure designed to more effectively channel incoming air. The end result is a thruster that’s smaller and has a lower mass, while at the same time boasting nearly double the exhaust velocity of its predecessor. Continue reading “Upgraded Plasma Thruster Is Smaller, More Powerful”→
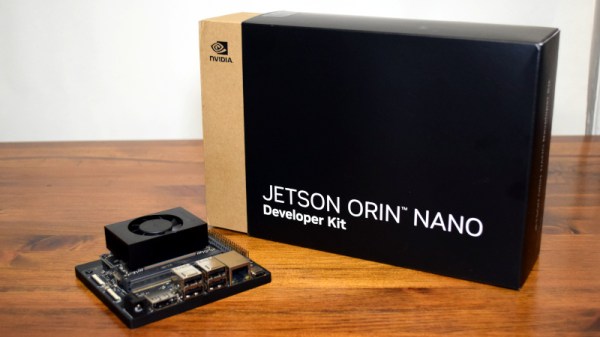
NVIDIA’s Jetson line of single-board computers are doing something different in a vast sea of relatively similar Linux SBCs. Designed for edge computing applications, such as a robot that needs to perform high-speed computer vision while out in the field, they provide exceptional performance in a board that’s of comparable size and weight to other SBCs on the market. The only difference, as you might expect, is that they tend to cost a lot more: the current top of the line Jetson AGX Orin Developer Kit is $1999 USD
Luckily for hackers and makers like us, NVIDIA realized they needed an affordable gateway into their ecosystem, so they introduced the $99 Jetson Nano in 2019. The product proved so popular that just a year later the company refreshed it with a streamlined carrier board that dropped the cost of the kit down to an incredible $59. Looking to expand on that success even further, today NVIDIA announced a new upmarket entry into the Nano family that lies somewhere in the middle.
While the $499 price tag of the Jetson Orin Nano Developer Kit may be a bit steep for hobbyists, there’s no question that you get a lot for your money. Capable of performing 40 trillion operations per second (TOPS), NVIDIA estimates the Orin Nano is a staggering 80X as powerful as the previous Nano. It’s a level of performance that, admittedly, not every Hackaday reader needs on their workbench. But the allure of a palm-sized supercomputer is very real, and anyone with an interest in experimenting with machine learning would do well to weigh (literally, and figuratively) the Orin Nano against a desktop computer with a comparable NVIDIA graphics card.
We were provided with one of the very first Jetson Orin Nano Developer Kits before their official unveiling during NVIDIA GTC (GPU Technology Conference), and I’ve spent the last few days getting up close and personal with the hardware and software. After coming to terms with the fact that this tiny board is considerably more powerful than the computer I’m currently writing this on, I’m left excited to see what the community can accomplish with the incredible performance offered by this pint-sized system.
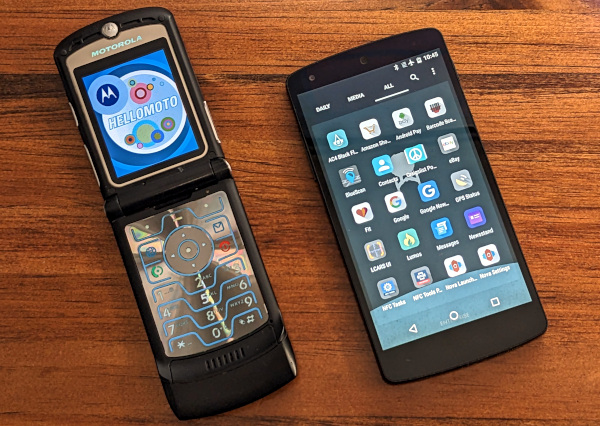
There are few devices that better exemplify the breakneck pace of modern technical advancement than the mobile phone. In the span of just a decade, we went from flip phones and polyphonic ringtones to full-fledged mobile computers with quad-core processors and gigabytes of memory.
While rapid advancements in computational power are of course nothing new, the evolution of mobile devices is something altogether different. The Razr V3 of 2003 and the Nexus 5 of 2013 are so vastly different that it’s hard to reconcile the fact they were (at least ostensibly) designed to serve the same purpose — with everything from their basic physical layout to the way the user interacts with them having undergone dramatic changes in the intervening years. Even the network technology they use to facilitate voice and data communication are different.
Two phones, a decade apart.
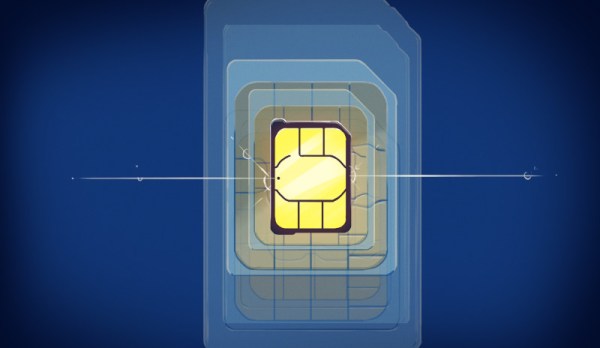
Yet, there’s at least one component they share: the lowly SIM card. In fact, if you don’t mind trimming a bit of unnecessary plastic away, you could pull the SIM out of the Razr and slap it into the Nexus 5 without a problem. It doesn’t matter that the latter phone wasn’t even a twinkling in Google’s eye when the card was made, the nature of the SIM card means compatibility is a given.
Indeed there’s every reason to believe that very same card, now 20 years old, could be installed in any number of phones on the market today. Although, once again, some minor surgery would be required to pare it down to size.
Such is the beauty of the SIM, or Subscriber Identity Module. It allows you to easily transfer your cellular service from one phone to another, with little regard to the age or manufacturer of the device, and generally without even having to inform your carrier of the swap. It’s a simple concept that has served us well for almost as long as cellular telephones have existed, and separates the phone from the phone contract.
So naturally, there’s mounting pressure in the industry to screw it up.
Editor-in-Chief Elliot Williams is joined this week by newly minted Development Editor (and definitely not brother) Al Williams to bring you the weekly highlights from our little corner of the Internet. Between the rapidly approaching deadline for the Low-Power Challenge to Samsung creating a fake Moon with artificial intelligence, there’s plenty in the news to get this episode started. From there, the Williams plural discuss using a webcam for cheap virtual reality thrills, an impressive expansion for the Flipper Zero, and whether or not finding a bug in the Nintendo DSi browser counts as retrocomputing. Stick around to hear about the fascinating work Joshua Vasquez has been doing with DIY light guide plates, and Arya Voronova’s deep-dive into PCI-Express.
Check out the links below if you want to follow along, and as always, tell us what you think about this episode in the comments!
It looks as though things may have gone from bad to worse at Virgin Orbit, the satellite carrying spin-off of Richard Branson’s space tourism company Virgin Galactic. After a disappointing launch failure earlier in the year, CNBC is now reporting the company will halt operations and furlough most employees for at least a week as it seeks new funding.
It’s no secret that company has struggled to find its footing since it was formed in 2017. On paper, it was an obvious venture — Virgin Galactic already had the White Knight Two carrier aircraft and put plenty of R&D into air-launched rockets, it would simply be a matter of swapping the crewed SpaceShipTwo vehicle for the LauncherOne orbital booster. But upgrades to the rocket eventually made it too large for the existing carrier aircraft, so the company instead purchased a Boeing 747 and modified it to lift their two-stage rocket out of the thick lower atmosphere. Continue reading “Virgin Orbit Pauses Operations, Seeks Funding”→