Sign Of The Smith Chart Times

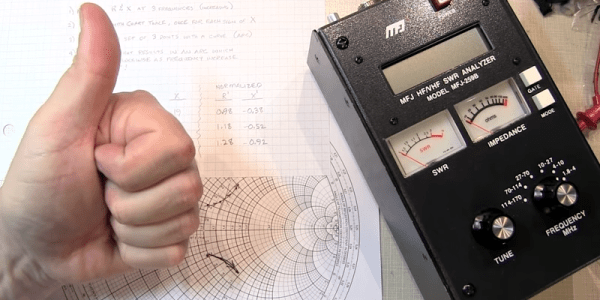
The Smith chart is a staple for analyzing complex impedance. [W2AEW] notes that a lot of inexpensive test gear like the MFJ-259B gives you complex readings, but fails to provide the sign of the imaginary part of the complex number. That makes it difficult to plot the results on a Smith chart or carry out other analysis. As you might expect, though, he has a solution for you that you can see in the video, below.

A common method is to increase the frequency slightly. In a simple case, you’d expect the imaginary part — the reactance — to go down for a capacitive impedance and up for an inductive one. Unfortunately, this doesn’t apply in many common cases, including when you are measuring through a transmission line which is probably what most people are doing with this type of test gear.

Continue reading “Sign Of The Smith Chart Times” →

A Two-Range OLED Capacitance Meter

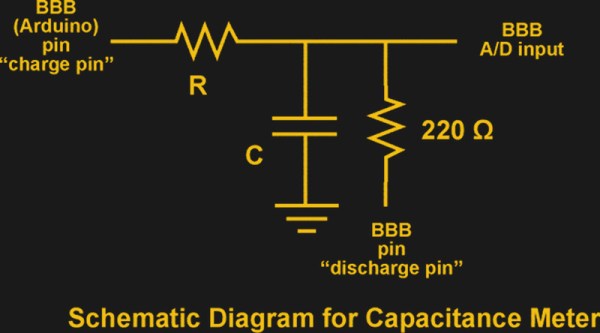
If you are just starting out in electronics, you need tools. But it is hard to build all your tools. Even though we see a lot of soldering station builds, you really ought to have a soldering iron to build the station. It is hard to troubleshoot a multimeter you just built if you don’t have a multimeter. However, a capacitance meter is a handy piece of gear, relatively simple to build, and you should be able to get it working without an existing capacitance meter. [gavinlyonsrepo] presents a simple design using an Arduino, an OLED display, and a few components.

The principle of operation is classic. On one range, the Arduino charges the capacitor through one resistor and discharges it through another while timing the operation. The amount of time taken corresponds to the capacitance.

Continue reading “A Two-Range OLED Capacitance Meter” →

Fake Omron Relays Are Worth What You Pay For Them

We love taking a look at fake components and [BigClive] has put together something really special in this category. When he saw he could buy suspiciously cheap Omron relays on eBay, he knew something must be fishy so he put in an order.

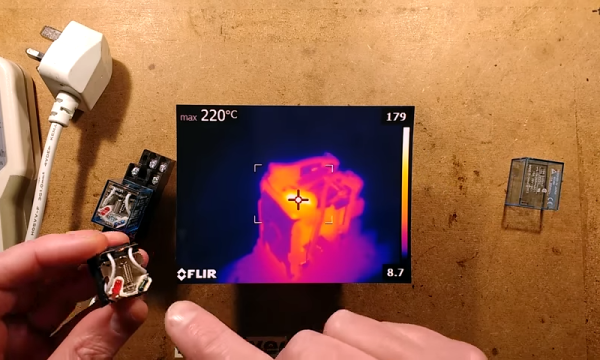
Some of the fakes he received are even marked Omrch instead of Omron, and your ear can detect the counterfeits by the varying sounds they make during operation. But of course [Clive’s] investigation goes much deeper than that. He started driving the relays to their rated voltages and taking temperatures with a FLIR camera.

The results were not surprising. At lower voltages the relays seemed to do okay, but closer to the maximums it’s obvious the components in the fakes are not rated for enough power to work. You can even see some charring of a resistor and its plastic holder from having too much power for the component’s rating. [Clive] actually replaced the errant resistor with a higher value resistor that reduces the current consumption and power dissipated.

He was also suspicious of the metal content of the contacts. You may think that doesn’t matter, but actually, the composition of relay contacts is critical to making reliable relay circuits. Depending on how much current flows and if the switching is dry (that is, made without current flowing) or not dictates use of different material.

The conclusion was that these relays might work for light duty projects, but for commercial projects or operating near the edge of the ratings, you want to give these a pass. If you do need a lot of low-power relays on the cheap — to compute a square root, or to build the whole computer — [Clive’s] process of testing and characterizing these fakes may come in handy for you.

Continue reading “Fake Omron Relays Are Worth What You Pay For Them” →

Diablo Drive Appears To Be Cursed

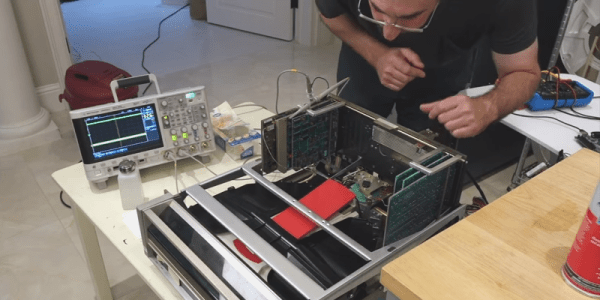
[CuriousMarc] didn’t think it would be a big deal when a former Xerox employee sent him an Alto Diablo drive for service. Turns out the drive was cursed — it would destroy everything it touched including a set of heads and an alignment cartridge. [Marc] and a partner spent two months trying to get the drive operable and the video of their process is pretty interesting.

We were interested in the troubleshooting, but we were really envious of their lab, full of HP workstations, an IBM mainframe, and even a Selectric. We kept having to rewind the video because we had tuned out while we were staring at some of the equipment in the background.

The guys got a lot of practice aligning the heads on the drive. Because the crashed head was bent, it actually dug into the alignment cartridge so on subsequent attempts they had to manually load the disk past the damage. They learned to leave the disk a little out of alignment because tightening the assembly will move it a little bit. If you were already aligned, the heads would be off after you did the tightening.

They used a custom FPGA-based tester that [Carl] developed after reverse engineering the disk format. It is amazing to watch the big drive in action and realize that a standard cartridge for this machine was 2.5 megabytes. There was another controller and disk system called the Trident that would get you a whopping 80 megabytes, but we don’t think this is one of those.

Did they succeed in exorcising whatever demons lived in the drive? Watch the video and find out. Even if you never have to fix a Diablo drive yourself, you’ll be entertained. Especially when they work out how to do a current adjustment on the drive by simulating the circuit in Spice.

We’ve seen a lot about the Alto which is surprising considering how few of them were built. We’ve seen a restoration and even an odd use for a light bulb related to the Alto’s CRT.

Continue reading “Diablo Drive Appears To Be Cursed” →

Vector Network Analyzer Uses SoC FPGA

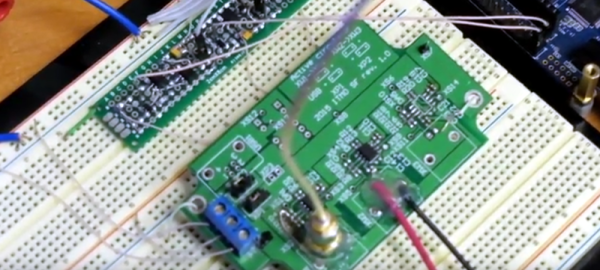
If you are working with AC circuits a vector network analyzer (VNA) is quite handy. As an entry to the InnovateFPGA competition for students, [Evgenii Vostrikov], [Danila Nikiforovskii], and [Daniil Smirnov] created a VNA using a DE10-Nano, high-speed analog to digital and digital to analog converters, and a circulator. Most of the details are in the video below, and on the project’s GitHub page.

The DE10-Nano has a dual-core ARM processor and an Altera FPGA in one package. That allows you to use the CPUs where that makes sense and still leverage the FPGA where you need high performance.

The circulator uses an op-amp to allow the test signal to route to the device under test, while steering any reflected signal back to the device for measurement. The design also uses a lock-in amplifier, something we’ve talked about a few times recently. This allows less expensive converters to generate magnitude and phase information.

Judging by the fan in the video, we suspect the setup gets a little toasty. The GitHub page has a lot of Russian on it, so we aren’t sure how much we could puzzle out since our Russian skills were mostly from watching the Adventures of Moose and Squirrel.

If you are interested in a VNA, they aren’t as expensive as they used to be. Particularly, if you roll your own and already have some things in your junk box.

Continue reading “Vector Network Analyzer Uses SoC FPGA” →

Breadboarding: Git For A/B Testing Actual Bread

We will be the first to admit, we like to use Git for a lot of things that are probably off the beaten path. But now thanks to [hendricius] you can find out how to make your own bread on GitHub. Let’s get one thing straight. This isn’t the breadmaker fad from a while back, although we are surprised we don’t see more hacked together breadmakers with Internet connectivity. This is old-fashioned bread baking with a bowl, some ingredients, and an oven or another heat source.

You might think this is just using Git as a repository for recipes, but it is more than that. According to [hendricius]:

Learn how to master the art of baking the programmer way. If you love programming, you will also enjoy breaking some bread. A/B test, iterate and ultimately become a self-taught baker. This repository is dedicated to becoming your bread manifesto with useful tricks and hacks. Furthermore, the goal is to illustrate how easy making bread is and that you can get started today without expensive tools.

Continue reading “Breadboarding: Git For A/B Testing Actual Bread” →

Harmony Hub Hacked And Patched

When we say “hack” here we most often mean either modifying something to do something different or building something out of parts. But as we build more Internet-connected things, it is worthwhile to think about the other kind of hack where people gain unauthorized access to a system. For example, you wouldn’t think a remote control would be a big deal for hackers. But the Logitech Harmony Hub connects to the Internet and runs Linux. What’s more is it can control smart devices like door locks and thermostats, so hacking it could cause problems. FireEye’s Mandian Red Team set out to hack the Harmony and found it had a lot of huge security problems.

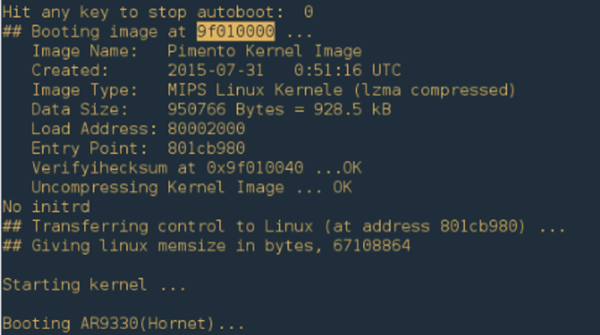
The remote didn’t check Logitech’s SSL certificate for validity. It didn’t have a secure update process. There were developer tools (an SSH server) left inactive in the production firmware and — surprisingly — the root password was blank! The team shared their findings with Logitech before publishing the report and the latest patch from the company fixes these problems. But it is instructive to think about how your Raspberry Pi project would fare under the same scrutiny.

In fact, that’s the most interesting part of the story is the blow-by-blow description of the attack. We won’t spoil the details, but the approach was to feed the device a fake update package that turned on a dormant ssh server. Although they started by trying to solder wires to a serial port, that wasn’t productive and the final attack didn’t require any of that.

We’ve looked at some ways to harden Linux systems like the Raspberry Pi before, but honestly, it is an ongoing battle. We’ve seen plenty of devices with cybersecurity holes in them — some not found by good guy hackers first.