Dual Trace Scope 1939 Style

If you buy a serious scope these days, it is a good bet it will have at least two channels. There is a lot of value to being able to see two signals in relation to one another at one time. Even though the dual-trace oscilloscope goes back to 1938, they were uncommon and expensive for many years. [Mr. Carlson] found a device from 1939 that would turn a single channel scope into a dual trace scope. In 1939, that was quite the engineering feat.

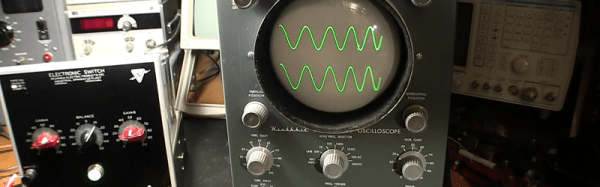
Today, a dual trace scope is very likely to be digital. But some analog scopes used CRTs with multiple beams to actually draw two traces on the same screen. Most, however, would draw either one trace followed by the other (alternate mode) or rapidly switch between channels (chopper mode). This Sylvania type 104 electronic switch looks like it takes the alternate approach, switching between signals on each sweep using vacuum tubes. You can see the device in action in the video, below.

The inputs and outputs of the device are just simple binding posts, but the unit looked to be in good shape except for the power cord. [Mr. Carlson] does a teardown and he even traced out a hand-drawn schematic. Fair warning. The video is pretty long. If you want to get right to the switch actually driving a scope, that’s at about one hour and seven minutes in.

We doubt we’ll see a tube-based Quake game anytime soon. If you want to get into restoring old tube-based gear yourself, you could do worse than read about radio restoration.
Continue reading “Dual Trace Scope 1939 Style”

ISM Communications For Arduino

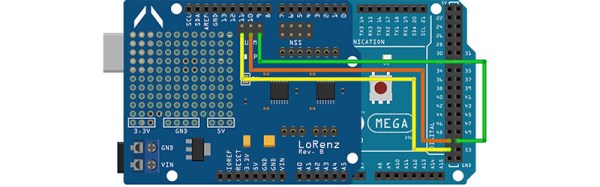
If you want to wirelessly communicate between devices, WiFi and Bluetooth are obvious choices. But there’s also the ISM (industrial, scientific, and medical) band that you use. There are inexpensive modules like the SX1278 that can handle this for you using LoRa modulation, but they haven’t been handy to use with an Arduino. [Jan] noticed the same thing and set out to build a shield that allowed an Arduino to communicate using LoRa. You can find the design data on GitHub. [Jan] calls it the LoRenz shield.

According to [Jan], the boards cost about $20 to $30 each to make, and most of that cost was in having PC boards shipped. LoRa lets you trade data rate for bandwidth, but typical data rates are fairly modest. As for range, that depends on a lot of factors, too, but we’ve seen ranges quoted in terms of miles.

Depending on where you live, there may be legal restrictions on how you use a radio like the SX1278. You should understand your local laws before you buy into using the ISM bands. We aren’t sure it would be wise, but the board can coexist with three other similar shields. So you could get 4 radios going on one Arduino if you had too and could manage the power, RF, and other issues involved. The breakout board the module uses has an antenna connector, so depending on your local laws, you could get a good bit of range out of one of these.

[Jan] promises a post on the library that makes it all work shortly, but you can find the code on GitHub now. If you look at the code in the examples directory, it seems pretty easy. You’d have to sling some software, but the SX1278 can support other modes in addition to LoRA including FSK and other data modulation techniques.

We’ve seen other LoRa shields, but not many. If you are interested in other wireless technologies, we’ve talked about them quite a bit. If you want a basic introduction to LoRa, [Andreas Spiess’] video below is a good place to start.

Continue reading “ISM Communications For Arduino”

6502 Retrocomputing Goes To The Cloud

In what may be the strangest retrocomputing project we’ve seen lately, you can now access a virtual 6502 via Amazon’s Lambda computing service. We don’t mean there’s a web page with a simulated CPU on it. That’s old hat. This is a web service that takes a block of memory, executes 6502 code that it finds in it, and then returns a block of memory after a BRK opcode or a time out.

You format your request as a JSON-formatted POST request, so anything that can do an HTTP post can probably access it. If you aren’t feeling like writing your own client, the main page has a form you can fill out with some sample values. Just be aware that the memory going in and out is base 64 encoded, so you aren’t going to see instantly gratifying results.

Continue reading “6502 Retrocomputing Goes To The Cloud”

Linux-Fu: Running Commands

One of the things that makes Linux and Unix-like systems both powerful and frustrating is that there are many ways to accomplish any particular goal. Take something simple like running a bunch of commands in sequence as an example. The obvious way is to write a shell script which offers a tremendous amount of flexibility. But what if you just want some set of commands to run? It sounds simple, but there are a lot of ways to issue a sequence of commands ranging from just typing them in, to scheduling them, to monitoring them the way a mainframe computer might monitor batch jobs.

Let’s jump in and take a look at a few ways you can execute sequences from bash (and many other Linux shells). This is cover the cron and at commands along with a batch processing system called task spooler. Like most things in Linux, this isn’t even close to a complete list, but it should give you some ideas on ways to control sequences of execution.

Continue reading “Linux-Fu: Running Commands”

Wearable Breadboard

We all know what a short circuit is, but [Clement Zheng] and [Manasvi Lalwani] want to introduce you to the shirt circuit. Their goal is to help children, teachers and parents explore and learn electronics. The vehicle is a shirt with a breadboard-like pattern of conductors attaching snaps. Circuit elements reside in stiff felt boxes with matching snaps. You can see it all in action in the video below.

We imagine you could cut the felt pieces out by hand with the included patterns. However, they used a laser cutter to produce the “breadboard” and the component containers. Conductive thread is a must, of course, as are some other craft supplies like glue and regular thread.

Continue reading “Wearable Breadboard”

Gyrators: The Fifth Element

A few years ago, there was a stir about a new fundamental component called a memristor. That wasn’t the first time a new component type was theorized though. In 1948 [Bernard Tellegen] postulated the gyrator. While you can’t buy one as a component, you can build one using other components. In fact, they are very necessary for some types of design. Put simply, a gyrator is a two-terminal device that inverts the current-voltage characteristic of an electrical component. Therefore, you can use a gyrator to convert a capacitor into an inductor or vice versa.

Keep in mind, the conversion is simply the electrical properties. Normally, current leads voltage in a capacitor and lags it in an inductor, and that’s what a gyrator changes. If you use a gyrator and a capacitor to make a virtual inductor, that inductor won’t magnetically couple to another inductor, real or simulated. There’s no magnetic field to do so. You also don’t get big voltage spikes caused by back EMF, which depending on your application could be a plus or a minus. But if you need an ungainly inductor in a circuit for its phase response, a gyrator may be just the ticket.

Continue reading “Gyrators: The Fifth Element”

Drill Press To Mill Conversion

Every time we look at the little short Z axis of our CNC mill, we think about converting a drill press to a mill. In theory, it seems like it ought to be easy, but we never quite get around to it. [AvE] did get around to it and made his usual entertaining video about it that you can see below. If you haven’t seen any of [AvE’s] videos before, be warned: there is a little colorful language in a spot or two.

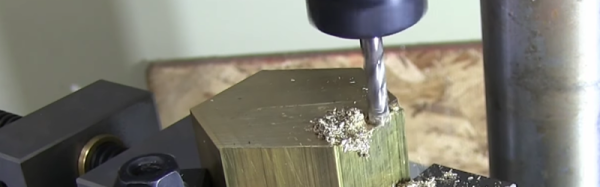
This isn’t a CNC mill, by the way, although we suspect you could convert it. Essentially, he adds a spindle and an XY table to a Ryobi drill press. It sounds simple, but getting everything to work did take a few tricks, including a blow torch.

Actually, turns out the blow torch didn’t really do it, but we won’t spoil the final resolution to the problem. Once it was resolved, though, he did manage to do some actual milling, accompanied by some music we wouldn’t associate with [AvE].

Although billed as a “poor man’s” build, the XY table alone was about $200. So add in the cost of the drill press, the spindle, and the mill and this is still a fair chunk of cash. We’d love to see it compared to a Harbor Freight milling vise. We suspect the Harbor Freight vise might not be as good, but is the difference worth the $130 difference in price?

We’ve seen this kind of conversion done before without the colorful language. If you do this conversion and want some practice, why not build a magnetic carabiner?