Motorized Inline Skates Run On Makita Power

Inline skates can be fun, but like most wheeled contraptions, they’re even better when motorized. With just such a goal in mind, [The Real Life Guys] decided to whip up a set of powered skates, running on Makita power!

To get power to the ground, the third wheel on each skate is modified to have a sprocket attached. A Makita drill is then fitted to the skate, transferring power to the wheel through a 90-degree gearbox and a chain drive. The drill is controlled by removing the trigger from the shell and hooking it up with an extended cable.

It’s a lairy setup that probably takes serious practice to use effectively, but does allow for fancy tricks like differential steering if you really want to show off. It’s a great example of using a powerdrill as an all-inclusive motion setup, with the battery, motor and drivetrain already integrated in a neat, tidy package. It’s not the first time we’ve seen a powered set of ‘skates, either! Video after the break.

Continue reading “Motorized Inline Skates Run On Makita Power” →

Better Controls For Your Chromecast Through CEC

Modern home cinema equipment is well-equipped with features for interoperability and convenience, but in practice, competing standards and arcana can make it fall over. Sometimes, you’ve gotta do a little work on your own to glue it all together, and that’s what led [Victor] to develop a little utility of his own.

ChromecastControls is a tool that makes controlling your home cinema easier by improving Chromecast’s integration with the CEC features of HDMI. CEC, or Consumer Electronics Control, is a bidirectional serial bus that is integrated as a part of the HDMI standard. It’s designed to help TVs, audio systems, and other AV hardware to communicate, and allow the user to control an entire home cinema setup with a single remote. Common use cases are TVs that send shutdown commands to attached soundbars when switched off, or Blu-Ray players that switch the TV on to the correct output when the play button is pressed.

[Victor]’s tool allows Chromecast to pass volume commands to surround sound processors, something that normally requires the user to manually adjust their settings with a separate remote. It also sends shutdown commands to the attached TV when Chromecast goes into its idle state, saving energy. It relies on the PyChromecast library to intercept traffic on the network, and thus send the appropriate commands to other hardware. Simply running the code on a Raspberry Pi that’s hooked up to any HDMI port on a relevant device should enable the CEC commands to get through.

It’s a project that you might find handy, particularly if you’re sick of leaving your television on 24 hours a day because Chromecast never bothered to implement a simple CEC command on an idle timeout. CEC hacks have a long history, too – we’ve been covering them as far back as 2010!

CircuitPython Now Working On Teensy 4.0

Python is often touted as a great language for beginner coders to learn. Until recently, however, it simply wasn’t a viable choice in the embedded space. That’s begun to change with projects like CircuitPython, and now it’s available on the Teensy 4.0!

This milestone is thanks in part to [arturo182], who did the ground work of getting CircuitPython to run on the iMX RT series of microcontrollers. This was built upon by [tannewt], who is the lead in charge of the CircuitPython project.

There are some bugs to work out; currently, the project is in a very early stage of development. [Paul Stoffregen], who heads Teensy development, has already pointed out that there needs to be allowance for the 4096 byte recovery partition in the Teensy 4.0’s storage, for example. Development continues at a rapid pace, and those with ideas about where the project should go can weigh in online.

It’s an exciting development, which brings easy Python development to one of the more powerful embedded development platforms on the market. We look forward to seeing many more projects take advantage of the power of the Teensy 4.0 moving forward. If you’re eager to see what can be done with CircuitPython, be sure to check out projects we’ve featured before. Video after the break.

Continue reading “CircuitPython Now Working On Teensy 4.0” →

Finally, A Real Set Of Gamecube Joycons

The Gamecube may not have sold as many units as its competitors in its day, but it maintains a cult fanbase to this day. Due largely to the Smash Bros. community, its controllers are still highly sought after. After the release of the Nintendo Switch, with plenty of fan renders around the place [Shank Mods] figured someone would create a set of Joycons with Gamecube controls. After waiting almost four years, he decided instead to do it himself.

The build begins with a Wavebird controller shell, chosen for its larger body, which is coincidentally the same height as the Switch. The shell was cut down the middle, and 3D printed components were created to attach Joycon mounting rails to the two halves of the controller. The large controller also has plenty of space inside, making it easy to fit all the Joycon components inside. Compatibility was a key aim of this build, so much attention was paid to make the Gamecube Joycons function properly with all Switch features. Extra buttons were added where necessary, and the formerly analog triggers were modified with plugs to match the solely digital operation of the Switch components.

It’s a project that had to overcome many hurdles, from mechanical redesigns to make everything fit, to figuring out the arcane electrical design of the Joycon hardware. The hard work paid off however, and [Shank Mods], along with a couple of talented community members, was able to create a beautiful piece of hardware. We’ve seen Gamecube-themed Joycons before, but this build really does take the cake. If you’ve instead modified the original Xbox controller to work with the Switch, be sure to let us know. Video after the break.

Continue reading “Finally, A Real Set Of Gamecube Joycons” →

The Way Of The PCB Artist: How To Make Truly Beautiful Circuit Boards

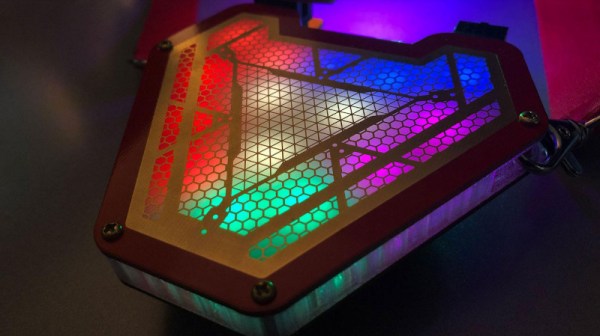
Getting your own PCBs made is a rite of passage for the hardware hacker. Oftentimes, it’s a proud moment, and many of us choose to immortalise the achievement with a self-aggrandizing credit on the silk screen, or perhaps a joke or personal logo. However, as far as artistically customized PCBs go, the sky really is the limit, and this is the specialty of [TwinkleTwinkie], whose Supercon talk covers some of the pitfalls you can run into when working at the edges of conventional PCB processes. 

[TwinkleTwinkie]’s creations are usually badges of one type or other — they’re meant to be worn on a lanyard around your neck, as a pin, or as a decoration added to another badge. The whole point is the aesthetic, and style is just as important as functionality. With diverse inspirations like Futurama, Alice in Wonderland and the shenanigans of the GIF community, his badges blend brightly colored boards with a big helping of LEDs and artistic silkscreening to create electronic works of art.

Keeping PCB Fab Houses from Upsetting the Artwork

These days, PCB fab houses offer more choice than ever, in terms of silkscreens, soldermask colors, and other options.  However, fundamentally, their primary concern is to produce reliable, accurate, electronically functional boards — and it’s something that can cause problems for #badgelife hackers designing for more aesthetic reasons.
Continue reading “The Way Of The PCB Artist: How To Make Truly Beautiful Circuit Boards” →

A Simple POV Globe Via APA102

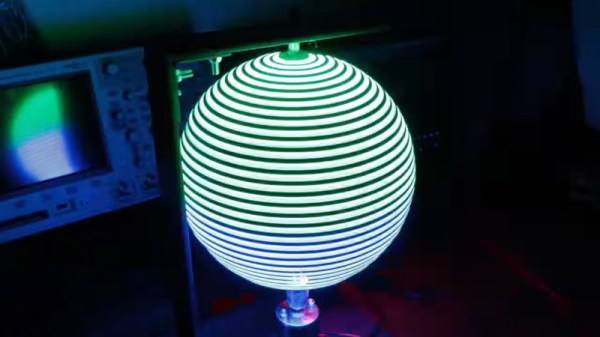
POV builds come in all shapes and sizes, and typically rely on LEDs for their high light output and fast response time. With this in mind, [Great Scott] grabbed some LED strip off the shelf and set about whipping up a POV LED globe.

Being a spinning POV build, it’s necessary to consider how to get power to the rotating elements. [Great Scott] decided to go with a simple solution of putting a LiPo battery on the rotating assembly, which runs the LEDs and Arduino Nano at the heart of the operation. The LEDs in question are of the APA102 type, making them readily addressable and capable of a wide color gamut. It’s all spun by a simple brushed DC motor, running from a separate supply at the base of the platform.

It’s very much a hacker build, held together with duct tape and zipties. Despite this, it looks tidy when in operation, as all of the important hardware is hidden at the centre of the globe. There’s a bit of a vibration problem, but [Great Scott] reckons this can be fixed with some frame modifications.

We’d love to see the build run some more advanced operations, like a representation of the Earth, or some kind of sun clock. If you’re interested in learning more about POV displays, we’ve got the primer you need. Video after the break.

Continue reading “A Simple POV Globe Via APA102” →

HiFi Audio On The Commodore 64 – 48KHz, Yo!

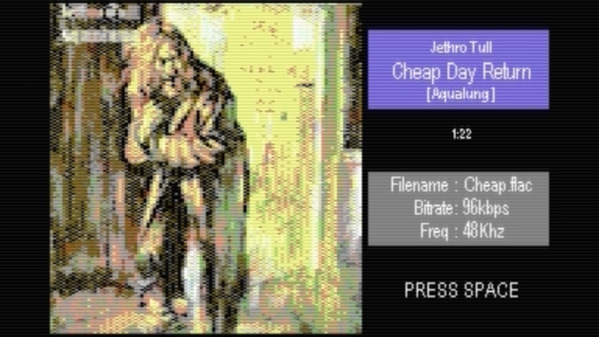
Prior to the development of CD-quality audio hardware in the mid-1990s, home computers and consoles typically made do with synthesized music. Due to the storage and RAM limitations of the time, there weren’t a whole lot of other practical options. If you’re willing to ignore practicality, however, you can do some wonderful things – such as playing high-quality audio on a Commodore 64!

The project is the work of [Antonio Savona], who set out to play hi-fi audio on a Commodore 64 using only period-correct hardware. That means no 16MB RAM expansions, and no crazy high-capacity carts. The largest carts of the era were just 1MB, as produced by Ocean, and [Antonio] intended to cram in a full 90 seconds of music.

Targeting a sample rate of 48 KHz with 8-bit samples would mean the cartridge could only fit 20 seconds of raw audio into its 1MB of storage. This wasn’t good enough, so the audio would have to be compressed, with the target being a 4:1 ratio to reach the 90 second goal. With the C64’s CPU running at just 1MHz, there are just 21 clock cycles to deal with each sample when playing at 48 KHz.

Obviously, [Antonio] had set quite the challenge, and some masterful assembly coding was used to get the job done. The final result has the audio sounding impressively good, given that it’s being pumped out by a 6502 that is surely sweating to get the job done.

We love a good C64 hack around these parts, and it’s now even possible to build a new one from scratch if that’s your particular itch. Video after the break.

Continue reading “HiFi Audio On The Commodore 64 – 48KHz, Yo!” →