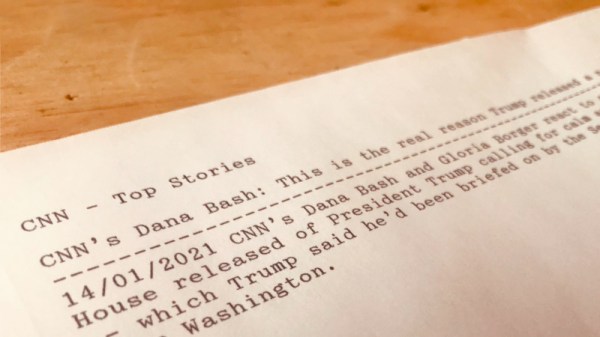
40% Keyboard Build Is 100% Open Source

[Blake]’s interest in building keyboards happened naturally enough — he was looking for a new project to work on and fell into the treasure chest that is the mechanical keyboard community. It sounds like he hasn’t built anything but keyboards since then, and we can absolutely relate.

This tidy 40% ortholinear is [Blake]’s third build, not including macro keebs. It’s based on an open source case and plate from Thingiverse, and uses an Arduino Pro Micro running the popular QMK firmware to read input from 47 Gateron blues and a rotary encoder.

We particularly like the double rainbow ribbon cable wiring method [Blake] used to connect each row and column to the controller. It looks beautiful, yes, but it’s also a great way to maintain sanity while programming and troubleshooting.

Keyboard builds can look daunting, even at 40% of standard size. But as [Blake] discovered, there are some really good guides out there with fantastic tips for hand-wiring in small spaces. And now there is another well-written guide with clear pictures to point to.

Looking to split from the standard rectangle form factor but don’t know what to go with? Divine your next clacker with this split keyboard finder.

Thanks for the tip, [jrdsgl]!

Easy Focus Stacking With Your CNC Machine

Macro photography is the art of taking photos of things very close up, and ideally at great detail. Unfortunately cameras have poor depth of field at close ranges, so to get around this, many use focus stacking techniques. This involves taking many photos at different focal lengths and digitally compositing them together. To help achieve this, [gtoal] realized that garden variety CNC machines would be perfect for the job.

To focus stack effectively, it’s desirable to move the camera in very small increments of sub-mm precision, in order to get different parts of the subject in focus. For this, a CNC machine excels, as it’s designed to move tool heads in very tiny, precise movements.

To achieve a bargain focus stacking rig, [gtoal] used a Dremel tool mount for cutting discs. It’s repurposed here, used as an easy way to fit a Raspberry Pi camera to a CNC tool head through its mounting holes. From there, it’s a simple manner of stepping the CNC a tiny amount at a time on the Z-axis, while taking photos with the Raspberry Pi along the way. [gtoal] notes that it would be simple for an experienced CNC user to whip up a program to automate the entire process.

We’ve seen other budget focus stacking rigs before, and even a busted 3D printer that was turned into an automated scanning microscope. If you’ve got your own tricks for top notch macro photography, drop us a note in the tipline!

Accessibility Keyboard Is Modular And Practical

We don’t have many details from [dariocose] about his K-Ability Dev Kit yet, but there are enough clues on his HackadayPrize2020 entry that we can tease out the critical points. The plan is to supply a control module with Bluetooth HID capability to act as a mouse and keyboard. It will plug into a socket on user-specific boards. Each style will be suited to a patient with a neuromuscular disease and will allow them to interact with computers in a way that suits their needs. For example, if someone lacks fine motor control, they may need large buttons, while someone with weak muscles may need pads close to one another. From the video’s looks below, the prototype boards aren’t anything fancier than cardboard and wire. Developing the best device doesn’t mean a dozen iterative prints or wasted laser-cut acrylic sheets.

Example code supports three mouse movements, left, right, and down, but there are plans to develop a tool to reprogram them. Given the name and prominent LCD, we suspect there will be keyboard support in the future. Processing and Bluetooth rest on the capable shoulders of an ESP32, which also supports touch sensing, so customized pads can respond to a wispy graze or a blunt fist.

We’re not short on customized keyboards that range from glorious elements of comfort to befuddling tools of typing.

Continue reading “Accessibility Keyboard Is Modular And Practical”

Ultra-Mobile Little Robot Will Climb The Walls

Can it crawl? Can it climb? Can it roll? Can it skate? Can it draw? Naminukas by [Mykolas Juraitis] can do all of those things, and it is the size of a winter boot. Roving robots generally fall into one locomotion category, and the fanciest are amphibious. We categorize this one as transforming between three modes.

The first mode is like an inch-worm and a robot arm. Using a vacuum cup at the hub of each wheel, it sticks one end to the ground then heaves itself in the direction it wants to go and repeats. Its second form is a two-wheel balancing robot, which is the fastest configuration, and it can even carry things on its suckers. For the finale, it can hybridize all the tricks and use a camera dolly like a skateboard. One end sticks to the dolly, and the other is a propulsion wheel.

Naminukas is not just about scooting around the floor, because it can use tools with enough dexterity to write legibly on a whiteboard, climb walls, and even move around the ceiling. If these become sentient, there will be no place to hide, except a room with shag carpet, and is that any way to live?

We enjoy multi-terrain vehicles from soaring seaplanes to tidal tanks.

Continue reading “Ultra-Mobile Little Robot Will Climb The Walls”

Cousteau’s Proteus Will Be The ISS Of The Seas

The Earth’s oceans are a vast frontier that brims with possibilities for the future of medicine, ocean conservation, and food production. They remain largely unexplored because of the physical limits of scuba diving. Humans can only dive for a few hours each day, and every minute spent breathing compressed air at depth must be paid for with a slower ascent to the surface. Otherwise, divers could develop decompression sickness from nitrogen expanding in the bloodstream.

An illustration of the Conshelf 3 habitat. Image via Medium

In the 1960s, world-famous oceanographer Jacques Cousteau built a series of small underwater habitats to extend the time that he and other researchers were able to work. These sea labs were tethered to a support ship with a cable that provided air and power.

Cousteau’s first sea lab, Conshelf 1 (Continental Shelf Station) held two people and was stationed 33 feet deep off the coast of Marseilles, France. Conshelf 2 sheltered six people and spent a total of six weeks under the Red Sea at two different depths.

Conshelf 3 was Cousteau’s most ambitious habitat design, because it was nearly self-sufficient compared to the first two. It accommodated six divers for three weeks at a time and sat 336 feet deep off the coast of France, near Nice. Conshelf 3 was built in partnership with a French petrochemical company to study the viability of stationing humans for underwater oil drilling (before we had robots for that), and included a mock oil rig on the nearby ocean floor for exercises.

Several underwater habitats have come and gone in the years since the Conshelf series, but each has been built for a specific research project or group of tasks. There’s never really been a permanent habitat established for general research into the biochemistry of the ocean.

Continue reading “Cousteau’s Proteus Will Be The ISS Of The Seas”

Codespaces For Embedded Development

We can sympathize with [Benjamin CabĂ©]. He has a lot of development boards and it has become painful to maintain the many toolchains for each board. We’ve also suffered from upgrading one tool breaks another tool in some obscure way. His solution? Use Github Codespaces which you can get early access for beta testers.

The idea is that you can spin off a container-specific to a GitHub repository that has all the proper versions and dependencies required to work with a project.

If you sign up for the beta, you’ll be on a waitlist, but it is interesting to see [Benjamin] go through the steps. The service is free during the beta and you get two codespaces. Presumably, you’ll eventually be able to pay for more capability.

The idea is good, but we’ll have to see about the implementation. A preconfigured container might move from machine to machine or even to deep storage for later reconstitution. Flashing the binary image to the device looked painful from the browser. We’ve seen it done nicely with, for example, the online Arduino IDE but it did take some installable software helpers to do that.

We’ll be curious about how many different platforms this will support. However, you can roll your own version of this and avoid the cloud using Docker or even a full-blown VM like VirtualBox. Sure, it is more work, but you control your destiny. Add something like Platform.IO and your choice of development tools and you can avoid having so many competing development tools all in your main computer.

Continue reading “Codespaces For Embedded Development”

Miniature Faux Floppy For 8-Bit Atari Looks The Part

There’s plenty of fun to be had with retrocomputers of yesteryear, but for modern users, it can be something of a culture shock. Going back to floppy disks after all these years is a reminder of just how far storage technology has come in terms of speed, reliability, and of course, capacity. Luckily, there are ways to combine the best of both worlds.

Floppy drive emulators for classic computers are of course nothing new, but we think this one [c0pperdragon] has put together is worthy of a closer look. Not only does the ATmega32U4 based emulator have an exceptionally low part count, but the code has been written in the Arduino IDE. Both features make it easy for new players to duplicate and revise the design should they feel so inclined. In a pinch you could even implement it on a breadboard with a garden variety Arduino.

The emulator is housed in a 3D printed enclosure designed to look like an era-appropriate Atari 1050 Disk Drive, except you’re using SD cards instead of floppies. The firmware can mimic two physical drives and supports up to 100 disk images on each SD card. The user interface is about as simple as it gets, with two push buttons and a pair of seven-segment LEDs to indicate which disk image is currently loaded up.

We’ve seen some very elaborate disk emulators over the years, but there’s something compelling about how straightforward this version is. If it helps a few more people experience the unique joys of retrocomputing, it’s a win in our book.