Game Boy? NES? Why Not Both!

If you’re a retro Nintendo fan you can of course carry a NES and a Game Boy around with you, but the former isn’t very portable. Never fear though, because here’s [Chad Burrow], who’s created a neat handheld console that emulates both.

It’s called the Acolyte Handheld, and it sports the slightly unusual choice for these parts of a PIC32 as its main processor. Unexpectedly it can use Sega Genesis controllers, but it has the usual buttons on board for portable use. It can drive either its own LCD or an external VGA monitor, and in a particularly nice touch, it switches between the two seamlessly. The NES emulator is his own work, while Game Boy support comes courtesy of Peanut-GB.

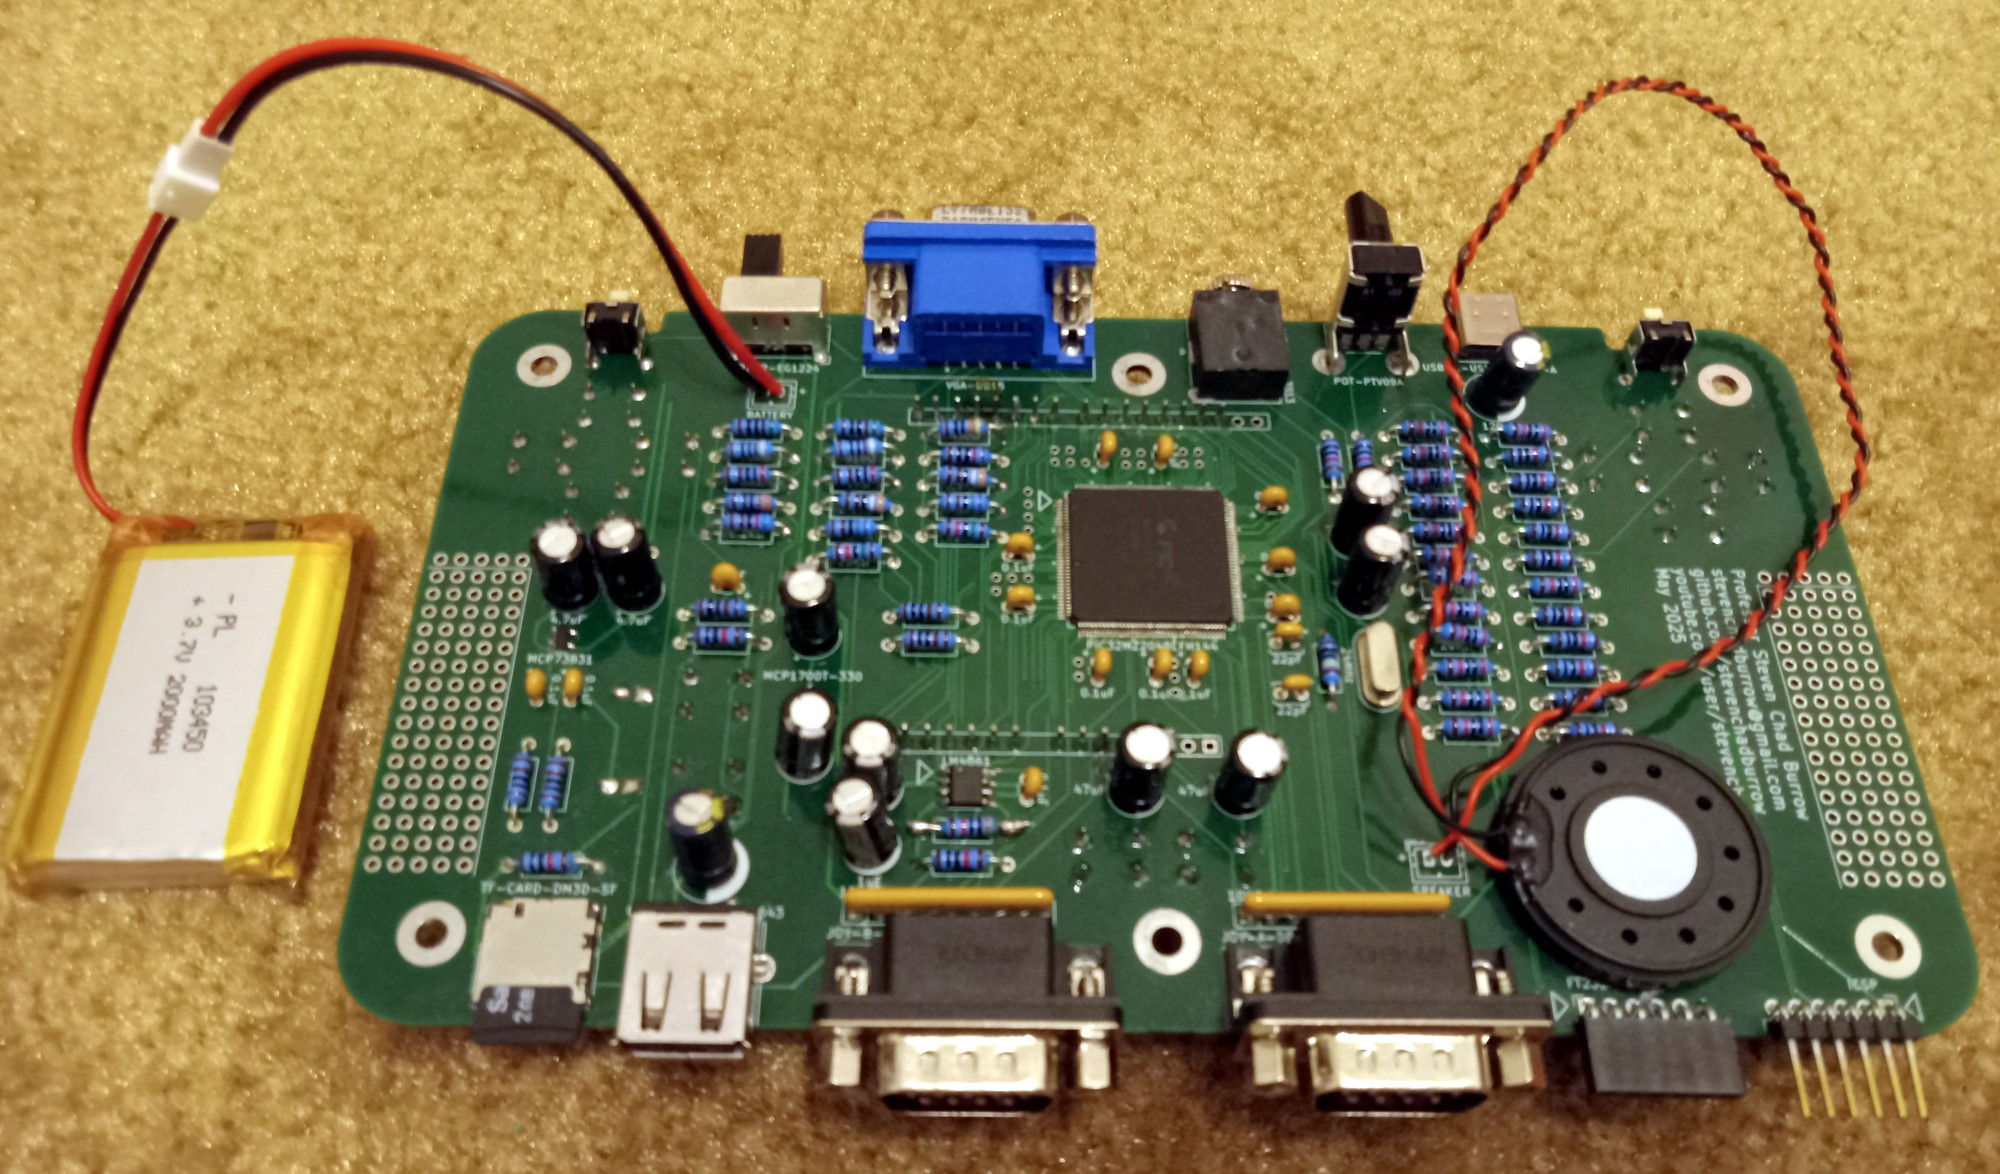
We like the design of the case, and particularly that of the buttons. Could it have been made smaller by forgoing some of the through-hole parts in favour of SMD ones? Quite likely, but though it’s chunky it’s certainly not outsized.

Portable Nintendo-inspired hardware is popular around here, as you can see with this previous handheld NES

Running FreeDOS And 8086tiny On The Game Boy Advance Because You Can

How many people haven’t looked at their Game Boy Advance (GBA) handheld gaming device and wondered how much better it might be if it could run FreeDOS. Inside an 8086 emulator. If you’re like [ZZAZZ] and similarly suffer intrusive project-related thoughts, then this might be a moment of clear recognition, somewhat like sharing one’s story at a Programmers Anonymous meeting, but we digress.

In the video, the basic premise of making even the 8086tiny emulator work on the GBA seemed improbable on the outset – courtesy of the rather limited memory environment provided by the GBA – before even daring to look at things like disk access.

However, letting silly things like segmented memory and mismatched memory addresses deter us from pleasing said intrusive thoughts would be beyond the pale. Ergo we get a shining example of how days of rewriting code, stripping code, debugging code, fixing alignment issues in code and writing work-arounds for newly discovered issues in code can ultimately lead to the proud moment where FreeDOS boots on the GBA.

Granted it takes over an hour to do so, and has to be started from a butchered Pokémon Emerald save file, courtesy of a well-known exploit in that game, thankfully preserved in counterfeit cartridges.

Admittedly we’re not sure what practical applications there are for FreeDOS on the GBA, but that’s never stopped hackers from taking on impossible projects before, so there’s no sense letting it get in the way now.

Continue reading “Running FreeDOS And 8086tiny On The Game Boy Advance Because You Can”

Hack Aims For Polaroid, Hits Game Boy Camera Sweet Spot

There’s just some joy in an instant camera. They were never quality cameras, even in the glory days of Polaroid, but somehow the format has survived while the likes of Kodachrome have faded away. [Mellow_Labs] decided he wanted the instacam experience without the Polaroid pricing, so he made his own in the video embedded after the break.

He says “Polaroid’ but we see Game Boy.

At its core, it’s a simple project: an ESP32-CAM for the image (these were never great cameras, remember, so ESP32 is fine– and do you really get to call it an instant camera if you have to wait for a Raspberry Pi to boot up?) and a serial thermal printer for the “instant photo”part. This admittedly limits the project to black and white, and pretty low res, but B/W is artistic and Lo-Fi is hip, so this probably gives the [Mellow Labs] camera street cred with the kids, somehow. Honestly, this reminds us more of the old Gameboy Camera and its printer than anything made by Polaroid, and we are here for it.

The build video goes through the challenges [Mellow Labs] found interfacing the serial printer to the ESP32–which went surprisingly well for what looks like mostly vibe coding, though we’re not sure how much time he spent fixing the vibe code off camera–as well as a the adventure of providing a case that includes the most absurdly beefy battery we’ve ever seen on a camera. Check out the full video below.

Instant cameras are no stranger to Hackaday: this one used e-ink; this one uses film, but is made of gingerbread. In 2022 we wondered if we’d ever shake the Polaroid picture, and the answer appears to be “no” so far.

Thanks to [Mellow] for tooting his own horn by submitting this project to the tip line. We love to see what our readers get up to, so please– toot away!

Continue reading “Hack Aims For Polaroid, Hits Game Boy Camera Sweet Spot”

Game Boy PCB Assembled With Low-Cost Tools

As computers have gotten smaller and less expensive over the years, so have their components. While many of us got our start in the age of through-hole PCBs, this size reduction has led to more and more projects that need the use of surface-mount components and their unique set of tools. These tools tend to be more elaborate than what would be needed for through-hole construction but [Tobi] has a new project that goes into some details about how to build surface-mount projects without breaking the bank.

The project here is interesting in its own right, too: a display module upgrade for the classic Game Boy based on an RP2350B microprocessor. To get all of the components onto a PCB that actually fits into the original case, though, surface-mount is required. For that [Tobi] is using a small USB-powered hotplate to reflow the solder, a Pinecil, and a healthy amount of flux. The hotplate is good enough for a small PCB like this, and any solder bridges can be quickly cleaned up with some extra flux and a quick pass with a soldering iron.

The build goes into a lot of detail about how a process like this works, so if you’ve been hesitant to start working with surface mount components this might be a good introduction. Not only that, but we also appreciate the restoration of the retro video game handheld complete with some new features that doesn’t disturb the original look of the console. One of the other benefits of using the RP2350 for this build is that it’s a lot simpler than using an FPGA, but there are perks to taking the more complicated route as well.

Continue reading “Game Boy PCB Assembled With Low-Cost Tools”

Restoring An Abandoned Game Boy Kiosk

Back in the olden days, there existed physical game stores, which in addition to physical games would also have kiosks where you could try out the current game consoles and handhelds. Generally these kiosks held the console, a display and any controllers if needed. After a while these kiosks would get scrapped, with only a very few ending up being rescued and restored. One of the lucky ones is a Game Boy kiosk, which [The Retro Future] managed to snag after it was found in a construction site. Sadly the thing was in a very rough condition, with the particle board especially being mostly destroyed.

Display model Game Boy, safely secured into the demo kiosk. (Credit: The Retro Future, YouTube)

These Game Boy kiosks also featured a special Game Boy, which – despite being super rare – also was hunted down. This led to the restoration, which included recovering as much of the original particle board as possible, with a professional furniture restore ([Don]) lending his expertise. This provides a master class in how to patch up damaged particle board, as maligned as this wood-dust-and-glue material is.

The boards were then reassembled more securely than the wood screws used by the person who had found the destroyed kiosk, in a way that allows for easy disassembly if needed. Fortunately most of the plastic pieces were still intact, and the Game Boy grey paint was easily matched. Next was reproducing a missing piece of art work, with fortunately existing versions available as reference. For a few missing metal bits that held the special Game Boy in place another kiosk was used to provide measurements.

After all this, the kiosk was powered back on, and it was like 1990 was back once again, just in time for playing Tetris on a dim, green-and-black screen while hunched half into the kiosk at the game store.

Continue reading “Restoring An Abandoned Game Boy Kiosk”

An Instant Gratification Game Boy Printer

When the Game Boy Printer was released back in 1998, being able to produce a hard-copy of your Pokémon diploma or your latest Game Boy Camera snapshot at the touch of a button was was pretty slick indeed. But in our modern paperless society, the GB Printer somehow sticks out as even more archaic than the other add-on’s for Nintendo’s iconic handheld. Even among the folks who are still proudly playing the games that support the Printer, nobody actually wants to print anything out — although that doesn’t mean they don’t want to see the images.

The TinyGB Printer, developed by [Raphaël BOICHOT] and [Brian KHUU], could be considered something of a Game Boy Non-Printer. Powered by the RP2040 Zero development board, this open source hardware device plugs into your Game Boy and is picked up by all the games as a legitimate Printer. But instead of cranking out a little slip of thermal paper once you hit the button, the image is displayed in all its 240×240 glory on a 1.3 inch TFT display mounted to the top of the board.

Continue reading “An Instant Gratification Game Boy Printer”

Game boy with custom cartridge mounted on car dashboard

A Game Boy Speedometer, Just Because You Can

From a practical standpoint, [John] may be correct that his recent creation is the “world’s worst digital dash”, but we’re still oddly enamored with the idea of using a Nintendo Game Boy as a digital speedometer. Pulling it off meant interfacing the handheld with the vehicle’s CAN bus system, so whether you’re into retro gaming or car hacking, this project has something to offer.

Showing real-time vehicle speed on the Game Boy sounds like it should be relatively easy, but the iconic game system wasn’t exactly built for such a task. Its 2 MHz CPU and 160×144 pixel dot-matrix screen were every kid’s dream in 1989, but using it as a car dashboard is pushing it. To bridge that gap, [John] designed two custom circuit boards. One interfaces with the Game Boy, intercepting its memory requests and feeding it data from a microcontroller. The other processes the CAN bus signals, translating speed information into a form the Game Boy can display. [John] used inexpensive tools and software to read the CAN bus data, and used GBDK-2020 to write the software in C. His video goes in great detail on how to do this.

Months of work have gone into decoding the Game Boy’s data bus and creating a schematic for the interface board. Tricking the Game Boy into thinking it was loading a game, while actually displaying incoming speed data. The screen’s low resolution and slow refresh rate rendered it barely readable in a moving vehicle. But [John]’s goal wasn’t practicality — it was just proving it could be done.

Want to dive deep into the Game Boy?  Have you seen the Ultimate Game Boy talk?

Continue reading “A Game Boy Speedometer, Just Because You Can”