Hacklet 115 – More Quick Tool Hacks

Some of the best hacks are the tools people make to help them complete a project. I last looked at quick tool hacks back in Hacklet 53. Hackers have been busy since then, and new projects have inspired new tools. This week on the Hacklet, I’m taking  a look at some of the best new quick tool hacks on Hackaday.io.
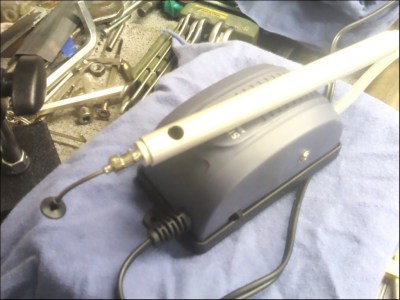
pickupWe start with [rawe] and aquarium pump vacuum pickup tool. Tweezers work great for resistors and caps, but once you start trying to place chips and other large parts, things quickly become frustrating. Commercial machines use high dollar vacuum pickup devices to hold parts. [rawe] built his own version using a cheap Chinese hand pickup tool and an aquarium pump. With some pumps, switching from air to vacuum is easy. Not with [rawe’s] pump. He had to break out the rotary tool and epoxy to make things work. The end result was worth it, a vacuum pickup tool for less than 10 Euro.


via1

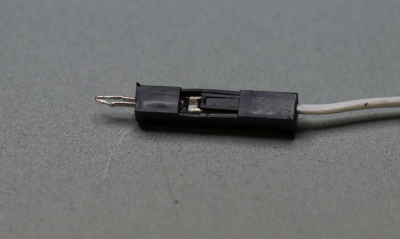
Next we have [David Spinden] with ViaConnect Circuit Board Test Tool, his entry in the 2016 Hackaday Prize. [David] wanted a spring loaded pin which could be used in .100 holes in printed circuit boards. He ended up using pins from one connector, shell from another, and packaging the whole thing up into a new tool. ViaConnect essentially makes any PCB as easy to use as a solderless breadboard. No headers required. This is great both for testing new designs and for the education sector.

Allen tool holderNext up is our favorite quick tool hacker, [Alex Rich] with Improved Allen Wrench / Hex Key Holder. If [Alex] looks familiar, that’s because he’s the creator of the Stickvise. This time he’s come up with a new way to store and organize your Allen wrenches. Inspired by a similar device seen on a YouTube video from [Tom Lipton], [Alex] opened up his CAD software and started designing. The original used a steel spring to keep the wrenches in place. [Alex] switched the spring to a rubber o-ring. The o-ring securely holds the wrenches, but allows them to be easily pulled out for use. Of course the design is open source, so building your own is only a couple of hours of printing away!
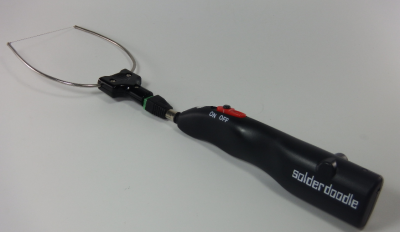


solderdoodFinally we have [Solarcycle] with Cordless Foam Cutting Tool – USB Rechargeable. Soldering irons make a lot of heat in a small area to melt metal. Foam cutters make heat in a larger area to cut Styrofoam. [Solarcycle] saw the relation and converted a Solderdoodle Pro cordless soldering iron into a banjo style hot wire foam cutter. A barrel connector converts the soldering iron tip output to two stiff wires. The stiff wires carry current to a 3 cm length of Kanthal iron-chromium-aluminium (FeCrAl) heating element wire. If you don’t have any Kanthal around, ask your local vape enthusiast – they have tons of it. The result is the perfect hand-held tool for carving and sculpting in foam. Just make sure to have lots of ventilation.

If you want to see more of these hacks, check out our newly updated quick tool hacks list! See a project I might have missed? Don’t be shy, just drop me a message on Hackaday.io. That’s it for this week’s Hacklet, As always, see you next week. Same hack time, same hack channel, bringing you the best of Hackaday.io!

Wrangling High Voltage

Working with high voltage is like working with high pressure plumbing. You can spring a leak in your plumbing, and of course you fix it. And now that you’ve fixed that leak, you’re able to increase the pressure still more, and sometimes another leak occurs. I’ve had these same experiences but with high voltage wiring. At a high enough voltage, around 30kV or higher, the leak manifests itself as a hissing sound and a corona that appears as a bluish glow of excited ions spraying from the leak. Try to dial up the voltage and the hiss turns into a shriek.

Why do leaks occur in high voltage? I’ve found that the best way to visualize the reason is by visualizing electric fields. Electric fields exist between positive and negative charges and can be pictured as electric field lines (illustrated below on the left.) The denser the electric field lines, the stronger the electric field.

The stronger electric fields are where ionization of the air occurs. As illustrated in the “collision” example on the right above, ionization can happen by a negatively charged electron leaving the electrically conductive surface, which can be a wire or a part of the device, and colliding with a nearby neutral atom turning it into an ion. The collision can result in the electron attaching to the atom, turning the atom into a negatively charged ion, or the collision can knock another electron from the atom, turning the atom into a positively charged ion. In the “stripping off” example illustrated above, the strong electric field can affect things more directly by stripping an electron from the neutral atom, again turning it into a positive ion. And there are other effects as well such as electron avalanches and the photoelectric effect.

In either case, we wanted to keep those electrons in the electrically conductive wires or other surfaces and their loss constitutes a leak in a very real way.

Continue reading “Wrangling High Voltage”

FR4 Machine Shield Is A CNC Milling Machine From FR4 PCB

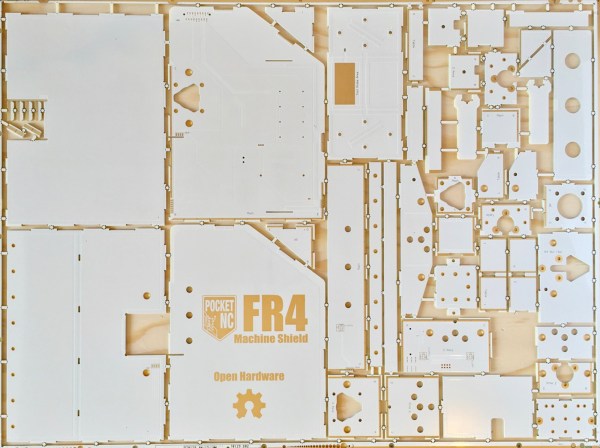
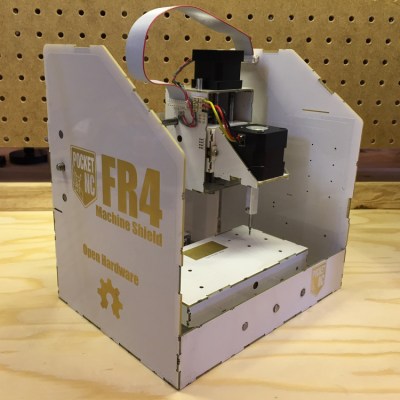
The people behind the PocketNC heard you like CNC PCB mills, so they milled you a PCB mill out of PCB. They announced their surprising new open source hardware product, a pocket sized 3-axis CNC machine entirely made out of FR4 PCB material, aptly named “FR4 Machine Shield”, at this year’s Bay Area Maker Faire.

UPDATE: The FR4 Machine Shield is now on Kickstarter

fr4_thumbWe know the concept from quadcopters, little robots, and generally things that are small enough to make use of their PCBs as a structural component. But an entire CNC machine, soldered together from a few dozen PCBs certainly takes it to the next level.

There is no doubt that 2mm thick fiber reinforced epoxy can be surprisingly rigid, although the Achilles heel of this method might be the solder joints. However, it looks like all load bearing, mechanical connections of the machine are supported by tightly interlocking “dovetail” finger-joints, which may help protecting all the solder connections from the strain hardening effects of continuous stress and spindle vibrations.

As you might expect, most of the wiring is embedded into the FR4 frame construction, and to squeeze the maximum value out of the PCB material, the motor driver boards interface via card edge connectors with the (currently Arduino based) controller board. In addition to the milling head, which features a brushless DC motor and a tool coupler, the team wants to develop heads for circuit printing, microscopy, pneumatic pick and place, hot air reflow, and 3D printing.

With all those cost-driven design choices, from the one-step manufacturing process of the frame and wiring to the dismissal of screws and nuts from the frame assembly, the “FR4 Machine Shield” could indeed become one of the cheapest CNC machine kits on the market. The team targets an introduction price of $400 during a Kickstarter campaign in June 2016. Can they deliver? [Gerrit] checked Pocket NC out at the Faire and ended up raving about how they run their business.

Enjoy their teaser video below!

Continue reading “FR4 Machine Shield Is A CNC Milling Machine From FR4 PCB”

Reading An IR Thermometer The Hard Way

[Derryn Harvie] from the MakeHackVoid maker space hacked a $10 IR Thermometer and made it talk USB. Sounds easy? Read on.

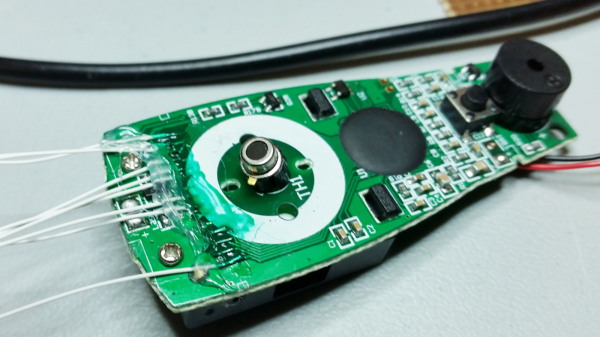
He opened it up in the hope of finding, and tapping into, a serial bus. But he couldn’t find one, and the main controller was a COB blob – hidden under unmarked black epoxy. Normally this is a dead-end.  (We’ve seen some interesting approaches to decapping epoxy blobs, and even ICs with lasers.)

But [Derryn] went his own way – intercepting the data going from the micro-controller to the LCD display, and reverse engineering it using another microcontroller. He scraped off the solder mask over the tracks leading to the LCD display, and used an oscilloscope to identify the common drive lines. He then used a function generator to excite each of the LCD common lines and the segments lines to build a complete matrix identifying all the combinations that drove the segments. With all the information decoded, wires were soldered so he could hook up an Arduino, and the cut tracks repaired.

Since the LCD was a multiplexed display, the bias voltages were at four levels. Luckily, he could extract most of the LCD information by reading just eight of the segment drive lines, using up all of the analog inputs on the Arduino. Perhaps a different microcontroller with more ADC inputs would have allowed him to display more LCD functions. Well, he can always upgrade his upgrade later. If you have a similar hack to implement, then [Derryn]’s code could be useful to get started.

Thanks, [csirac2] for sending us this tip from MakeHackVoid.

My Payphone Runs Linux

For the 20th anniversary of the Movie “Hackers” [Jamie Zawinski], owner of DNA Lounge in San Francisco, threw an epic party – screening the movie, setting up skating ramps and all that jazz. One of the props he put up was an old payphone, but he didn’t have time to bring it alive. The one thing he didn’t want this phone to do was to be able to make calls. A couple of weeks later, he threw another party, this time screening “Tank Girl” instead. For this gathering he had enough time to put a Linux computer inside the old payphone. When the handset is picked up, it “dials” a number which brings up a voice mail system that announces the schedule of events and other interactive stuff. As usual, this project looked simple enough to start with, but turned out way more complicated than he anticipated. Thankfully for us, he broke down his build in to bite sized chunks to make it easy for us to follow what he did.

This build is a thing of beauty, so let’s drill down into what the project involved:

Continue reading “My Payphone Runs Linux”

Homemade Internal Combustion Engine – Sans Machine Shop

We’ve got a question for you:  If you were stuck in a basement, with nothing too much more than some copper pipe, solder, JB-Weld, and a few hand tools, do you think you could make a working 2-stroke motor? Well, [Makerj101] did just that, and the results are fan-freaking-tastic.

[Makerj101] began his journey like most of us do – with a full face-plant type failure. His first attempted at building an internal combustion engine wouldn’t run, due to a low compression ratio, and too small port sizes. So he did what most of us would do, and tore apart a small gas-power weed-whacker motor to see what he was doing wrong.

The type of engine he’s making is a 2-stroke. That makes the design much simpler as there are no mechanically controlled valves a like 4-stroke motor. The piston (along with the cylinder wall) does double duty by also directing the intake and exhaust gasses – along with a simple flap-type check valve.

For now, the ignition system is run off of mains power, but he has plans to change that – creating a self contained engine. We’re amazed that the entire build is made with such simple tools. Even the the piston is cast out of “JB Weld” epoxy putty. After seeing this, we think that the kid who took apart a clock is going to have to up his game a bit.

We’ve included all 6 parts after the break.

Continue reading “Homemade Internal Combustion Engine – Sans Machine Shop”

Building Custom Integrated Circuits

The first integrated circuits weren’t tiny flecks of silicon mounted to metal carriers and embedded in epoxy or ceramic. The first integrated circuits, albeit a looser definition of such, were just a few transistors, resistors, and diodes mashed together in the same package. With this in mind, [Rupert] created his own custom IC. It’s an IR receiver transmitter constructed out of a transistor, resistor, and an LED.

The attentive reader should be asking, “wait, can’t you just buy an IR receiver transmitter?” Yes, yes you can. But that’s not a hack™, and would otherwise be very uninteresting.

[Rupert]’s IC is just three parts, a 2n2222 transistor, a 220Ω resistor and an IR LED. With a good bit of deadbug soldering, these three parts were melded into something that resembled, and had the same pinout of, a Vishay TSOP4838 IR receiver. The epoxy used to encapsulate this integrated circuit is a standard 2-part epoxy and laser printer toner. Once everything is mixed up into a gooey slurry, it’s dripped over the IC producing a blob of an integrated circuit. It’s functionally identical to the standard commercial version, and looks good enough for a really cool project [Rupert]’s been working on.

Thanks [foehammer] for the tip.