Sometimes, a little puny matchbox-sized electronic speed controller (ESC) won’t do the job. If you find yourself looking for something heftier, say, in the range of hundreds of amps, you might look towards a design like the MP2 ESC. [owhite] has built an example of the design that can deliver some serious power.
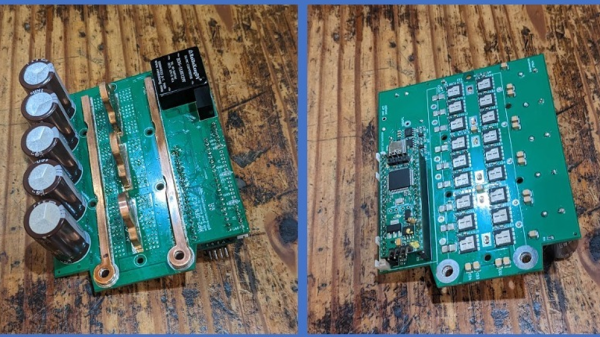
[owhite’s] build has some serious specs: it’s rated to offer up to 300 amps at up to 150 volts, though thus far, it’s only been tested at up to 100 V. Like the original MP2, which hails from the Endless Sphere forums, it’s designed to be compatible with VESC code using the STM32F405 microcontroller. It’s intended for driving high-powered traction motors in applications like e-bikes and electric scooters, as you might have guessed by its potential output power being well into the tens of kilowatts range.
If you’re eager to build your own, you can do so, with the design files on GitHub. Just note that you’ll need some hefty parts to handle the juice, including beefy MOSFETS and juicy capacitors rated at 160 V.
Open source motor controllers abound of late, and we’ve featured a few in recent times. Just remember that astute design and using parts within their means is the key to avoiding letting the smoke out! Continue reading “300 Amps Through An Open Source Speed Controller”