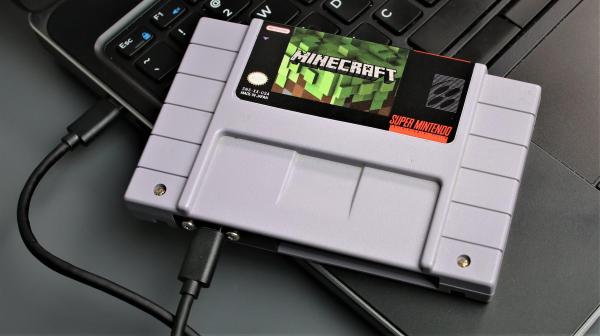
Sometimes it’s the little touches and details that make a project. That’s certainly the case with [Franklinstein]’s Super Nintendo (SNES) Cartridge Hard Drive. It might only be an enclosure for a solid-state hard drive with a USB interface, but the attention to detail is what really makes it worth checking out.
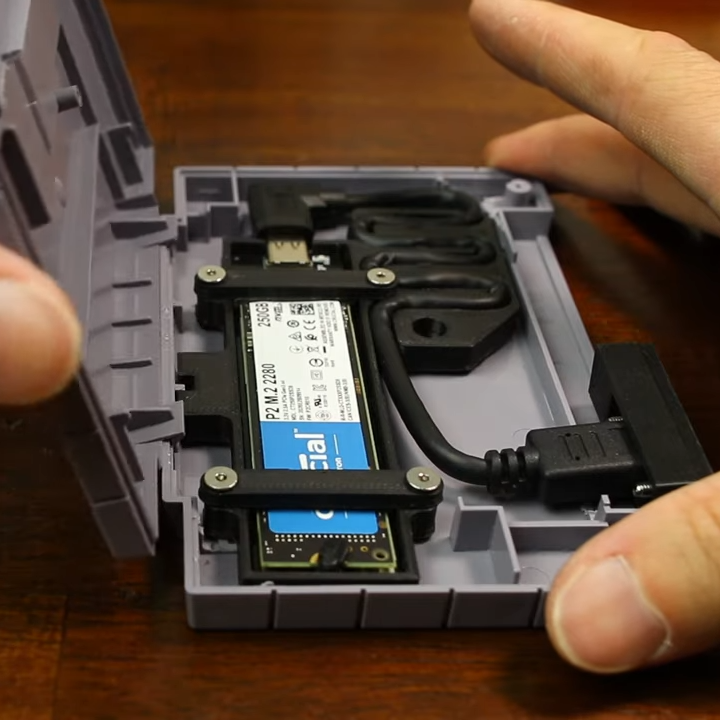 A SNES cartridge has a pretty standard clamshell-ish construction, but fitting the solid-state drive plus cable adapter turned out to be a bit of a challenge.
Since [Franklinstein] wanted the cartridge to look as original as possible, careful measuring and cutting was needed to securely fit the drive and provide an unobtrusive USB-C port tucked discreetly into the cartridge’s opening. We like the technique of using a 3D printed fixture to take up the slack on the cable by exactly the right amount, resulting in a 100% rattle-free end product. A custom Minecraft sticker label provides the finishing touch.
Being able to plug it into a computer and actually play Minecraft is a neat gimmick, but it really shows that some careful construction and assembly can be what makes something look like a clean build instead of a hack job. Take a look at additional build detail and pictures, and check out the video of the build, embedded below.
Hey, if sneaky cartridge mod tricks intrigue you, then you’ll absolutely want to check out how it was possible to play DOOM on a NES from a cartridge. Maybe that’s the next evolution for a cartridge with a Minecraft label on it?
Continue reading “Super NES Cartridge Pulls A Sneaky, Plays Minecraft“