Ensuring that water is safe to use and consume can be a real chore, especially for those who live in impoverished areas without access to safe drinking water. Here is where researchers at Stanford University hope that their recently developed low-cost catalyst can make a difference. This catalyst comes in the form of nano-sized particles (nanoflakes) consisting out aluminium oxide, molybdenum sulfide, copper and iron oxide. When exposed to sunlight, the catalyst performs like a photon-sensitive semiconductor/metal junction (Cu-MoS2), with the dislodged electrons going on to react with the surrounding water, resulting in the formation of hydrogen peroxide (H2O2) and hydroxy radicals.
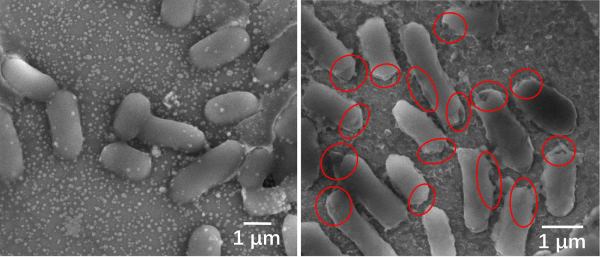
Waterborne diseases are very common, with even the US reporting 7,000 deaths and 120,000 hospitalizations in 2021, according to the US CDC, and many more affected worldwide. Much of the harm is done by microbes, in particular bacteria such as E. coli, which are prolific in aquatic environments. By using this catalyst powder in contaminated water, the researchers reported that the Escherichia coli colonies in the tested samples were fully eradicated after a 60 second exposure to sunlight.
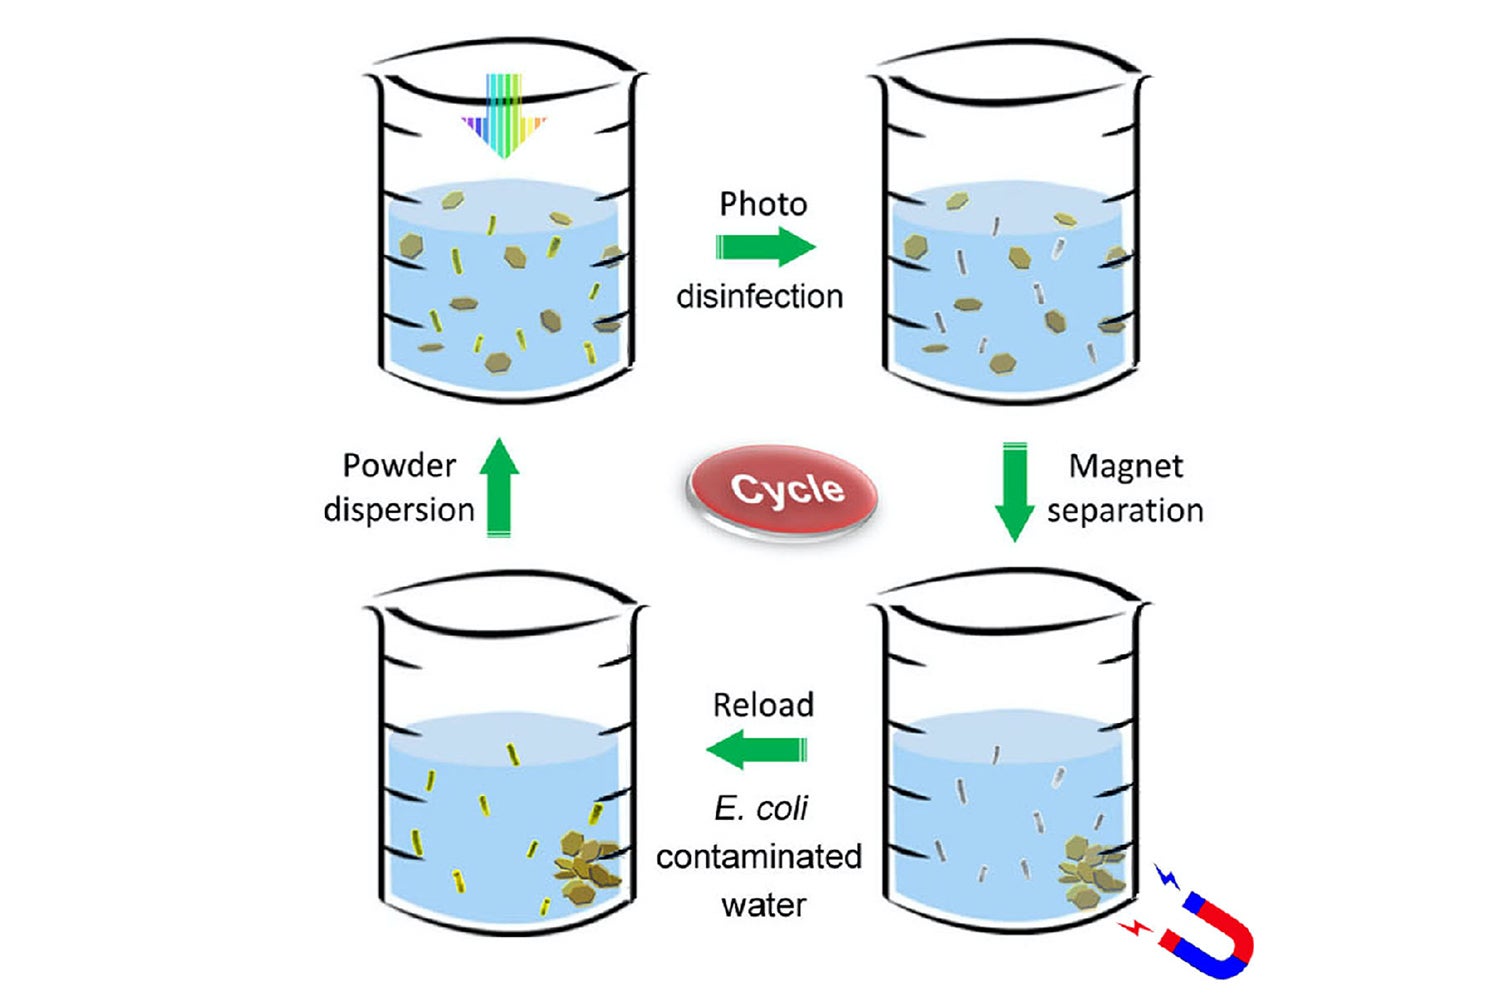
The reason for this is that hydrogen peroxide and similar reactive oxygen species are highly destructive to living cells, yet they are simultaneously very safe. Because of their high reactivity they are very unstable and thus short-lived. This is useful when the water with the now very dead microbes is consumed afterwards, with the catalyst itself being ferromagnetic and thus easily separated using a magnet.
With this proof of concept in hand, it’d be interesting to see what the product will look like, especially when it comes to the final separation step and making this as easy as possible. Since the catalyst is not consumed or presumably contaminated, it can last pretty much forever, making it an attractive alternative to water purification tablets and expensive filtration systems.
(Heading image: Microscopic images of E. coli before (left) and after disinfection. The bacteria died quickly after sunlight produced chemicals that caused serious damage to the bacterial cell membranes, as shown in the red circles. (Image credit: Tong Wu/Stanford University) )