It’s Doom, This Time On A Bluetooth LE Dongle

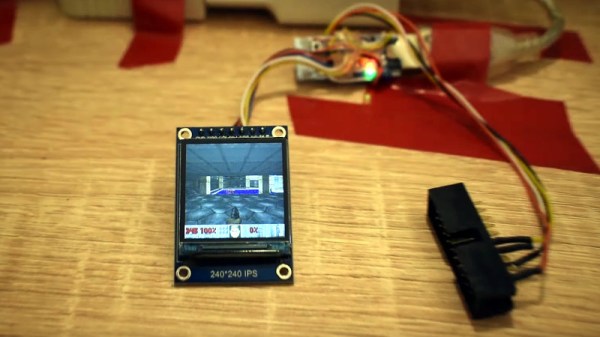
By now most readers should be used to the phenomenon of taking almost any microcontroller and coaxing it to run a port of the 1990s grand-daddy of all first-person shooters, id Software’s Doom. It’s been done on a wide array of devices, sometimes only having enough power for a demo mode but more often able to offer the full experience. Latest to the slipgate in this festival of pixelated gore is [Nicola Wrachien], who’s achieved the feat using an nRF52840-based USB Bluetooth LE dongle.

Full details can be found on his website, where the process of initial development using an Adafruit CLUE board is detailed. A 16MB FLASH chip is used for WAD storage, and an SPI colour display takes us straight to that cursed base on Phobos. The target board lacks enough I/O brought out for connection to screen and FLASH, so some trickery with 7400 logic is required to free up enough for the task. Controls are implemented via a wireless gamepad using an nRFS1822 board, complete with streamed audio to a PWM output.

The result can be seen in the video below the break, which shows a very playable game of both Doom and Doom 2 that would not have disgraced many machines of the era. This was prototyped on an Adafruit Clue board, and that could be the handheld console you’ve been looking for!

Continue reading “It’s Doom, This Time On A Bluetooth LE Dongle”

Using A Laser To Blast Away A Bayer Array

A Bayer array, or Bayer filter, is what lets a digital camera take color photos. It’s an array of tiny color filters that sit on top of a camera’s CCD. The filter makes it so that each sub-pixel in the image sensor only sees red, green, or blue light. The Bayer filter is an elegant tool that gives us color digital photos, but what would you do if you wanted to remove one?

[Les Wright] has devised a way to remove the Bayer filter from the Raspberry Pi Camera. Along with filtering red, green, and blue light for their respective sensors, Bayer filters also greatly reduce the amount of UV and IR light that make it to the CCD sensor. [Les] uses the Raspberry Pi camera in his Pi-based Spectrometer, and he wants to remove the Bayer filter to improve and expand its sensitivity.

Of course, [Les] isn’t the first one to want to do this. Some have succeeded in physically scratching the filter off of the CCD, but because the Pi Camera has vital circuitry around the outside of the sensor, scratching the filter off would likely destroy the circuitry. Others have stripped it off using chemical means, so [Les] gave this a go and destroyed no small number of cameras in his attempt to strip the filter off with solvents like DMSO, brake fluid, and industrial paint stripper.

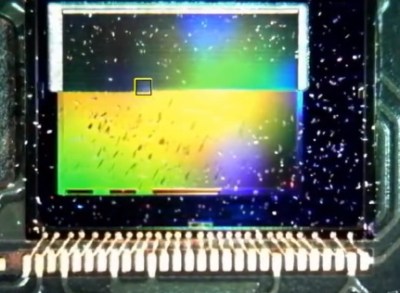
A look at the CCD, halfway through the process.

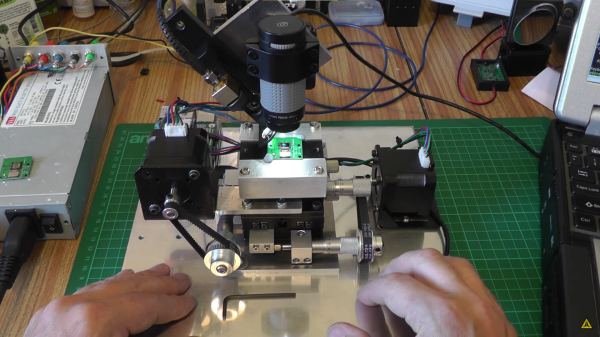
Inspired by techniques used in industry, [Les] eventually tried to use a several-kW nitrogen laser to burn off the filter (which seems appropriate given his experience with lasers). He built a rig that raster scans the laser across the sensor using stepper motors to drive micrometer bases. A USB microscope was included to allow progress to be monitored, and you can see a change in the sensor’s appearance as the filter is removed.

After blasting off the Bayer filter, [Les] plugged his improved camera into his home-built spectrometer and pointed it outside. The new camera gives the spectrometer much more uniform sensitivity and allows [Les] to see further into the IR and UV bands. The spectrometer can even detect the Fraunhofer lines—subtle dips in the sun’s spectrum from absorption by molecules in the atmosphere.

This is incredible for a DIY setup and instrument, and we can’t wait to see what [Les] does next to improve his measurements. If your spectrometry needs are more mass than visual, take a look at this home-built mass spectrometer. Home spectrometers aren’t just for examining light spectra—they can also be used to judge the ripeness of fruit!

Continue reading “Using A Laser To Blast Away A Bayer Array”

Cocktail Of Chemicals Makes This Blueprint Camera Unique

When you’re looking at blueprints today, chances are pretty good that what you’re seeing is anything but blue. Most building plans, diagrams of civil engineering projects, and even design documents for consumer products never even make it to paper, let alone get rendered in old-fashioned blue-and-white like large-format prints used to produced. And we think that’s a bit of a shame.

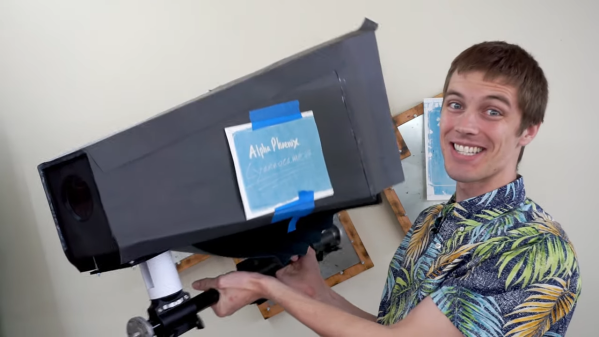
Luckily, [Brian Haidet] longs for those days as well, so much so that he built this large-format cyanotype camera to create photographs the old-fashioned way. Naturally, this is one of those projects where expectations must be properly scaled before starting; after all, there’s a reason we don’t go around taking pictures with paper soaked in a brew of toxic chemicals. Undaunted by the chemistry, [Brian] began his journey with simple contact prints, with Sharpie-marked transparency film masking the photosensitive paper, made from potassium ferricyanide, ammonium dichromate, and ammonium iron (III) oxalate, from the UV rays of the sun. The reaction creates the deep, rich pigment Prussian Blue, contrasting nicely with the white paper once the unexposed solution is washed away.

[Brian] wanted to go beyond simple contact prints, though, and the ridiculously large camera seen in the video below is the result. It’s just a more-or-less-lightproof box with a lens on one end and a sheet of sensitized paper at the other. The effective ISO of the “film” is incredibly slow, leading to problematically long exposure times. Coupled with the distortion caused by the lens, the images are — well, let’s just say unique. They’ve got a ghostly quality for sure, and there’s a lot to be said for that Prussian Blue color.

We’ve seen cyanotype chemistry used with UV lasers before, and large-format cameras using the collodion process. And we wonder if [Brian]’s long-exposure process might be better suited to solargraphy.

Continue reading “Cocktail Of Chemicals Makes This Blueprint Camera Unique”

A SNES, Ray Tracing

A trick famously used by Nintendo to keep its slowly aging SNES console fresh against newer competition was to produce new games with extra support chips in the cartridge to push out hitherto-unthinkable performance. Chips such as the famous SuperFX gave us 3D polygonal graphics, but it would have been a few more years before even much faster platforms could achieve real-time ray-tracing. Nintendo may not have managed it, but here in 2020 [Ben Carter] has a SNES on his bench rendering a complex 3D ray-traced world.

Ray tracing refers to the practice of rendering a scene with accurate lighting by tracing the rays of light that go towards making each pixel. It can achieve results that even approach photorealism, but it remains an extremely computationally intensive job for any computer. To do this with a SNES he hasn’t resorted to a modern computer like the excellent Raspberry-Pi-based NES DOOM cartridge, instead he’s tried to create something that might have graced a Nintendo custom chip back in the 1990s. The tool may be a thoroughly modern DE10-Nano FPGA dev board, but what it implements could conceivably have been made as a 1990s-spec ASIC. In it are three ray tracing cores that do the work, but the final rendering is handled by the SNES itself. At 200 x 160 pixels and 256 colours it’s no graphical powerhouse, but the maximum frame rate of 30 fps makes it no slouch for the day. The video below the break supplies extra detail.

Perhaps an unexpected takeaway of the rendered scene lies in how of its era it seems. It comes from an age in which checker-board floors, mirrored balls, and azure blue skies looked so futuristic, and just before the likes of Toy Story redefined what the general public might expect from 3D rendering. If Nintendo had produced a ray-traced SNES game using a chip like this one, it would have certainly been a defining moment for gaming in that decade.

Continue reading “A SNES, Ray Tracing”

Fire Pit Burns To The Beat With Bluetooth

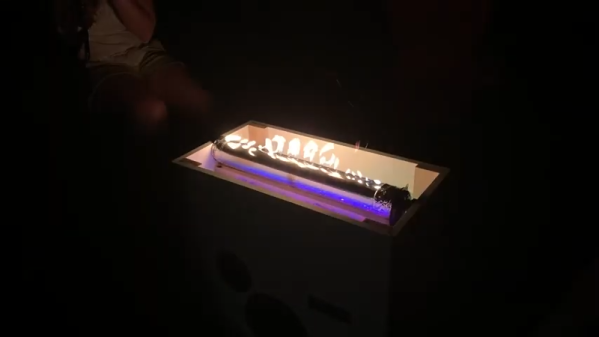
Humans have several primal fascinations and perhaps two of the biggest ones are fire and music. While you can picture some cavemen and cavewomen sitting around a fire beating on sticks for rhythm, we think they’d be impressed if the fire danced along with the music. Through the power of Bluetooth, that’s exactly what [Random Tech DIY’s] new fire pit does.

Technically, this is called a Rubens tube, and while it’s an old technology, the Bluetooth is a certainly a modern touch. As you might expect, most of this project is workshop time, cutting MDF and plastic. The audio system is off-the-shelf and drives some car stereo speakers. The results looked good, and although it always makes us nervous building things that carry propane gas, it seems to work well enough from where we’re sitting.

We had to wonder what things you could change that would affect the display. Changing the number of holes, the diameter of the holes, or the gas pressure, for example, would certainly change how the flames look and react to the sound waves.

We have seen other Rubens tube projects, of course. However, we were really interested in the use of these as crude oscilloscopes before the availability of cathode ray tubes. We’ve seen a modern take on that, too.

Continue reading “Fire Pit Burns To The Beat With Bluetooth”

Unbricking A $2,000 Exercise Bike With A Raspberry Pi Zero And Bluetooth Hacks

Really, how did we get the point in this world where an exercise bike can be bricked? Such was the pickle that [ptx2] was in when their $2,000 bike by Flywheel Home Sports was left without the essential feature of participating in virtual rides after Peloton bought the company. The solution? Reverse engineer the bike to get it working with another online cycling simulator.

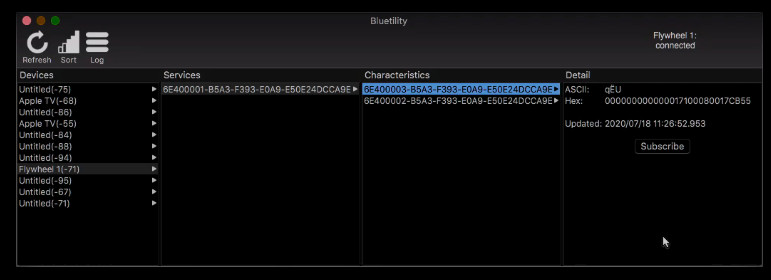
Sniffing Flywheel Bluetotooth packets with Bluetility

We have to admit we weren’t aware of the array of choices that the virtual biking markets offers. [ptx2] went with Zwift, which like most of these platforms, lets you pilot a smart bike through virtual landscapes along with the avatars of hundreds of other virtual riders. A little Bluetooth snooping with Bluetility let [ptx2] identify the bytes in the Flywheel bike’s packets encoding both the rider’s cadence and the power exerted, which Zwift would need, along with the current resistance setting of the magnetic brake.

Integration into Zwift was a matter of emulating one of the smart bikes already supported by the program. This required some hacking on the Cycling Power Service, a Bluetooth service that Zwift uses to talk to the bike. The final configuration has a Raspberry Pi Zero W between the Flywheel bike and the Zwift app, and has logged about 2,000 miles of daily use. It still needs a motor to control the resistance along the virtual hills and valleys, but that’s a job for another day.

Hats off to [ptx2] for salvaging a $2,000 bike for the price of a Pi and some quality hacking time, and for sticking it to The Man a bit. We have to say that most bike hacks we see around here have to do with making less work for the rider, not more. This project was a refreshing change.

[Featured images: Zwift, Flywheel Sports]

[via r/gadgets]

Antennas That You Install With A Spray-Can

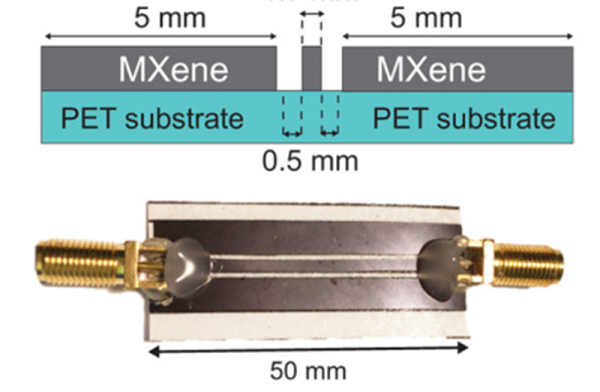
With the explosion in cell phones, WiFi, Bluetooth, and other radio technologies, the demand for antennas is increasing. Everything is getting smaller and even wearable, so traditional antennas are less practical than ever. You’ve probably seen PCB antennas on things like ESP8266s, but Drexel University researchers are now studying using titanium carbide — known as MXene — to build thin, light, and even transparent antennas that outperform copper antennas. Bucking the trend for 3D printing, these antennas are sprayed like ink or paint onto a surface.

A traditional antenna that uses metal carries most of the current at the skin (something we’ve discussed before). For example, at WiFi frequencies, a copper antenna’s skin depth is about 1.33 micrometers. That means that antennas have to be at least thick enough to carry current at that depth from all surfaces –practically 5 micrometers is about the thinnest you can reasonably go. That doesn’t sound like a lot, but when you are trying to make something thin and flexible, it is pretty thick. Using MXene, the researchers made antennas as thin as 100 nanometers thick — that’s 10% of a micrometer and only 2% of a conventional antenna.

Continue reading “Antennas That You Install With A Spray-Can”