In the secret Hackaday bunker, we have some emacs users, some vi users, and some people who don’t really care. However, even the staunchest of our emacs supporters had to do a double take at [Vreeze’s] project that creates a GameBoy emulator using the venerable text editor. You can see [Alexei Nunez’s] reaction to the emulator in the video below.
The Eboy uses unicode characters to output the graphics. You can use emacs commands to load ROM images and use your keyboard to control the game.
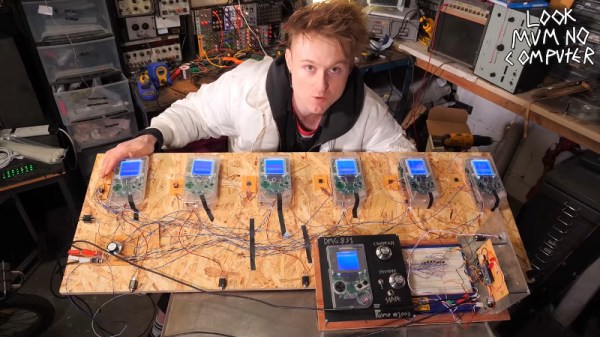
The original Nintendo Gameboy is perhaps one of the most revered platforms for the music known as chiptune. Primarily, artists will use the console with software like LSDJ or Nanoloop to produce their compositions. Some artists will even use two consoles when performing live. However, that’s all fairly quaint as far as [LOOK MUM NO COMPUTER] is concerned.
Back in 2016, a rig was constructed with three Gameboys. With each console having 3 oscillators and a noise channel, this gave plenty of scope. There was even a facility to detune the oscillators for a fatter sound.
Yet there remains a universal human philosophy – more is always better. In this vein, the plan is to create a monster machine consisting of 48 Gameboy consoles. This offers a somewhat maddening 144 oscillators and 48 noise channels to play with. The plan is to produce a massive synthesizer capable of producing incredibly thick, dense tones with up to six note polyphony.
The hardware side of things is at once simple and ingenious. Buttons on the consoles are connected together for remote control using ribbon cables and transistors. System clocks for the consoles are provided by a LTC1799 oscillator chip, which allows the clock to be modulated for audio effects. Initial tests with up to six Gameboys running from a single clock source have been remarkably successful.
Any mad scientist could see the genius involved in this project, and we can’t wait to see the full rig in operation. If you’re just getting started with Gameboy music, check out this primer on modding your Gameboy for hi-fi sound. Video after the break.
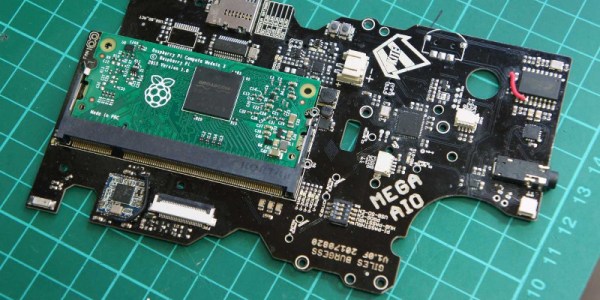
[Kite] has been making custom PCBs for GameBoys for a long time. Long enough, in fact, that other people have used his work to build even more feature-rich GameBoy platforms. Unfortunately some of their work had stagnated, so [Kite] picked it up and completed a new project: a GameBoy that uses a Raspberry Pi running on his upgraded GameBoy PCB.
At its core the build uses a Raspberry Pi 3, but one that has been shrunk down to the shape of a memory module, known as the Compute Module 3. (We featured the original build by [inches] before, but [Kite] has taken it over since then.) The upgrade frees up precious space in the GameBoy case to fit the custom PCB that was originally built by [Kite], and also eliminates the need to cut up a Raspberry Pi and solder it to the old version of his PCB. The build is very clean, and runs RetroPie like a champ. It has some additional features as well, such as having an HDMI output.
For anyone looking for that retro GameBoy feel but who wants important upgrades like a backlit color screen, or the ability to play PSP games, this might be the build for you. The video below goes into details about how it all fits together. If you’re looking for more of a challenge in your GameBoy hacks, though, there’s an ongoing challenge to build the tiniest GameBoy possible as well.
The Gameboy line of handheld systems from Nintendo have been wildly popular, but lack one major thing – a video output. This can be troublesome if you’d like to view the games on a bigger screen, for more comfortable gaming sessions or detail work like producing chiptunes. One option is to use the Gameboy Player for the Gamecube, however that system’s age means you’re out of luck if you want a crisp, clear picture on a modern digital display. Wouldn’t it be great if you could get HDMI output from a Gameboy Advance Instead?
A family resemblance?
When it comes to working with video signals, FPGAs can’t be beat. [Stephen] leverages an FPGA in this project to read the GBA’s video signals and convert them to the modern digital format. Unfortunately, it’s not a seamless install – limited space means the GBA’s screen must be entirely removed, replaced with the adapter in a manner resembling the terrifying Facehugger.
Packaging aside, the output from the device is nothing short of stunning – the graphics are absolutely crystal clear when displayed on a modern HDMI television. This is because the FPGA is capturing the exact digital output from the GBA, and piping it out as HDMI – there’s no analog fuzziness, conversions or noise to spoil the image. Output is a tasty 1280×720, upscaled from the GBA’s original resolution. For more details, check out the forum thread where [Stephen] runs through the build.
The only thing missing is details – we’d love to know more about the exact hardware used, and any trials and tribulations during the build! As far as we can tell, the build doesn’t stop at just video – a SNES controller is used instead of the original buttons, and we have a feeling sound is being passed over the HDMI channel as well sound is piped to the TV from the GBA’s headphone port.
It’s great to see these projects for old hardware come out – modern hardware has the muscle to achieve things previously unthinkable on retro consoles. We’ve seen similar projects before – like adding VGA to an original Game Boy.
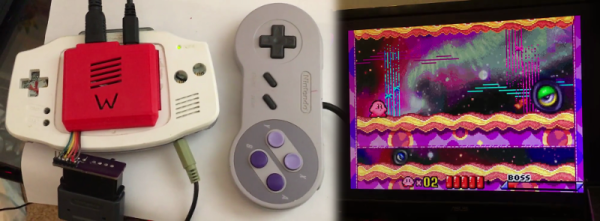
[Ryzee119]’s GBA might not look so different at first glance. The screen is way better than you remember, but that may just be your memory playing tricks on you. The sound comes out of the speakers. It feels the right weight. It runs off AA batteries. Heck, even the buttons feel right.
It’s not until you notice that it really shouldn’t be playing any games without a cartridge inserted that you know something is not right in the Mushroom Kingdom. When you look inside you see the edge of a Raspberry Pi Zero instead of the card edge connector you expected.
It took a lot of work for [Ryzee119] to convert a dead, water damaged, GBA to a thriving emulation station based around a Pi Zero. The first step was desolder the components he couldn’t find anywhere else. The LR buttons, the potentiometer, and even the headphone jack. The famously hard to see screen, of course, had to go. It was replaced by a nice TFT. Also, the original speaker was too corroded from the water and he sourced a replacement.
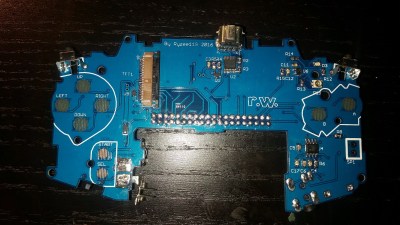
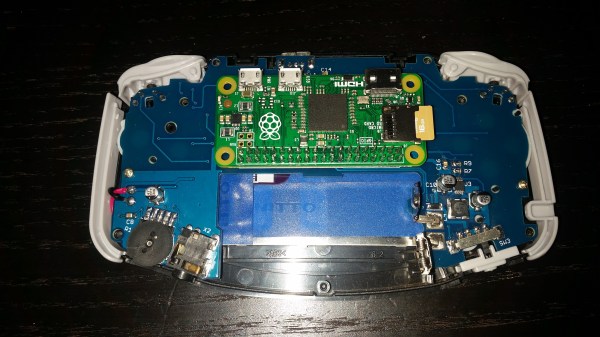
Custom replacement PCB
Next he took a good photo of the GBA’s circuit board. We wonder if he used the scanner method mentioned in the comments of this article? He spent a lot of time in Dassault’s DraftSight, a 2D CAD program, outlining the board. Then, after thoroughly verifying the size of the board for the Nth time he imported the outlines to EagleCAD.
He managed to cram quite a bit onto the board while remaining inside the GBA’s original envelope. The switches, potentiometer, and jack went back to their original locations. Impressively, he made his own pad traces for the A, B, and D-Pad buttons. The mod even handles slowly decreasing battery voltages better than the original.
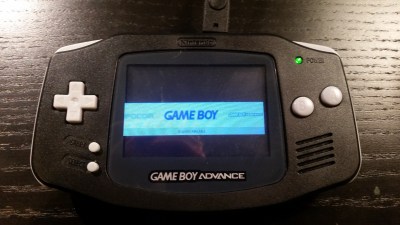
In the end it all snaps together nicely. He’s configured it to boot into the emulator right at start-up. If you’d like one for yourself, all his files are open source.
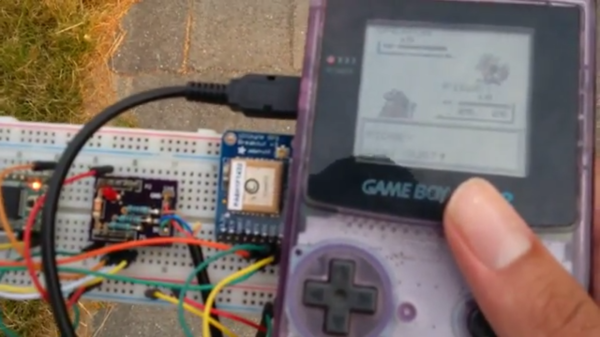
[Pepijn de Vos] was excited to interact with the world’s most popular augmented reality pedometer, Pokemon Go, and was extremely disappointed to find that his Blackberry couldn’t run it. Still, as far as he could tell from behind his wall of obsolete technology, Pokemon Go is all about walking distractedly, being suspicious, and occasionally catching a Pokemon. That should be possible.
Not a stranger to hacking Pokemon on the Gameboy, [Pepijn] put together a plan. Using his TCPoke module, he took it a step further. Rather than just emulating the original gameboy trade signals over the internet, he hacked a Pokemon Red ROM with some custom Z80 assembly to add some features to the Cable Club in the game.
After some waiting for the delivery man to bring a flashable cartridge and along with some Arduino code, he could now translate the steps he took in the game to his steps in the real world. Well, mostly. He could pick the location where he would like to catch a Pokemon. The character stands there. Somewhere around 100m the game will trigger a random pokemon battle.
[Pepijn] is now no longer a social outcast, as you can see in the video after the break. On a simple trip to the grocery store he caught two Pokemon!
He started with a 3.5″ LCD off eBay for about $25, and got it running with the Pi Zero. It’s only 320×240 resolution, but hey, we’re recreating a Gameboy — not a smartphone. The next step was rather finicky: cutting up the case to fit the new components in.
Using a collection of files he whittled down the screen opening in the case to make room for the LCD, a few hours later and it looked surprisingly good.
From there he started laying out the components inside of the case, trying to figure out the best layout for everything to fit nicely. To power the unit he’s using a lithium ion battery from a Samsung Note which should give him some serious play-time. It fits right in where the game card is suppose to go.
To add some extra control functionality he’s added the game-pad buttons from a SNES onto the back where the battery door is, he’s also got a USB port on the side, a MicroSD card slot, and even a new audio pre-amp with potentiometer for controlling the speaker volume.
In case you can’t find a mint condition Gameboy case like [Chad] did, you could just print one from scratch


 It’s not until you notice that it really shouldn’t be playing any games without a cartridge inserted that you know something is not right in the Mushroom Kingdom. When you look inside you see the edge of a Raspberry Pi Zero instead of the card edge connector you expected.