Gorgeous Mini-Lathe Makes The Most Out Of Wood And Metal

It’s a cliche that the only machine tool that can make copies of itself is the lathe. It’s not exactly true, but it’s a useful adage in that it points out that the ability to make big round things into smaller round things, and to make unround things into round things, is a critical process in so many precision operations. That said, making a lathe primarily out of wood presents some unique challenges in the precision department

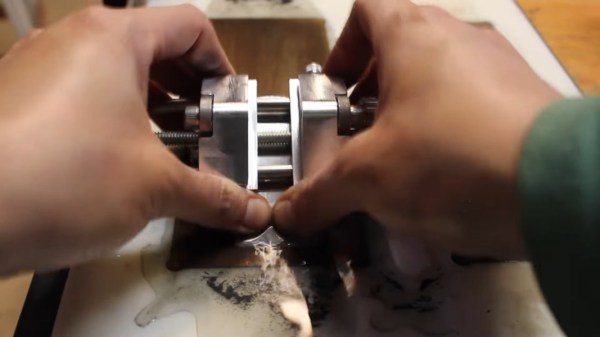
This isn’t [Uri Tuchman]’s first foray into lathe-building. Readers may recall the quirky creator’s hybrid treadle-powered and electric lathe, also primarily an exercise in woodworking. That lathe has seen plenty of use in [Uri]’s projects, turning both wood and metal stock into parts for his builds. It wasn’t really optimal for traditional metal turning, though, so Mini-Lathe 2 was undertaken. While the bed, headstock, and tailstock “castings” are wood — gorgeously hand-detailed and finished, of course — the important bits, like the linear slides for the carriage and the bearings in the headstock, are all metal. There’s a cross-slide, a quick-change tool post, and a manual lead screw for the carriage. We love the finely detailed brass handcranks, which were made on the old lathe, and all of the lovely details [Uri] always builds into his projects.

Sadly, at the end of the video below we see that the lathe suffers from a fair amount of chatter when turning brass. That’s probably not unexpected — there’s not much substitute for sheer mass whenit comes to dampening vibration. We expect that [Uri] will be making improvements to the lathe in the coming months — he’s not exactly one to leave a job unfinished.

Continue reading “Gorgeous Mini-Lathe Makes The Most Out Of Wood And Metal”

Celebrating The 4004’s 0x31st Anniversary

This weekend marked the 49th anniversary of the legendary Intel 4004 microprocessor, and to celebrate [Erturk Kocalar] combined the old and new in this intriguing Retroshield 4004 / Busicom 141-PF calculator project. We have reported on his Arduino shield project before, which lets you connect a variety of old microprocessors to an Arduino so you can experiment with these old chips with a minimum of fuss.

[Erturk] decided to use the Arduino to simulate the hardware of the Busicom 141-PF, a calculator famous for bringing us the microprocessor. In addition to the calculator, the Arduino has to simulate the Intel 4004 CPU’s supporting chips, which include ROM, RAM, and shift registers. If you want to build one of these yourself, all the design files are open source, or you can get an assembled shield from his Tindie store. In either case, you will have to provide your own 4004, which are surprisingly still available. (Tindie and Hackaday share the same parent company, Supplyframe. We’ve got nothing to do with Intel.)

We really appreciate the detailed explanation that [Erturk] provides about the inner workings of the calculator. Interfacing the emulator to the original ROM code running on the 4004 is non-trivial — take a look at the explanation of the spinning drum printer, for example. We enjoyed perusing the annotated ROM listing, as well as reading the story of the efforts which have been undertaken to prevent these historical documents from being lost forever. Be sure to check out the history of the 4004 and its inventor Federico Faggin if you’d like to delve deeper.


Teardown: Recon Sentinel

It might be hard to imagine now, but there was a time when the average home had only a single Internet connected device in it. This beige box, known as a “desktop computer” in those olden days, was a hub of information and productivity for the whole family. There was a good chance you might even need to wait for your turn to use it, since it’s not like you had a personal device in your pocket that let you log on from the bathroom whatever room you might be in at the time. Which is just as well, since even if you had broadband back then, you certainly weren’t shooting it around the house with the Magic Internet Beams that we take for granted now.

Things are a lot more complicated today. Your computer(s) are only part of the equation. Now there’s mobile phones and tablets sharing your Internet connection, in addition to whatever smart gadgets you’ve brought into the mix. When your doorbell and half the light bulbs in the house have their own IP address, it takes more than a fresh copy of Norton AntiVirus to keep everything secure.

Which is precisely what Cigent Technology says the Recon Sentinel was designed for. Rather than protecting a single computer or device, this little gadget is advertised as being able to secure your entire network by sniffing out suspicious activity and providing instant notifications when new hardware is connected. According to the official whitepaper, it also runs a honeypot service Cigent calls a “cyber deception engine” and is capable of deploying “Active Defense Countermeasures” to confuse malicious devices that attempt to attack it.

It certainly sounds impressive. But for $149.99 plus an annual subscription fee, it better. If you’re hoping this teardown will tell you if it’s worth springing for the $899.99 Lifetime Subscription package, don’t get too excited. This isn’t a review, we’re only interested in cracking this thing open and seeing what makes it tick.

Continue reading “Teardown: Recon Sentinel”

Harnessing Your Creativity Hack Chat

Join us on Wednesday, November 18th at noon Pacific for the Harnessing Your Creativity Hack Chat with Leo Fernekes!

(Note: this Hack Chat was rescheduled from 10/14/2020.)

You’re sitting at your bench, surrounded by the tools of the trade — meters and scopes, power supplies and hand tools, and a well-stocked parts bin. Your breadboard is ready, your fingers are itching to build, and you’ve got everything you need to get started, but — nothing happens. Something is missing, and if you’re like many of us, it’s the one thing you can’t get from eBay or Amazon: the creative spark that makes innovation happen.

Creativity is one of those things that’s difficult to describe, and is often noticed most when it’s absent. Hardware hacking requires great buckets of creativity, and it’s not always possible to count on it being there exactly when it’s called for. It would be great if you could somehow reduce creativity to practice and making it something as easy to source for every project as any other commodity.

While Leo Fernekes hasn’t exactly commoditized creativity, judging from the breadth of projects on his YouTube channel, he’s got a pretty good system for turning ideas into creations. We’ve featured a few of his builds on our pages, like a discrete transistor digital clock, the last continuity tester you’ll ever need, and his somewhat unconventional breadboarding techniques. Leo’s not afraid to fail and share the lessons learned, either.

His projects, though, aren’t the whole story here: it’s his process that we’re going to discuss. Leo joins us for this Hack Chat to poke at the creative process and see what can be done to remain rigorous and systematic in your approach but still make the process creative and flexible. Join us with your questions about finding the inspiration you need to turn parts and skills into finished projects that really innovate.

join-hack-chatOur Hack Chats are live community events in the Hackaday.io Hack Chat group messaging. This week we’ll be sitting down on Wednesday, November 18 at 12:00 PM Pacific time. If time zones baffle you as much as us, we have a handy time zone converter.

Click that speech bubble to the right, and you’ll be taken directly to the Hack Chat group on Hackaday.io. You don’t have to wait until Wednesday; join whenever you want and you can see what the community is talking about.

Continue reading “Harnessing Your Creativity Hack Chat”

Simple Tips For Better 3D-Printed Enclosures

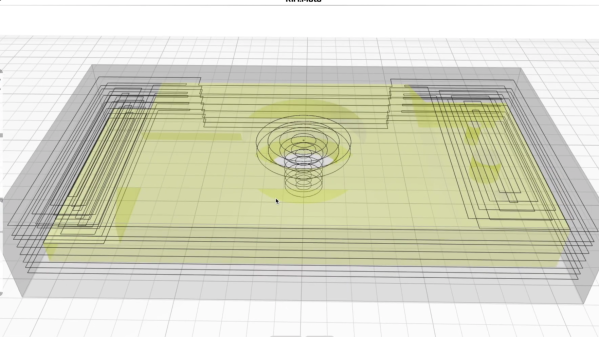
3D printing can be great for making enclosures, and following some simple guidelines can help the whole process go much smoother. 3D Hubs has an article on designing printed enclosures that has clear steps and tips to get enclosures coming out right the first time. 3D Hubs offers 3D printing and other services, and the article starts with a short roundup of fabrication methods but the rest is a solid set of tips applicable to anyone.

The first recommendation is to model the contents of the enclosure as a way to help ensure everything fits as it should, and try to discover problems as early as possible during the design phase, before anything gets actually printed. We’ve seen how a PCB that doesn’t take the enclosure into account risks needing a redesign, because there are some issues an enclosure just can’t fix.

The rest of their advice boils down to concrete design guidelines about wall thickness (they recommend 2 mm or more), clearances (allow a minimum of 0.5 mm between internal components and enclosure), and how to size holes for fasteners, clips, or ports. These numbers aren’t absolute minimums, but good baseline values to avoid surprises.

One final useful tip is that using a uniform wall thickness throughout the enclosure is general good practice. While this isn’t strictly necessary for successful 3D printing, it will make life easier if the enclosure ever moves to injection molding. Want to know more? Our own Bob Baddeley has an excellent primer on injection molding, and his been-there-done-that perspective is invaluable.

Art of 3D printer in the middle of printing a Hackaday Jolly Wrencher logo

3D Printering: The Things Printers (Don’t) Do

3D printers are amazing things, but if one judges solely by the successes that get showcased online, it can look as through anything at all is possible. Yet in many ways, 3D printers are actually quite limited. Because success looks easy and no one showcases failure, people can end up with lopsided ideas of what is realistic. This isn’t surprising; behind every shining 3D print that pushes the boundaries of the technology, there are misprints and test pieces piled just out of sight.

If you have ever considered getting into 3D printing, or are wondering what kinds of expectations are realistic, read on because I am going to explain where objects come from, and how to recognize whether something is a good (or bad) fit for 3D printing. The important thing to understand is that printers have limitations, and to get a working idea of what those limitations are. The result will be a better understanding of what they can do, and what problems they can reliably solve.

3D Printers Have Limits

I recently had a talk with someone who wanted to know if a 3D printer could help with a problem they had. As I listened to them describe their needs, I realized I had in a way heard it all before many times.

My colleague actually had a fairly good idea of what printers could do, in theory. But they had very little grasp of what printers did not do, and that disconnect left them a bit adrift when it came to practical applications. To help address this gap, here are some tips that can give anyone a working understanding of the things 3D printers do not do well. Continue reading “3D Printering: The Things Printers (Don’t) Do”

Automatic Winder Takes The Drudgery Out Of Tesla Coil Builds

What is it about coil winding automation projects that’s just so captivating? Maybe it’s knowing what a labor saver they can be once you’ve got a few manually wound coils under your belt. Or perhaps it’s just the generally satisfying nature of any machine that does an exacting task smoothly and precisely. Whatever it is, this automatic Tesla coil winder has it in abundance.

According to [aa-epilectrik]’s account, the back story of this build is that while musical Tesla coils are a big part of the performance of musical group ArcAttack, they’re also cool enough in their own right to offer DIY kits for sale. This rig takes on the job of producing the coils, which at least takes some of the drudgery out of the build. There’s no build log, but there are enough details on reddit and Instagram to work out the basics. The main spindle is driven by a gearmotor while the winding carriage translates along a linear slide thanks to a stepper-driven lead screw. The spool holding the fine magnet wire needs to hold proper tension to prevent tangling; this is achieved through by applying some torque to the spool with a small DC motor.

There are some great design elements in this one, not least being the way tension is controlled by measuring the movement of an idler pulley using a linear pot. At top speed, the machine looks like it complete a coil in just about three minutes, which seems pretty reasonable with such neat results. Another interesting point: ArcAttack numbers [Anouk Wipprecht], whom we’ve featured a couple of times on these pages, among its collaborators. Small world.

Continue reading “Automatic Winder Takes The Drudgery Out Of Tesla Coil Builds”