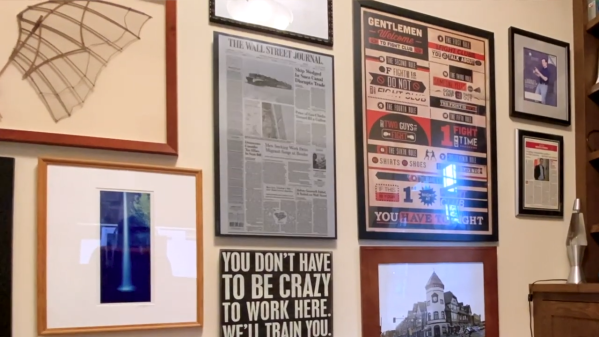
The project started with a 32″ Visionect e-ink display configured as a thin client. With a battery life measured in months thanks to the low power electronics, most of the work here was focused on the backend. A docker container running on a local NAS server collects newspapers via freedomforum.org, formats them to fit the aspect ratio of the display, and serves them up. [Greg] is really trying to preserve the design and thought that goes into the front page of each of these publications as traditional newspaper layouts are often designed by hand.
We love the simplicity and the “it-just-works” feel of this project as there are no buttons, wires, or anything that you need to fiddle with. [Greg] points out that it could also be used for other purposes, and we’d love to see a large calendar such as this e-ink calendar or perhaps even a 32″ version of this e-ink laptop. The code for this is on his GitHub with a video after the break.
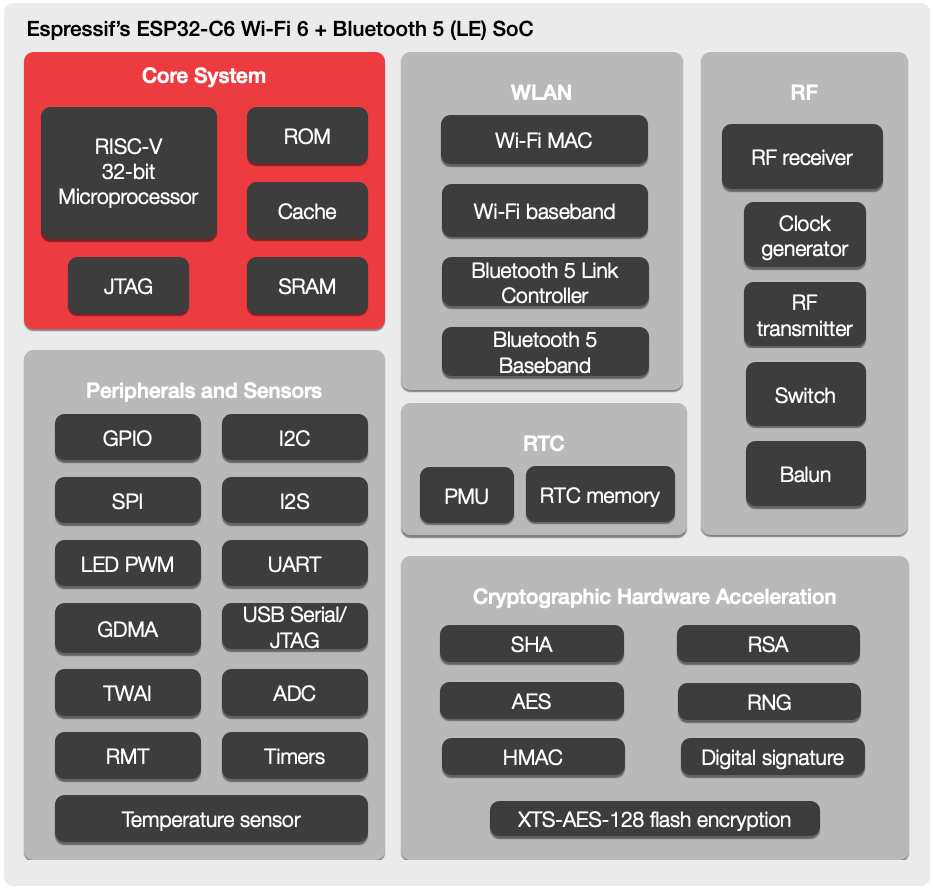
If you’re a reader of Hackaday, then you’ve almost certainly encountered an Espressif part. The twin microcontroller families ESP8266 and ESP32 burst onto the scene and immediately became the budget-friendly microcontroller option for projects of all types. We’ve seen the line expand recently with the ESP32-C3 (packing a hacker-friendly RISC-V core) and ESP32-S3 with oodles of IO and fresh new CPU peripherals. Now we have a first peek at the ESP32-C6; a brand new RISC-V based design with the hottest Wi-Fi standard on the block; Wi-Fi 6.
There’s not much to go on here besides the standard Espressif block diagram and a press release, so we’ll tease out what detail we can. From the diagram it looks like the standard set of interfaces will be on offer; they even go so far as to say “ESP32-C6 is similar to ESP32-C3” so we’ll refer you to [Jenny’s] excellent coverage of that part. In terms of other radios the ESP32-C6 continues Espressif’s trend of supporting Bluetooth 5.0. Of note is that this part includes both the coded and 2 Mbps Bluetooth PHYs, allowing for either dramatically longer range or a doubling of speed. Again, this isn’t the first ESP32 to support these features but we always appreciate when a manufacturer goes above and beyond the minimum spec.
Welcome to the ESP32-C6
The headline feature is, of course, Wi-Fi 6 (AKA 802.11ax). Unfortunately this is still exclusively a 2.4GHz part, so if you’re looking for 5GHz support (or 6GHz in Wi-Fi 6E) this isn’t the part for you. And while Wi-Fi 6 brings a bevy of features from significantly higher speed to better support for mesh networks, that isn’t the focus here either. Espressif have brought a set of IoT-centric features; two radio improvements with OFDMA and MU-MIMO, and the protocol feature Target Wake Time.
OFDMA and MU-MIMO are both different ways of allowing multiple connected device to communicate with an access point simultaneously. OFDMA allows devices to slice up and share channels more efficiency; allowing the AP more flexibility in allocating its constrained wireless resources. With OFDMA the access point can elect to give an entire channel to a single device, or slice it up to multiplex between more than once device simultaneously. MU-MIMO works similarly, but with entire antennas. Single User MIMO (SU-MIMO) allows an AP and connected device to communicate using a more than one antenna each. In contrast Multi User MIMO (MU-MIMO) allows APs and devices to share antenna arrays between multiple devices simultaneously, grouped directionally.
Finally there’s Target Wake Time, the simplest of the bunch. It works very similarly to the Bluetooth Low Energy (4.X and 5.X) concept of a connection interval, allowing devices to negotiate when they’re next going to communicate. This allows devices more focused on power than throughput to negotiate long intervals between which they can shut down their wireless radios (or more of the processor) to extended battery life.
These wireless features are useful on their own, but there is another potential benefit. Some fancy new wireless modes are only available on a network if every connected device supports them. A Wi-Fi 6 network with 10 Wi-Fi 6 devices and one W-Fi 5 (802.11ac) one may not be able to use all the bells and whistles, degrading the entire network to the lowest common denominator. The recent multiplication of low cost IoT devices has meant a corresponding proliferation of bargain-basement wireless radios (often Espressif parts!). Including new Wi-Fi 6 exclusive features in what’s sure to be an accessible part is a good start to alleviating problems with our already strained home networks.
When will we start seeing the ESP32-C6 in the wild? We’re still waiting to hear but we’ll let you know as soon as we can get our hands on some development hardware to try out.
Thanks to friend of the Hackaday [Fred Temperton] for spotting this while it was fresh!
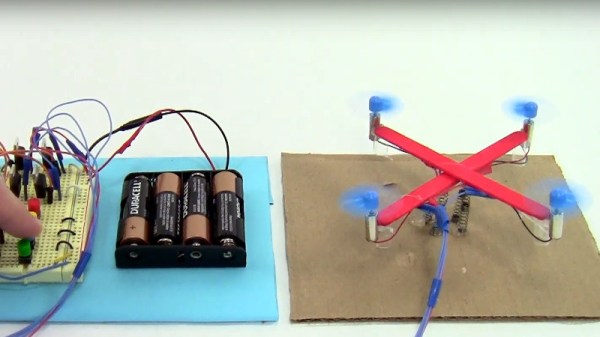
Multirotors, or drones as they’re popularly called, are so ubiquitous as to have become a $10 toy. They’re no less fun to fly for it though, and learning how they work is no less fascinating. It’s something [Science Buddies] has addressed in a series of videos examining them from first principles. They may be aimed at youngsters, but they’re still an entertaining enough watch for those of advancing years.
Instead of starting with a multirotor control board, the video takes four little DC motors and two popsicle sticks to make a rudimentary drone frame. Then with the help of dowels and springs it tethers the craft as the control mechanisms are explained bit by bit, from simple on-off motor control through proportional control to adding an Arduino and following through to how a multirotor stays in flight. It’s instructional and fun to watch, and maybe even for some of us, a chance to learn something.
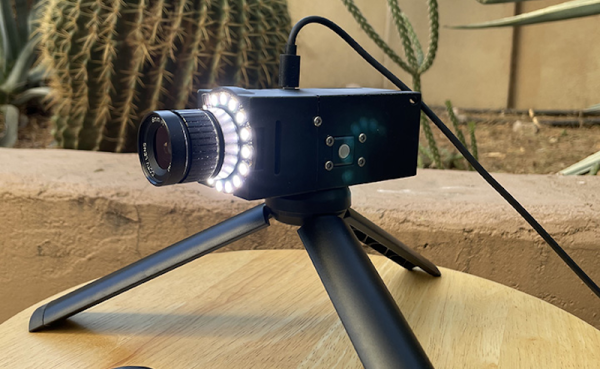
Security cameras are a commodity item these days, but that doesn’t mean [edgett’s] design using a Pi Zero, an Arducam, an LED ring, and active cooling isn’t worth a look. This is a great example of how integrating some off-the-shelf modules and 3D printing can create very professional-looking results. There’s also a trackball interface so you can control the camera. The software, written in Python, is available on GitHub.
The trackball doesn’t move the camera, but it does manage a menu system that lets you capture a photo or video, set the optical parameters like exposure, shutter, and ISO, and launch Camera Remote to offer a Web-based interface instead of the trackball.
If you add infrared illumination, you can swap out the camera for an IR version and have a nice-looking night vision camera, too. The camera is reasonably compact. Not including the lens and the tripod, the camera measures 100 by 44 by 44 mm. So under two inches square and about 4 inches long.
We worried a little about gluing the LED ring down, but then again our phones are all glued together these days, so maybe we should stop fretting. One thing we didn’t see on either site, though, was a picture taken with the camera itself. However, the 12-megapixel camera and quality lens should do a great job. We’ve even seen that particular camera module work with a much smaller computer recently.
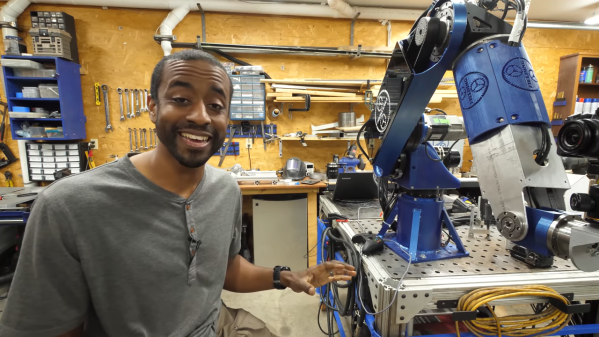
[Jeremy Fielding] is rightly impressed with the power and precision of industrial robot arms. The big arms that you see welding cars on assembly lines and the like are engineering feats in their own right, which is why his leap into scratch-building one in the home shop promises to be quite an adventure, and one we’re eager to follow.
From the look of the video below, [Jeremy]’s arm is already substantially complete, so it seems like he’ll be releasing videos that detail how he got to the point where this impressively large and powerful arm took over so much of his shop. He’s not fooling around here — this is a seven-axis articulated arm built from aluminum and powered by AC servos. [Jeremy] allows that some of the structural parts are still 3D-printed prototypes that he’s using to finalize the design before committing to cutting metal, a wise move as he notes that most of the metalworking skills he needs to complete the build are still fairly new to him. It still looks amazing, and we’re looking forward to the rest of the series to see how he got to this point.
The livingroom coffee table has long been a favorite realm of the model railroad. But what to do when you actually want to have coffee? [Peter Waldraff] has come up with a most eloquent answer to the problem by designing a coffee table model railroad capable of turning the world upside down.
This isn’t [Peter’s] first rodeo. In his demo video below he shows off a coffee table train he built 20 years ago using a rectangular layout under glass. This time the circular design means a spherical volume can rotate around two skateboard bearing pivot points, revealing the mountainous scene on one side and the boring old wood table on the other. But what happens to the N-scale train itself when gravity is reversed? There’s a brilliant solution to that!
The frame of the coffee table includes an outer loop for train storage. Before flipping the model upside-down, the train itself is sent to this siding for safe keeping. In an earlier build video we can glimpse the latching mechanism that uses a solenoid and is actuated by a magnet in the center of the table. A clever use of toggle bolts (sometimes known as butterfly anchors for securing things on drywall) has them transfer power to the outer ring of storage track when their spring-loaded arms come in contact with some screw heads on the other side of the gap. The source of the electricity is a rechargeable Makita power tool battery in a hidden chamber within the mountain.
Of course we’ve seen other hideaway coffee table trains like this lovely hand-carved version. But you have to admire how [Peter] managed to incorporate everything into a self contained unit here, without the needing to store a removable cover. If you are someone who wants to always show off your handy work, that’s where a perspex box coffee table design comes into play.
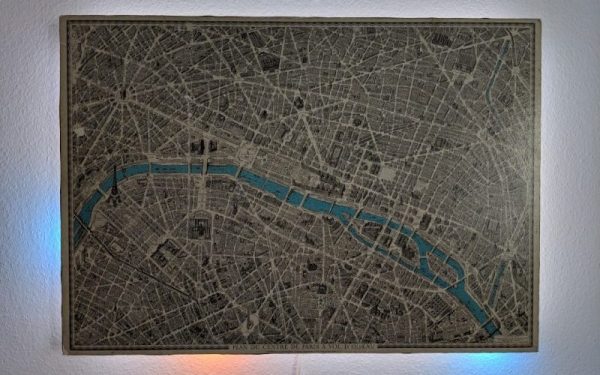
There’s plenty to love about antiques, from cars, furniture, to art. While it might be a little bit of survivorship bias, it’s easy to appreciate these older things for superior quality materials, craftsmanship, or even simplicity. They are missing out on all of our modern technology, though, so performing “restomods” on classics is a popular activity nowadays. This antique map of Paris, for example, is made of a beautiful hardwood but has been enhanced by some modern amenities as well.
At first the creator of this project, [Marc], just wanted to give it some ambient lighting, but it eventually progressed over the course of two years to have a series of Neopixels hidden behind it that illuminate according to the current sun and moon positions. The Neopixels get their instructions from an ESP8266 which calculates these positions using code [Marc] wrote himself based on the current date. Due to the limitations of the ESP8266 it’s not particularly precise, but it gets the job done to great effect.
To improve on the accuracy, [Marc] notes that an ESP32 could be used instead, but we can give the ESP8266 a pass for now since the whole project is an excellent art installation even if it is slightly off on its calculations. If you need higher accuracy for tracking celestial objects, you can always grab a Raspberry Pi too.

 This isn’t [Peter’s] first rodeo. In his demo video below he shows off a coffee table train he built 20 years ago using a rectangular layout under glass. This time the circular design means a spherical volume can rotate around two skateboard bearing pivot points, revealing the mountainous scene on one side and the boring old wood table on the other. But what happens to the N-scale train itself when gravity is reversed? There’s a brilliant solution to that!