While few of us need robotic arms in our daily life, they’re a popular build with makers. Often, the most accessible builds throw together some RC servos and 3D printed parts, with limited accuracy a consequence of the components chosen. [Adam Bäckström] decided to take such a design and push it to its limits, however, with astounding results.
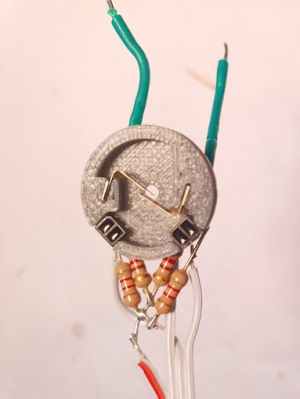
[Adam]’s first robot arm build was a major disappointment, when the servos he had purchased for the build turned out to be terrible at holding an angle. With limited funds, he elected to improve on what he had, learning much about precision control techniques along the way. [Adam] taught himself how to implement industrial strength control loops using hobby hardware, by implementing additional encoders into servos and taking into account velocity and torque in addition to just position. With a magnetic encoder on the servo output shaft and a tiny optical encoder hand-built for inside the motor itself, much higher accuracy is achievable by allowing the control system to compensate for backlash.
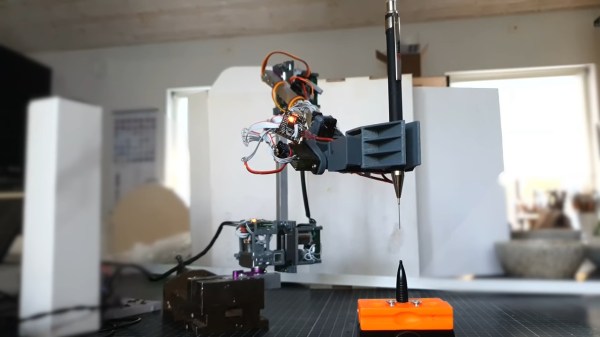
The results are stunning, with [Adam]’s robot arm able to move incredibly smoothly throughout its range of motion. Perhaps the best demonstration of this is the pencil demo, where the robot arm delicately threads a pencil lead through the tip of a mechanical pencil without breaking. We’d love to see these techniques implemented more often; we imagine they’d be a great addition to a build like this one. Video after the break.
Continue reading “Robot Arm Achieves Amazing Accuracy With Just Servos”