A DIY 6.5-Digit Multimeter Is A Lesson In Clever Circuitry

A multimeter is an easy prospect, right? Back in the day you could make one fairly easily with a decent panel meter and a set of precision resistors, and now a digital one can be had for throwaway prices from China.

But what if instead of a cheap-and-cheerful bench instrument your needs extend to a high-precision device, a really good multimeter? It’s a path [jaromir.sukuba] has trodden with his 6.5 digit multimeter project, and along the way he’s offered us a fascinating window into their design that should be of interest to any electronic engineer even if they never intend to build a multimeter.

The range selection network of switches and resistors, microcontroller, and seven-segment displays are universal to a multimeter design, meaning that there is nothing too special about them in a high-precision instrument except that here he’s using an FPGA for timing.

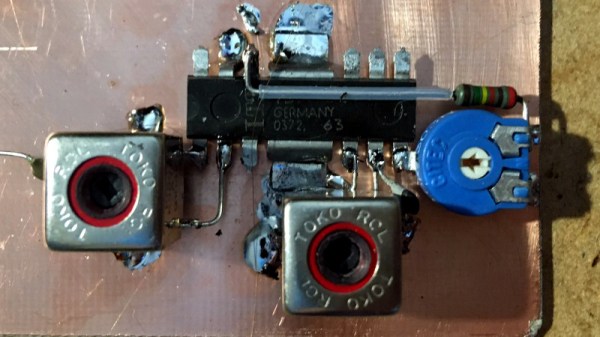
Where the meat lies in this project is in the ADC and its associated voltage reference, and for that he takes a surprising turn. Instead of taking an off-the-shelf ADC part from one of the usual manufacturers, he’s created his ADC from scratch using op-amps, and to understand why that is the case he takes us on a journey into the world of dual-slope integrating ADCs. These circuits are very well explained in a 1989 HP journal article (PDF, page 8), and are a clever design that measures the time taken to charge and discharge a capacitor from the voltage to be measured and compares it to the same time from the reference voltage.

The beauty of it comes out in the HP article, that the mathematics of the charge/discharge cycle cancel out any effects of the analogue component values, allowing the much higher precision of the reference and the clock timing to dictate that of the reading. We look forward to seeing more of this project.

It’s surprising how few home-made multimeters we have on these pages, perhaps because of those cheap ones. Of the few we’ve had, perhaps this state-based Nixie one is most unusual.

Springs And Things Wrap Into A Polyhedron Of Interactive LED Art

Any resemblance between The Wobble Sphere and a certain virus making the rounds these days is purely coincidental. Although as yet another project undertaken during the COVID-19 lockdowns, we can see where the inspiration came from.

Wobble Sphere is another work of interactive art from the apparently spring-driven imagination of [Robin Baumgarten], whose Quantum Garden piece graced our pages last year. The earlier, flatter version used a collection of spring door stops — the kind that sound awesome when plucked by a passing foot — each of which is surrounded by a Neopixel ring. The springs act as touch sensors that change the patterns and colors on the LED rings in endlessly fascinating ways.

For Wobble Sphere, [Robin] took the same spring and LED units, broke them into a collection of hexagonal and pentagonal PCBs, and wrapped the whole thing up into a 72-sided polyhedron. There’s some impressive mechanical and electrical engineering involved in the transition from 2D to 3D space, not least of which is solving the problem of how to connect everything while providing pluck-friendly structural support. The former was accomplished with a ton of ribbon cables, while the latter was taken care of with a combination of a 3D-printed skeleton and solder connections between adjacent PCBs. The result is a display that invites touch and rewards it with beautiful patterns of light chasing around the sphere. See it in action in the video after the break.

Lest anyone think springs are the only tool in [Robin]’s box, we mustn’t forget that he once set a knife-wielding Arduino-powered game on an unsuspecting public. Check it out; it’s way more fun than it sounds.

Continue reading “Springs And Things Wrap Into A Polyhedron Of Interactive LED Art”

Little Jumping Bot Can Now Stick The Perfect Landing

Sticking the perfect landing can take years of practice for a human gymnast, and it seems the same is true for little monopedal jumping robots. Salto-1P, an old acquaintance here on Hackaday, always needed to keep jumping to stay upright. With some clever control software improvements, it can now land reliably on an area the size of a coin, and then stay there. (Video after the break)

[Justin Yim] from the UC Berkeley’s Biomimetics Lab has been working on Salto for the past four years, and we’ve covered it twice before. Attitude control is handles by a combination of propeller thrusters for roll and yaw, and a reaction wheel for pitch.While it was already impressive before, it had a predictable landing area about the size of a dinner plate.

The trick to the perfect landing is a combination of landing angle, angular velocity and angular momentum. Salto can only correct for ±2.3° of landing angle error, because it doesn’t have a second foot to catch itself when something goes wrong. Ideally the robot’s angular velocity and momentum should be as close as possible to 0 at takeoff, which gives the reaction wheel maximum control authority in flight, as well as on landing.  Basically a well executed takeoff directly influences the chances of a good landing.  [Justin] does an excellent job explaining all this and more on the project’s presentation video. Continue reading “Little Jumping Bot Can Now Stick The Perfect Landing”

Swimming Pool Lap Counter Relies On Ultrasound

Swimming is a great way to exercise, both for the cardiovascular benefits and the improved muscle tone. However, while he’s a fan, [Peter Quinn] sometimes finds it hard to keep track of how far he’s gone when he gets in the zone. Obviously, the solution is an electronic lap counter, which [Peter] promptly set about creating.

The build is based around an ultrasonic distance sensor, which is triggered when it detects a swimmer approaching the end of the lane. It’s run by an Arduino Nano, which is also set up to announce the accumulated distance with a speech synth library. [Peter] notes there have been some stumbling blocks thus far, necessitating modifications along the way. Water ingress into the ultrasonic sensor has required the installation of a protective shroud, while battery operation has required a module to properly handle the lithium-polymer battery.

While we might hesitate to bring a takeaway container full of wires, circuit boards and an LED display to a public pool for fear of being deemed a bomber, the basic bones of the project are a great way to approach the problem. There’s plenty of scope to implement laptiming too, as we’ve seen in other sporting builds!

Digital Caliper Talks For Accessibility, With This App

A good instrument stays with its owner for a lifetime, becoming part of their essential trusted toolkit to be consulted as a matter of habit. If you use a caliper to measure dimensions  you’ll know this, and a quick glance at its scale or digital display will be second nature. But if you aren’t fortunate enough to have the eyesight to see the caliper, then it’s off-limits, and that’s something [Naomi Wu] has addressed with her open-source accessible speaking caliper app. It’s an Android app that connects to digital calipers that contain Bluetooth connectivity, and as well as speaking aloud the caliper reading it also displays it in very large text on the device screen. As well as the source link from which you can build the app, it’s available for installation directly from the Google Play Store.

If you’re used to [Naomi] from her video tours of the electronics businesses in her native Shenzhen, her eye-catching wearable projects, or her exploits with an industrial CNC machine in her living room, you might be interested to know that aside from this app she’s been a long-time proponent of open-source in China. She was responsible among other projects for the Sino:bit educational computer board, which holds the distinction for her of having secured the first ever Chinese OSHWA certification.

You can see the caliper app in action below the break.

Continue reading “Digital Caliper Talks For Accessibility, With This App”

Art Piece Builds Up Images With Dots On Thread

Hackers being as a rule practical people, we sometimes get a little guff when we run a story on an art installation, on the grounds of not being sufficiently hacky. We understand that, but sometimes the way an artist weaves technology into their pieces is just too cool to pass us, as with this thread-printing art piece entitled On Framing Textile Ambiguities.

We’ll leave criticism of the artistic statement that [Nathalie Gebert]’s installation makes to others more qualified, and instead concentrate on its technical aspects. The piece has four frames made mainly from brass rods. Three of the frames have vertical rods that are connected to stepper motors and around which is wrapped a single thread. The thread weaves back and forth over the rods on one frame, forming a flat surface that constantly changes as the rods rotate, before heading off to do the same on the others. The fourth frame has a platen that the thread passes over with a pen positioned right above it. As the thread pauses in its endless loop, the pen clicks down onto it, making a dot of color. The dots then wend their way through the frame, occasionally making patterns that are just shy of recognizable before morphing into something new. The video below shows it better than it can be easily described.

Love it or hate it, you’ve got to admit that it has some interesting potential as a display. And it sort of reminds us of this thread-art polar robot, although this one has the advantage of being far simpler.

Continue reading “Art Piece Builds Up Images With Dots On Thread”

A Homebrew Radio, As All The Best Homebrew Radios Should Be

It started with an old TV sound chip, and some curiosity. The TDA1701 that [Philip Bragg] found in a box of junk is a complete FM IF strip and audio power amplifier from the golden age of analogue PAL televisions, and while it was designed for the 5.5 MHz or 6 MHz FM subcarrier of European broadcast TV, he found it worked rather well at the more usual 10.7 MHz of a radio receiver. There followed a long thread detailing the genesis bit-by-bit of a decent quality VHF radio receiver, built dead-bug-style on a piece of PCB material.

The TDA1701 was soon joined by a couple of stages of IF amplification with a ceramic filter, and then by several iterations of a JFET mixer. A varicap tuned MOSFET RF amplifier followed, and then a local oscillator. Finally it became a fully-functional FM radio, with probably far better performance than most commercial radios. He admits tuning is a little impractical though, with what appears to be a cermet preset potentiometer covering the entire band.

We suspect this project isn’t finished, and we hope he posts the schematic. But it doesn’t really matter if he doesn’t, because the value here isn’t in the design. Instead it lies in the joy of creating an ad-hoc radio just for the fun of it, and that’s something we completely understand.

We’ve covered a lot of radios in our time, and while it might be the first to feature a TV sound chip, it’s not the first built on bare PCB.