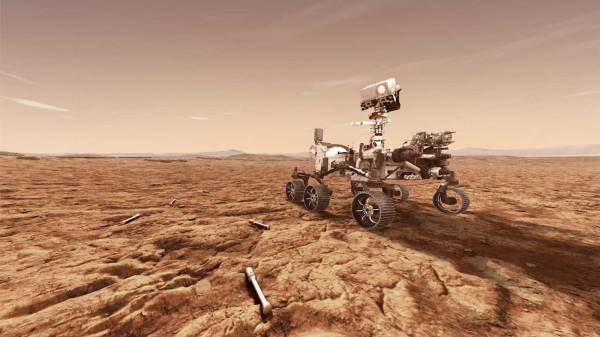
Chaotic Oscillator From Antique Logic

While working on recreating an “ancient” (read: 60-year-old) logic circuit type known as resistor-transistor logic, [Tim] stumbled across a circuit with an unexpected oscillation. The oscillation appeared to be random and had a wide range of frequency values. Not one to miss out on a serendipitous moment, he realized that the circuit he built could be used as a chaotic oscillator.

Chaotic systems can be used for, among other things, random number generation, so making sure that they do not repeat in a reliable way is a valuable property of a circuit. [Tim]’s design uses LEDs in series with the base of each of three transistors, with the output of each transistor feeding into the input of the next transistor in line, forming a ring. At certain voltages close to the switching voltages of the transistors, the behavior of the circuit changes unpredictably both in magnitude and frequency.

Building real-life systems that exhibit true randomness or chaotic behavior are surprisingly rare, and even things which seem random are often not random enough for certain applications. [Tim]’s design benefits from being relatively simple and inexpensive for how chaotic it behaves, and if you want to see his detailed analysis of the circuit be sure to visit his project’s page.

If you want to get your chaos the old fashioned way, with a Chua circuit, look out for counterfeit multipliers.

USB-C Is Taking Over… When, Exactly?

USB is one of the most beloved computer interfaces of all time. Developed in the mid-1990s, it undertook a slow but steady march to the top. Offering an interface with good speeds and a compact connector, it became the standard for hooking up interface devices, storage, and even became the de-facto way to talk old-school serial, too.

In late 2014, the USB Implementers Forum finalised the standard for the USB-C plug. Its first major application was on smartphones like the Nexus 5X, and it has come to dominate the smartphone market, at least if you leave aside the iPhone. However, it’s yet to truly send USB-A packing, especially on the desktop. What gives? Continue reading “USB-C Is Taking Over… When, Exactly?”

Switch Tester Servo-Slaps Them ’til They Fail

[James] is designing an open-source 3D printed keyboard switch, with the end goal of building a keyboard with as many printed parts as possible. Since keyswitches are meant to be pressed quite often, the DIY switches ought to be tested just as rigorously as their commercial counterparts are at the factory. Maybe even more so.

The broken spring after 13,000+ automated boings.

Rather than wear out his fingers with millions of actuations, [James] built a robot to test switches until they fail. All he has to do is plug a switch in, and the servo-driven finger slowly presses the slider down until the contacts close, which lights the LED.

The system waits 100ms for the contacts to stop any tiny vibrations before releasing the slider. That Arduino on the side tracks the contact and release points and sends them to the PC to be graphed. If the switch fails to actuate or release, the tester stops altogether.

We love that this auto-tester works just fine for commercial switches, too — the bit that holds the switch is separate and attaches with screws, so you could have one for every footprint variant. [James] recently did his first test of a printed switch and it survived an astonishing 13,907 presses before the printed coil spring snapped.

One could argue that this doubles as a servo tester. If you want a dedicated device for that, this one can test up to sixteen at a time.

Continue reading “Switch Tester Servo-Slaps Them ’til They Fail”

OTA ESP32 GUI Makes Updates Simple

One of the disadvantages of having cheap WiFi-capable boards like those based on the ESP32 is that you have to update them. If you have even a few in every room of your house, it can be a pain to pull them out and connect them to a cable for programming. Over the air programming is a great answer, and [Kevin] shows how you can control the update via a simple GUI. You can see a video demonstration of how it works below.

[Kevin] uses a ready-made OTA library to do the work, but creates a GUI configuration and downloader tool. There is a manual step to force the board into the OTA mode, which might be a mild inconvenience, but it improves security since you need physical access to the device to do an update.

Continue reading “OTA ESP32 GUI Makes Updates Simple”

Educational Radio, Educates

Analyzing and troubleshooting a modern AM/FM radio, digital radio, or TV can be a pretty daunting task. However, a common AM radio is easy to understand, experiment with, and repair. Learning about that will help you understand more complex circuits later. That’s the idea behind the Elenco AM radio which is built on a wide-open PCB with markings for all the important sections. [The Offset Volt] uses one of these to explain how a receiver works, especially how a diode detects the signal and how the automatic gain control works.

Between a series of diagrams and live scope demonstrations, you can see the effects of capacitance in the receiver along with other circuit effects.

Continue reading “Educational Radio, Educates”

New Silq Programming Language Aims To Make Quantum Programming Easier

Fresh from ETH Zurich comes the new Silq programming language. They also have submitted a paper to the PLDI 2020 conference on why they feel that it is the best quantum programming language so far. Although it may be not common knowledge, the lack of usable general purpose quantum computers has not kept multiple teams from developing programming languages for such computer systems.

Microsoft’s Q# is a strong contender in this space, along with the older QCL language. The claims by the Silq team on exactly why their language is better appear to come down to it being ‘more high level’, and by supporting automatic (and safe) uncomputation. While the ‘high level’ aspect is suspect since Q# is most decidedly a high-level programming language, their uncomputation claim does at least have some merit.

Quantum algorithm with uncompute step.

Uncomputation is a concept in quantum programming, where one occasionally has to remove a few intermediate objects from the current state because they may cause quantum interference that would affect the resulting output. Normally, one would save the intermediate result to a register for this, then reset the state and continue. Which parts of the state to keep and what to uncompute is however not easily determined, as a quick glance at related answers over at the Quantum Computing StackExchange and Theoretical Computer Science might reveal.

The main question thus appears the validity of this claim about Silq being able to automatically determine what ‘garbage’ can be safely uncomputed, and what should be part of the quantum interference. We have all seen with languages like Java and C# how even with traditional computing something as simple as garbage collecting can go horribly wrong. Maybe we shouldn’t count our quantum chickens yet until this particular waveform has fully collapsed.

(Thanks to Qes)

A True 4K Projector From Scrap EBay Components

Cinemas all over the world have become no-go zones with COVID-19 around, but watching the latest blockbuster on the small screen at home is simply not the same. You could bring the big screen home, but buying a quality projector is going to set you back a small pile of cash. Fortunately [Matt] from [DIY Perks] has an alternative for us, demonstrating how to build your own true 4K projector with parts bought off eBay, for a fraction of the price.

The core of the projector is a small 4K LCD panel, which is from a modified Sony smartphone. [Matt] disassembled the phone, removed the backlight from the LCD, which leaves it semi-transparent, and mounted it at a right angle to the rest of the phone body. The battery was also replaced with a voltage regulator to simulate a full battery. To create a practical projector, a much brighter backlight is needed. [Matt] used a 100W 10 mm diameter LED for this purpose. The LED needs some serious cooling to prevent it from burning itself out, and a large CPU cooler does the job perfectly. Two Fresnel lenses in series are used to turn the diverging light from the LED into a converging light source to pass through the LCD. An old 135 mm large format camera lens is placed at the focal point of light to act as a projection lens. The entire assembly is mounted on a vertical frame of threaded rods, nuts, and aluminium plates. [Matt] also used these threaded rods with GT2 pulleys to create a simple but effective moving platform for the projection lens that allows the focus of the projected image to be adjusted. The frame is topped off by a 45-degree mirror to project the image against a wall instead of the roof, and the frame is covered with aluminium panels.

The video after the break goes into incredible detail on how projector functions and how to build your own down. It definitely looks like a doable build for most hackers. [Matt] will also be releasing a complete PDF build guide in the next few weeks. Continue reading “A True 4K Projector From Scrap EBay Components”