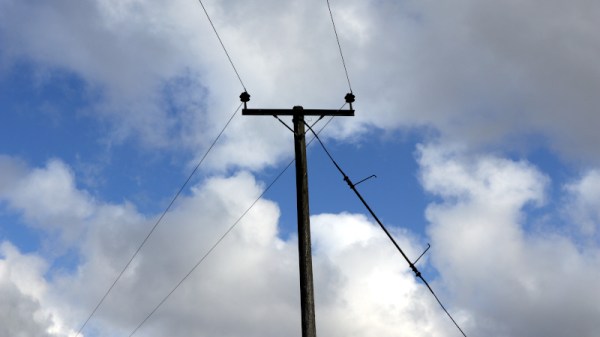
Keeping Time With Blinkenlights

If we’ve learned anything over the years, it’s that hackers like weird clocks, and they love packing as many multicolored LEDs into a device as is humanly possible. Combine both of those concepts into one project, and you’ve got a perfect storm. So as far as unnecessarily complex timepieces go, we’d say the “Crazy Clock 4” built by [Fearless Night] ranks up there among the all-time greats.

This Arduino Pro Mini powered clock syncs the current time via GPS, with a temperature compensated DS3231 RTC to keep it on the straight and narrow between satellite downlinks. Once the clock has the correct time, how do you read it? Well, at the top you’ve got a basic numerical readout for the normies, and next to that there’s a circular LED display that looks like it could double as a sci-fi movie prop. On the lower level there’s a binary clock for the real show-offs, and as if that wasn’t enough, there’s even dual color-coded analog meters to show the hours and minutes.

[Fearless Night] has provided everything you need to follow along at home, from the Arduino source code to the 3D models of the case and Gerber files for the custom PCB. Personally we think just the top half of the clock would be more than sufficient for our timekeeping needs. If nothing else it should help save some energy, as the clock currently pulls an incredible 20 watts with all those LEDs firing off.

Should you decide to take a walk down memory lane and check out some of the other interesting LED clocks we’ve featured in the past, you’d be busy for quite awhile. But for our money, it’s still hard to beat the impossibly obtuse single-LED clock.

Cheating At Bowling, The Hacker Way

Anyone who has ever gone to a bowling alley will know the preferred (but ineffective) technique to telepathically control a bowling ball. [Mark Rober] and [James Bruton] decided to change that and hacked a bowling ball that can be steered remotely (and discreetly), simply by leaning your body.

They started with a standard bowling ball, that was cut in half and hollowed out on a lathe. A beam sits on the centre line of the ball, mounted on a bearing in each half to allow the ball to spin around it. Steering done by shifting the centre of mass, by moving a steel pendulum that hangs below the beam side to side with heavy-duty servo. The servo is controlled with an Arduino, and an IMU to detects the balls orientation. Power is provided by and RC Lipo battery. The wireless controller is a sneaky little device that is taped to [Mark]’s back and covered with clothing, and steers the ball by detecting how far he leans with an IMU module. The brain is an Arduino Mini and an NRF24L01 provides the RF link.

While it’s not an easy build, it’s a fairly simple system electronically, with off the shelf electronics modules and perfboard. The genius is in the implementation and its entertainment value. The look on the kids faces when [Mark] “telepathically” controls the ball, after showing off the fact that he has zero natural ability, is absolutely priceless. [Mark Rober], a former NASA engineer, has made a name for himself with viral Youtube videos on cool projects like a glitter booby trap for package thieves and a liquid sand hot tub. [James Bruton], a former toy designer is known for his robotics prowess that he has put on display with OpenDog and functional Star Wars robots.

For us this hack is a perfect example of one that entertains and inspires, a powerful combination for young and old alike. Check out the awesome video after the break. Continue reading “Cheating At Bowling, The Hacker Way”

Object Tracking Camera Slider Gets The Nice Shots

In this day and age, where all leisure activities must be duly captured and monetized online, camera sliders are hot items. Many start with a simple manual build, before graduating to something motorized for more flexibility. [Saral Tayal] took things a step further, implementing a basic tracking mode for even sweeter shots. 

The build is mechanically simple, relying on 8mm steel rods and linear bearings more typically found in 3D printers. An Arduino Uno is pressed into service to run the show, outfitted with an OLED screen to run the interface. A RoboClaw motor controller is used to control the geared DC motors used, one controlling the linear motion, the other the rotation of the camera.

With encoders fitted to the motors, the RoboClaw controller enables the Arduino to track the position and rotation of the slider as it moves. The slider then can be given the position of an object relative to itself. With a little maths, it will rotate the camera to track the object as it moves along.

It’s a simple addition to the typical slider build that greatly increases the variety of shots that can be achieved. There are plenty of ways to go about building a slider, too, as we’ve seen before. Video after the break.
Continue reading “Object Tracking Camera Slider Gets The Nice Shots”

Mimic Artfully Employs LEDs In Fashion

Any science fiction piece set in the near-future involves clothes that light up or otherwise have some form of electronics inside. This hasn’t happened in mainstream fashion just yet, but [Amped Atelier] are doing serious work in the field. Mimic was their entry for the 2016 MakeFashion Gala, serving as a great example of LEDs in fashion done right.

Mimic consists of two pieces, designed as cocktail dresses that mimic their surroundings, in much the same way as a chameleon. LEDs are controlled by an Arduino, fitted with a colour sensor. When activated, the Arduino can change the color of the LEDs to match whatever is presented to the sender. This technology could serve as a great way to avoid clashing with a friend’s outfit, or to send a surreptitious signal to your ride that you’re ready to leave.

The LEDs are hidden beneath attractive geometric diffusers, which are 3D printed directly on to the fabric of the outfit. This gives an attractive, finished look to the garment, and allows the diffusers to naturally flow with the lines of the piece.

These pieces show that it’s possible to create glowable night wear that is as stylish as it is high tech. If you’re looking for something a little edgier however, we’ve got that too. Video after the break.

Continue reading “Mimic Artfully Employs LEDs In Fashion”

Dambusting, R/C Style

Disclaimer: no dams were actually busted in the making of the video below. But that doesn’t mean that a scale-model homage to the WWII Dam Busters and their “Bouncing Bombs” isn’t worth doing, of course.

In a war filled with hacks, [Barnes Wallis]’ Bouncing Bomb concept might just be the hackiest. In the video below, [Tom Stanton] explains that [Wallis] came up with the idea of skipping a bomb across the surface of a lake to destroy enemy infrastructure after skipping marbles across the water. Using barrel-shaped bombs, he built a rig that could give them the proper amount of backspin and release them at just the right time, letting them skip across the surface of the lake while the bomber made an escape. Upon hitting the rim of the dam, the bomb would sink to explode near the base, maximizing damage.

[Tom]’s scale rig ended up being a clever design with spring-loaded arms to release a 3D-printed barrel after being spun up by a brushless motor. He teamed up with R/C builder [James Whomsley], who came up with a wonderful foam-board Lancaster bomber, just like RAF No. 617 Squadron used. With a calm day and smooth water on the lake they chose for testing, the R/C Lanc made a few test runs before releasing the first barrel bomb. The first run was a bit too steep, causing the bomb to just dive into the water without skipping. Technical problems and a crash landing foiled the second run, but the third run was perfect – the bomb skipped thrice while the plane banked gracefully away. [Tom] also tried a heavy-lift quadcopter run with the bomb rig, something [Barnes Wallis] couldn’t even have dreamed of back in the day.

Hats off to [Tom] and [James] for collaborating on this and getting the skipping to work. It reminds us a bit of the engineered approach to rock-skipping, though with less deadly intentions.

Continue reading “Dambusting, R/C Style”

Hacking Surgery: Suspended Animation May Be Here

Suspended animation is a staple of science fiction. Need to take a 200 year trip to another star system? Go to sleep in some sort of high-tech coccoon and wake up at your destination. We saw it in Star Trek, 2001, and many other places. Doctors at the University of Maryland have reprtedly put at least one patient in suspended animation, and it isn’t to send them to outer space. The paper (behind a paywall, of course) is available if you have the medical background to wade through it. There’s also a patent that describes the procedure.

Trauma surgeons are frustrated because they often see patients who have been in an accident or have been shot or stabbed that they could save if they only had the time. A patient arriving at an ER with over half their blood lost and their heart stopped have a less than 5% chance of leaving the ER without a toe tag. By placing the patient in suspended animation, doctors can gain up to two hours to work on injuries that previously had to be repaired in mere minutes.

Continue reading “Hacking Surgery: Suspended Animation May Be Here”

A 3D Printer Scratch Built For Your Viewing Pleasure

Today it’s almost always cheaper to buy an imported 3D printer kit than it is to source your own parts and build one yourself. But that doesn’t stop people from doing it anyway. Whether they’re looking for something a bit more solid, or just want to do things their own way, there are still valid reasons to design and build your own machine. Luckily for us in the audience, [Rob Mech] decided to document the build of his custom “LayerFused C201” printer on his YouTube Channel.

If you’ve ever dreamed of taking the plunge and building a 3D printer exactly the way you want, but were never able to manage the time, this seven video series might be the next best thing. Each video takes you through a different step of the construction, from building the frame out of aluminum extrusion all the way to wiring up the endstop switches and the 32-bit SKR v1.3 controller. There’s even a video that introduces the viewer to the concept of a “Frankenstein” printer that uses cobbled together parts just long enough to produce its own final components.

All told, [Rob] says the Bill of Materials for the LayerFused C201 comes to at least $200, but that’s going to take shopping around for the lowest possible prices and potentially even salvaging some components from other machines and projects. Like we said, building a cheap printer is absolutely not the goal here; it’s all about building a printer you want to use. Continue reading “A 3D Printer Scratch Built For Your Viewing Pleasure”