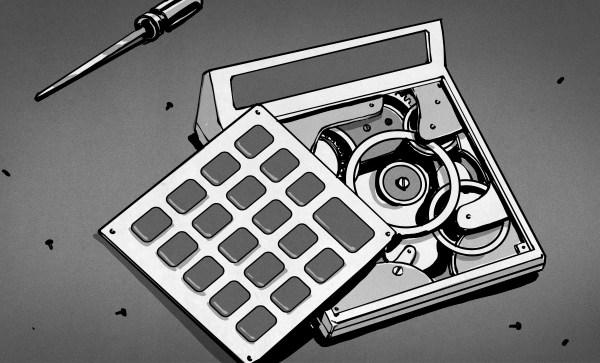
Haptic Glove Controls Robot Hand Wirelessly

[Miller] wanted to practice a bit with some wireless modules and wound up creating a robotic hand he could teleoperate with the help of a haptic glove. It lookes highly reproducible, as you can see the video, below the break.

The glove uses an Arduino’s analog to digital converter to read some flex sensors. Commercial flex sensors are pretty expensive, so he experimented with some homemade sensors. The ones with tin foil and graphite didn’t work well, but using some bent can metal worked better despite not having good resolution.

Continue reading “Haptic Glove Controls Robot Hand Wirelessly”

Beat The Streets With This Text Spraying Robot

In the midst of striking for climate change awareness, you may need some extra hands. That’s what [Anred Zynch] thought when they built Strettexter, the text-spraying writing robot that sprays onto streets.

The machine is loaded with 8 spray cans placed into a wooden box (a stop line with a wooden ledge to prevent the cans from falling out) and is fixed on top of a skateboard. It uses a PWN/Servo shield soldered onto an Arduino Uno connected to 8 servo motors (TowerPro SG90s) to control each of the spray bottles. A table converts every character into 5×8 bit fonts to fit the size of the spraying module. The device also includes a safety switch, as well as an encoder for measuring the horizontal distance traveled.

The Strettexter is activated by pulling on the skateboard once it’s been set up and connected to power (for portability, it uses a 8000mAh power bank). In its current configuration, the words stretch out pretty long, but some additional testing will probably lead to better results depending on the constraints of your canvas. The shorter the words, the more difficult it is for the white text to be legible, since there is significant spacing between printed bits.

We don’t condone public vandalism, so use this hack at your own discretion.

Continue reading “Beat The Streets With This Text Spraying Robot”

24 Hours Of Temperature Data At A Glance

In an era where we can see the current temperature with just a glance at our smartphones, the classic “Time and Temp” gadget sitting on the desk doesn’t have quite the same appeal. The modern weather fanatic demands more data, which is where this gorgeous full-day temperature display from [Richard] comes in.

The display, built inside of a picture frame, shows the temperature recorded for every hour of the day. If the LED next to the corresponding hour is lit that means the value displayed is from the current day, otherwise it’s a holdover from the previous day’s recordings. This not only makes sure all 24 LED displays have something to show, but gives you an idea of where the temperature might be trending for the rest of the day. Naturally there’s also a display of the instantaneous temperature (indoor and outdoor), plus [Richard] even threw in the current wind speed for good measure.

In the video after the break, [Richard] briefly walks us through the construction of his “Thermo Logger”, which reveals among other things that the beautiful panel art is nothing more exotic than a printed piece of A4 paper. The video also features a 3D model of the inside of the device which appears to have been created through photogrammetry; perhaps one of the coolest pieces of project documentation we’ve ever seen. We’ll just throw this out there: if you want to ensure that your latest build makes the front page of Hackaday, pop off that back panel and make some decent quality 3D scans.

Given the final result, it should come as no surprise to find that this isn’t the first incredible weather display that [Richard] has built. We previously covered another weather monitoring creation of his that needed two seperate display devices to adequately display all the data it was collecting.

Continue reading “24 Hours Of Temperature Data At A Glance”

Build Your Own Plasma Ball

The simple plasma ball – it graces science museums and classrooms all around the world. It shares a place with the Van de Graaf generator, with the convenient addition of spectacular plasma rays that grace its spherical surface. High voltage, aesthetically pleasing, mad science tropes – what would make a better DIY project?

For some background, plasma is the fourth state of matter, often created by heating a neutral gas or ionizing the gas in a strong electromagnetic field. The availability of free electrons allows plasma to conduct electricity and exhibit different properties from ordinary gases. It is also influenced by magnetic fields in this state and can often be found in electric arcs.

[Discrete Electronics Guy] built a plasma bulb using the casing from an old filament bulb and an ignition coil connected to a high voltage power supply. The power supply is based on the 555 timer IC. It uses a step-up transformer (the ignition coil) driven by a square wave oscillator circuit at a high frequency working as AC voltage. The square wave signal boosts the current into the power transistor, increasing its power.

The plasma is produced inside the bulb, which contains inactive noble gases. When touching the surface of the bulb, the electric arc flows to the point of contact. The glass medium protects the skin from burning, but the transparency allows the plasma to be seen. Pretty cool!

Continue reading “Build Your Own Plasma Ball”

Giant LEDs, Ruby Lasers, Hologram Displays, And Other Cool Stuff Seen At Maker Faire Rome

Hackers from all over Europe descended upon Rome last weekend for the Maker Faire that calls itself the “European Edition”. This three-day event is one of the largest Maker Faires in the world — they had 27,000 school students from all over Italy and Europe attend on Friday alone.

This was held at Fiera Roma, a gigantic conference complex two train stops south of the Rome airport — kind of in the middle of nowhere. I was told anecdotally that this is the largest event the complex hosts but have no data to back up that claim. One thing’s for certain, three days just wasn’t enough for me to enjoy everything at the show. There was a huge concentration of really talented hardware hackers on hand, many who you’ll recognize as creators of awesome projects regularly seen around Hackaday.

Here’s a whirlwind tour of some of my favorites. On that list are a POV holographic display, giant cast-resin LEDs, an optical-pump ruby laser built out of parts from AliExpress, blinky goodness in cube-form, and the Italian audience’s appreciation for science lectures (in this case space-related). Let’s take a look.

Continue reading “Giant LEDs, Ruby Lasers, Hologram Displays, And Other Cool Stuff Seen At Maker Faire Rome”

Hackaday Podcast 041: The “How Not To” Episode Of Rebreathers, Chain Sprockets, Hovercraft, And Data Logging

Hackaday Editors Mike Szczys and Elliot Williams shed some light on a true week of hacks. It seems as though all kinds of projects are doing this the “wrong” way this week and its delightful to see what they learn along the way. Hovercraft can work using the Coandă effect which uses the blowers on the outside. You can dump your Linux logs to soldered-on eMMC memory, and chain sprockets can be cut from construction brackets. If you really want to build your own rebreather you can. All of these hacks work, and seeing how to do something differently is an inspiring tribute to the art of hardware hacking… you can learn a lot by asking yourself why these particular techniques are not the most commonly used.

Plus, Mike caught up with Alessandro Ranellucci at Maker Faire Rome last weekend. In addition to being the original author of slic3r, Alessandro has been Italy’s Open Source lead for the last several years. He talks about the legislation that was passed earlier this year mandating that software commissioned by the government must now be Open Source and released with an open license.

Take a look at the links below if you want to follow along, and as always tell us what you think about this episode in the comments!

Take a look at the links below if you want to follow along, and as always, tell us what you think about this episode in the comments!

Direct download (60 MB or so.)

Continue reading “Hackaday Podcast 041: The “How Not To” Episode Of Rebreathers, Chain Sprockets, Hovercraft, And Data Logging”

Tiny Cube Hosts A Hearty Tube

Tiny PCBAs and glowy VFD tubes are like catnip to a Hackaday writer, so when we saw [hamster]’s TubeCube tube segment driver we had to dig in to learn more. We won’t bury the lede here; let’s enjoy a video of glowing tubes before we go further:

The TubeCube is built to fit the MiniBadge badge addon standard, which is primarily used to host modules on the SAINTCON conference badge. A single TubeCube hosts a VFD tube, hardware to provide a 70 V supply, and a microcontroller for communication and control. Each TubeCube is designed to accept ASCII characters via UART to display on it’s display, but they can also be chained together for even more excitement. We’re not sure how [hamster] would be able to physically wear the beast in the video above, but if he can find a way, they all work together. If you’re interested in seeing the dead simple UART communication scheme take a look at this file.

We think it’s also worth pointing about the high voltage supply. To the software or mechanically minded among us it’s easy to get trapped thinking about switching power supplies as a magical construct which can only be built using all-in-one control ICs. But [hamster]’s supply is a great reminder that a switching supply, even a high voltage one, isn’t as complex as all that. His design (which he says was cribbed from Adafruit’s lovely Ice Tube Clock) is essentially composed of the standard primitives. A big low voltage capacitor C1 to source the burst of energy which will be boosted, the necessary inductor/high voltage cap C2 which ends up at the target voltage, and a smoothing cap C3 to make the output a little nicer. It’s controlled by the microcontroller toggling Q1 to control the current flow through L1. The side effect is that by controlling the PWM frequency [hamster] can vary the brightness of the tubes.

Right now it looks like the repository has a schematic and sources, which should be enough to build a small tube driver of your own. If you can’t get enough TubeCubes, there’s one more video (of a single module) after the break.

Continue reading “Tiny Cube Hosts A Hearty Tube”