Failing At Making Ferrofluid

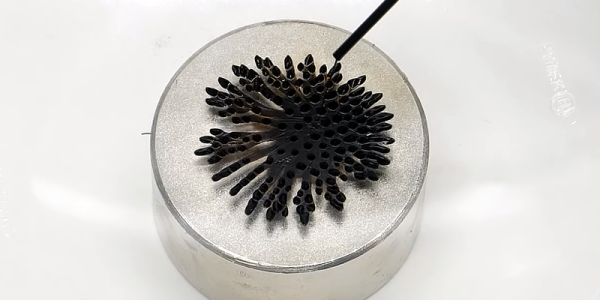
[NileRed] admits that while ferrofluid has practical uses, he simply wanted to play with it and didn’t want to pay the high prices he found in Canada. A lot of the instructions he found were not for making a true ferrofluid. He set out to create the real thing, but he wasn’t entirely successful. You can see the results — which aren’t bad at all — in the video below.

We’ve always said you learn more from failure than success. The process of creating ferrofluid involves two key steps: creating coated nanoparticles of magnetite and removing particles that are too large or improperly coated. After the first not entirely satisfactory attempt, [NileRed] tried to purify the material using solvents and magnets to create better-quality particles. Even the “bad” material, though, looked fun to play with along with a powerful magnet.

You’ll see that the material is clearly magnetic, it just doesn’t spike like normal ferrofluid. [NileRed] had commercial ferrofluid for testing and found that if he diluted it enough, it behaved like his homemade fluid. So while not conclusive, it seems like he diluted the batch too much.

We hope to see a better batch from him soon. The base material he used for the first patch was homemade — he covers that in a different video. However, for the second batch, he is going to start with commercial ferric chloride — what we know as PCB etchant.

Even though the experiment was not entirely successful, we enjoyed seeing the process and watching the performance of both the homemade batch and the commercial ferrofluid. He’s getting a lot of advice and speculation in the video comments, and it is very possible a Hackaday reader might be able to help, too.

We’ve seen other reports of unsuccessful ferrofluid production. If you need a practical reason to make or buy some, how about a clock?

Ghost Rider Costume Is Smoking Hot

It’s that spooky time of year once again, with pumpkins and cobwebs as far as the eye can see. This year, [Mikeasaurus] has put together something really special – a Ghost Rider costume with some amazing effects.

The costume starts with the skull mask, which started with a model from Thingiverse. Conveniently, the model was already set up to be 3D printed in separate pieces. [Mike] further modified the design by cutting out the middle to make it wearable. The mask was printed in low resolution and then assembled. [Mike] didn’t worry too much about making things perfect early on, as the final finish involved plenty of sanding and putty to get the surface just right. To complete the spooky look, the skull got a lick of ivory paint and a distressed finish with some diluted black acrylic.

With the visual components complete, [Mike] turned his attention to the effects. Light is courtesy of a series of self-blinking LEDs, fitted inside the mask to give the eye sockets a menacing orange glow. However, the pièce de résistance is the smoke effect, courtesy of a powerful e-cigarette device and an aquarium pump. At 225W, and filled with vegetable glycerine, this combination produces thick clouds of smoke which emanate from the back of the wearer’s jacket and within the skull itself. Truly stunning.

[Mike] reports that the costume is scary enough that he has been banned from answering the door as Ghost Rider. We think it’s bound to be a hit, regardless. For another epic mask build, check out the Borderlands Psycho. Video after the break. Continue reading “Ghost Rider Costume Is Smoking Hot”

Kinetic Sculpture Achieves Balance Through Machine Learning

We all know how important it is to achieve balance in life, or at least so the self-help industry tells us. How exactly to achieve balance is generally left as an exercise to the individual, however, with varying results. But what about our machines? Will there come a day when artificial intelligences and their robotic bodies become so stressed that they too will search for an elusive and ill-defined sense of balance?

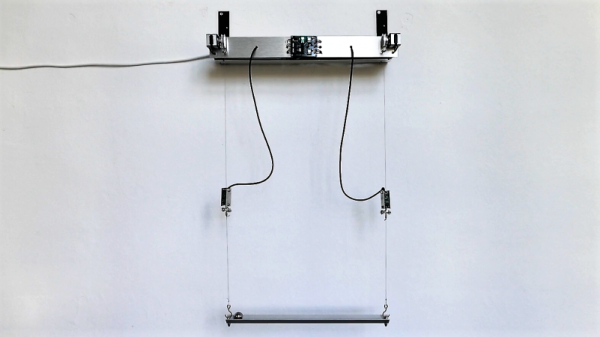
We kid, but only a little; who knows what the future field of machine psychology will discover? Until then, this kinetic sculpture that achieves literal balance might hold lessons for human and machine alike. Dubbed In Medio Stat Virtus, or “In the middle stands virtue,” [Astrid Kraniger]’s kinetic sculpture explores how a simple system can find a stable equilibrium with machine learning. The task seems easy: keep a ball centered on a track suspended by two cables. The length of the cables is varied by stepper motors, while the position of the ball is detected by the difference in weight between the two cables using load cells scavenged from luggage scales. The motors raise and lower each side to even out the forces on each, eventually achieving balance.

The twist here is that rather than a simple PID loop or another control algorithm, [Astrid] chose to apply machine learning to the problem using the Q-Behave library. The system detects when the difference between the two weights is decreasing and “rewards” the algorithm so that it learns what is required of it. The result is a system that gently settles into equilibrium. Check out the video below; it’s strangely soothing.

We’ve seen self-balancing systems before, from ball-balancing Stewart platforms to Segway-like two-wheel balancers. One wonders if machine learning could be applied to these systems as well.

Continue reading “Kinetic Sculpture Achieves Balance Through Machine Learning”

Gutters To Gardens: The IoT Rain Barrel

There’s nothing quite like having a garden in your backyard. You get tomatoes with flavor. Fresh herbs are easy. If you’d like to go crazy, you can always grow a gigantic pumpkin. But there’s a problem with gardening: the work. You’ve got to water, and you’ve got to weed. You’ve also got to deal with the thousand ladybugs you bought for a laugh.

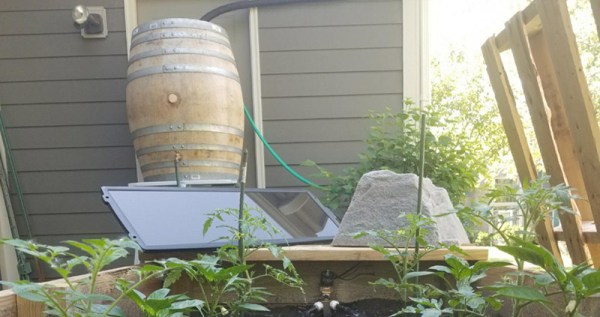
For his Hackaday Prize entry, [Kent] has solved at least one of these problems. It’s an Internet of Things rain barrel. It’s designed to be as simple as possible so that anyone can set it up in just a few hours, and there’s also an option to make this rain barrel solar powered, making it eminently sustainable.

The design of this rain barrel begins as you would expect, with a 55-gallon rain barrel collecting water from [Kent]’s gutters. At the bottom of this barrel is a bunghole, and from that, a 12-volt pump sucks up the water and dispenses it into the garden bed. Everything is controlled through a Particle Photon, one of the easiest ways to set up an Internet of Things project, and yes, you can control this entire setup with an Alexa. The future is now.

Below, you can check out a few of the demo videos [Kent] put together for his project. One of them is solenoids clicking off to Deep Purple’s Smoke on the Water because if you’re going to build an Internet of Things thing with clicky electromechanical valves, you might as well make it play music.

Continue reading “Gutters To Gardens: The IoT Rain Barrel”

Books You Should Read: Designing Reality

These days, budget CNC builds are mainstream. Homebrew 3D printers and even laser cutters are old hats. Now I find myself constantly asking: “where’s it all going?” In the book, Designing Reality, Prof Neil Gershenfeld and his two brothers, Alan and Joel, team up to answer that question. In 250 pages, they forecast a future where digital fabrication tools become accessible to everyone on the planet, a planet where people now thrive in networked communities focused on learning and making.

Designing Reality asks us to look forward to the next implications of the word “digital”. On its surface, digital  means discretized, but the implications for this property are extreme. How extreme? Imagine a time where cnc-based fabrication tools are as common as laptops, where fab labs and hackerspaces are as accepted as libraries, and where cities are self-sufficient. The Gershenfelds invite us to open our eyes into a time where digital has vastly reshaped our world and will only continue to do so. Continue reading “Books You Should Read: Designing Reality”

Competitive Surface Mount Soldering Comes To Supercon

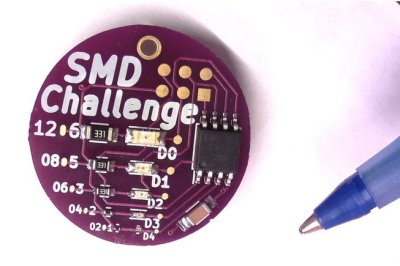
Who will show the best soldering skills at the Hackaday Superconference next week? We have a little — in fact, a very little — challenge for you: solder surface mount components down to a tiny 0201 package. This is the SMD Soldering Challenge and successfully finishing the board at all shows off the best of hand soldering skills, but during the weekend we’ll also keep a running leader board.

Ballpoint pen for scale

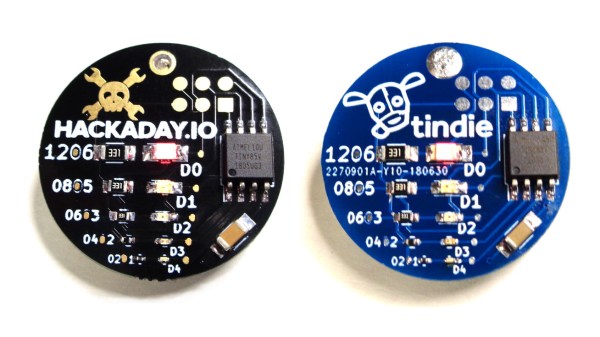
For the event we’re using the SMD Challenge board by MakersBox which utilizes a SOIC8 ATtiny85 to drive LED/resistor pairs in 1206, 0805, 0603, 0402, and 0201 packages. There will be a 5 minute inspection time at the start of the heat to open the kit, get familiar with the board, and confirm that you have all of the components and tools you need. We suggest not sneezing while placing that 0201 part down on the board — there is a spare set of 0201 parts only in the kit so you might get one extra chance with the smallest parts if you need it, but replacements will not be provided for parts lost during the heat.

There will be eight heats of six people participating so make sure you get signed up as soon as you get to Supercon. You can only compete once and you must use our soldering iron and solder. We will also have magnifiers, tweezers, flux, and desoldering braid on hand. You can bring reasonable tools and other support materials; Supercon staff running the challenge are the arbiters of “reasonable” in this case.

Scoring is based on time, completion, functionality (of the circuits you attempted to complete), neatness, and solder joint quality. If the top score is a tie, the fastest time across all the heats will be the winner. The official rules are on the event page so take a moment to look them over.

Don’t think it is going to be easy. Here’s a quote from the SMD Challenge board project page:

Be warned that trying to hand solder a 0201 package, which is just slightly larger than a grain of sand, may be considered evidence of insanity and get you committed to bad places by your loved ones and/or arch nemesis

The real prize is the bragging rights of being the Hackaday soldering virtuoso. Do you have what it takes? Someone reading this right now will be. But the first step is to show up at the Hackaday Superconference. See you there and good luck!

A Multifunction ESP8266 Smartwatch

Most of the DIY smartwatch projects we feature here on Hackaday aren’t exactly what most people would consider practical daily-use devices. Clunky designs, short battery life, limited functions: they’re more a wearable display of geek cred than they are functional timepieces. Oddly enough, the same could be said of many of the “real” smartwatches on the market, so perhaps the DIY versions are closer to the state-of-the-art than we thought.

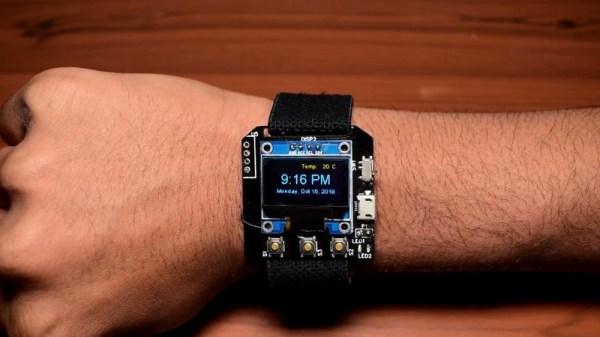
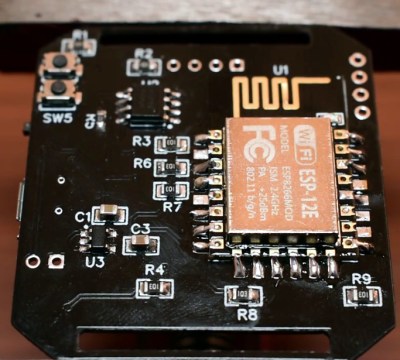
But this ESP8266 smartwatch created by [Shyam Ravi] is getting dangerously close to something you could unironically leave the house with. It’s still missing an enclosure that prevents you from receiving PCB acupuncture while wearing it, but beyond than that it has a more than respectable repertoire of functions. It even seems to be a fairly reasonable size (with the potential to be even smaller). All that with a total build cost of less than $20 USD, and we’re thinking this might be a project to keep an eye on.

Not content with a watch that simply tells the time, [Shyam] added in a weather function that pulls the current conditions for his corner of the globe from the Yahoo weather API and displays it above the time and date on the watch’s multi-color OLED display when the center button is pressed. Frankly, given the state of DIY watches, that would already have been impressive enough; but he didn’t stop there.

The left and right buttons control Internet-connected relays which [Shyam] uses to turn his lights and air conditioner on and off. When he presses the corresponding button, the watch will even display the status of the devices wherever his travels might take him.

A smattering of DIY watches pass by our careful gaze, though it’s been a while since we’ve seen an ESP8266 watch. More recently we’ve seen an Arduino watch, and some downright gorgeous analog creations.

Continue reading “A Multifunction ESP8266 Smartwatch”