Automated Turntable For 3D Scanning

Those just starting out in 3D printing often believe that their next major purchase after the printer will be a 3D scanner. If you’re going to get something that can print a three dimensional model, why not get something that can create said models from real-world objects? But the reality is that only a small percentage ever follow through with buying the scanner; primarily because they are notoriously expensive, but also because the scanned models often require a lot of cleanup work to be usable anyway.
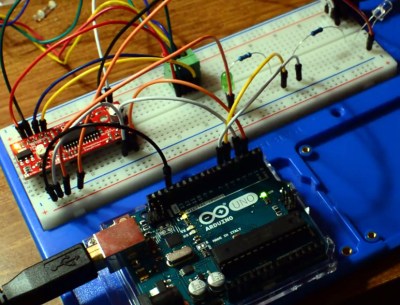
While this project by [Travis Antoniello] won’t make it any easier to utilize scanned 3D models, it definitely makes them cheaper to acquire. So at least that’s half the battle. Consisting primarily of a stepper motor, an Arduino, and a EasyDriver controller, this is a project you might be able to assemble from the parts bin. Assuming you’ve got a pretty decent camera in there, anyway…

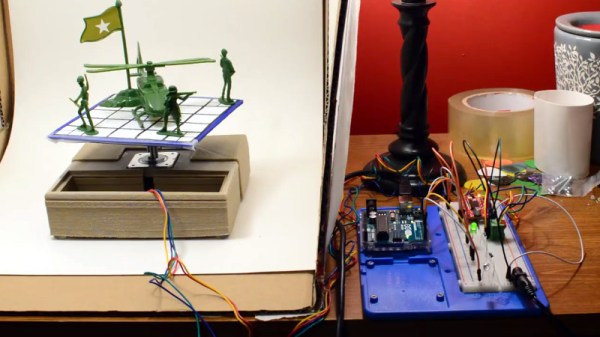
The general idea is to place a platform on the stepper motor, and have the Arduino rotate it 10 degrees at a time in front of a camera on a tripod. The camera is triggered by an IR LED on one of the Arduino’s digital pins, so that it takes a picture each time the platform rotates. There are configurable values to give the object time to settle down after rotation, and a delay to give the camera time to take the picture and get ready for the next one.

Once all the pictures have been taken, they are loaded into special software to perform what’s known as photogrammetry. By compiling all of the images together, the software is able to generate a fairly accurate 3D image. It might not have the resolution to make a 1:1 copy of a broken part, but it can help shave some modeling time when working with complex objects.

We’ve previously covered the use of photogrammetry to design 3D printed accessories, as well as a slightly different take on an automated turntable a few years ago. The process is still not too common, but the barriers to giving it a try on your own are at least getting lower.

Continue reading “Automated Turntable For 3D Scanning”

Rover V2 Handles Stairs As Easily As The Outdoors

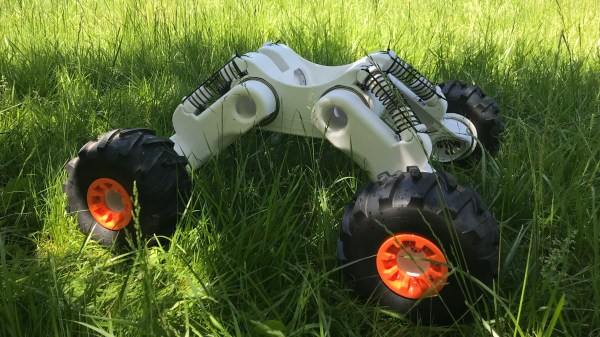
Rover V2 is an open-source, 3D-printable robotic rover platform that has seen a lot of evolution and development from its creator, [tlalexander]. There are a number of interesting things about Rover V2’s design, such as the way the wheel hubs themselves contain motors and custom planetary gearboxes. This system is compact and keeps weight down low to the ground, which helps keep a rover stable. The platform is all wheel drive, and moving parts like the suspension are kept high up, as far away from the ground as possible. Software is a custom Python stack running on a Raspberry Pi that provides basic control.

The Rover V2 is a full mechanical redesign of the previous version, which caught our attention with its intricate planetary gearing inside the wheel hubs. [tlalexander]’s goal is to create a robust, reliable rover platform for development that, thanks to its design, can be mostly 3D printed and requires a minimum of specialized hardware.

Specialized Knife Sharpener From Old Airplane

“Surely sharpening a knife can’t be that hard” one might think, as they destroy the edge on their pocket knife by flailing it wildly against a whetstone of indeterminate grain. In reality, knife sharpening is as nuanced a practice as virtually any other field, and getting a quality finish is much harder than it seems. It also gets increasingly complex with different blades, as [Turbo Conquering Mega Eagle] shows with is customized knife sharpening jig.

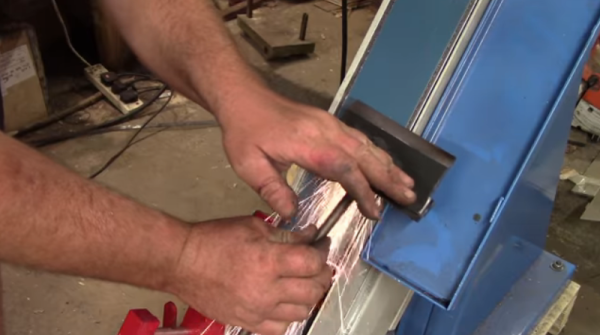
The hardest part in any blade sharpening is getting the proper bevel angle. A heavy angle is good for heavy-duty tools like axes, but for fine work like shaving a more sharp angle is required. Usually, a table-mounted jig is required but due to production constraints, a handheld one was used. It’s made with push rods and a cam follower from an airplane engine (parts are plentiful since this particular engine breaks all the time) and can impart very specific bevel angles on blades. For example, machetes have a heavy angle near the handle but a finer point towards the tip, and this tool helps streamline sharpening many knives quickly.

If you want to try your hand at another project that’s not as straightforward as it might seem, you might want to build a knife from scratch before you make an attempt at a sharpening tool. It’s just as nuanced a process, but with a little practice can be done with only a few tools.

Continue reading “Specialized Knife Sharpener From Old Airplane”

Build Your Own Portable Arduino Soldering Iron

At this point you’ve almost certainly seen one of these low-cost portable soldering irons, perhaps best exemplified by the TS100, a pocket-sized temperature controlled iron that can be had for as little as $50 USD from the usual overseas suppliers. Whether or not you’re personally a fan of the portable irons compared to a soldering station, the fact remains that these small irons are becoming increasingly popular with hackers and makers that are operating on a budget or in a small workspace.

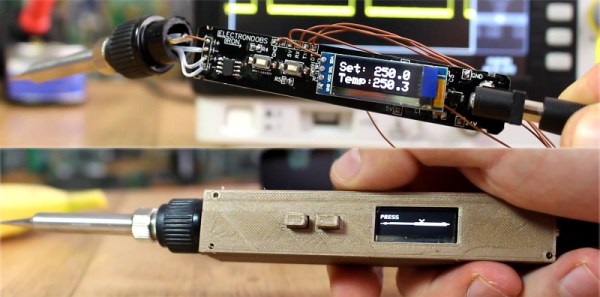
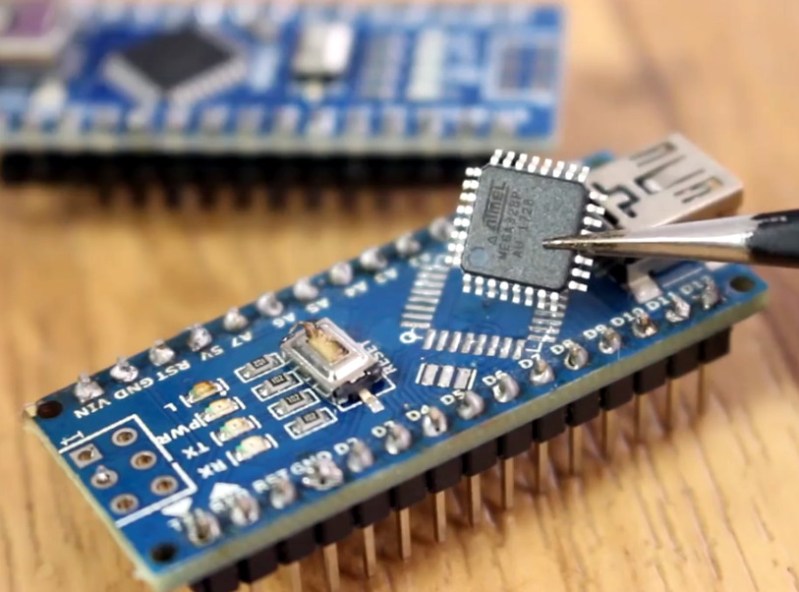
Believing that imitation is the most sincere form of flattery, [Electronoobs] has come up with a DIY portable soldering iron that the adventurous hacker can build themselves. Powered by an ATMega328p pulled out of an Arduino Nano, if offers the same software customization options of the TS100 but at a considerably lower price. Depending on where you source your components, you should be able to build one of these irons for as little as $15.

The iron features a custom PCB and MAX6675 thermocouple amplifier to measure tip temperature. A basic user interface is provided by two tactile buttons on the PCB as well as an 128×32 I2C OLED display. In a future version, [Electronoobs] says he will look into adding some kind of sensor to detect when the iron is actually being used and put it to sleep when inactive.

The tip is sourced from a cheap soldering station replacement iron, and according to [Electronoobs], is probably the weakest element of the entire build. He’s looking into using replacement TS100 tips, but says he’ll need to redesign his electronics to make it compatible. The case is a simple 3D printed affair, which looks solid enough, but seems likely to be streamlined in later versions.

We’ve seen a number of attempts at DIY soldering irons over the years, but we have to say, this one is probably the most professional we’ve ever seen. It will be interesting to see how future revisions improve on this already strong initial showing.

Continue reading “Build Your Own Portable Arduino Soldering Iron”

Amiga 2000 Emergency Repair

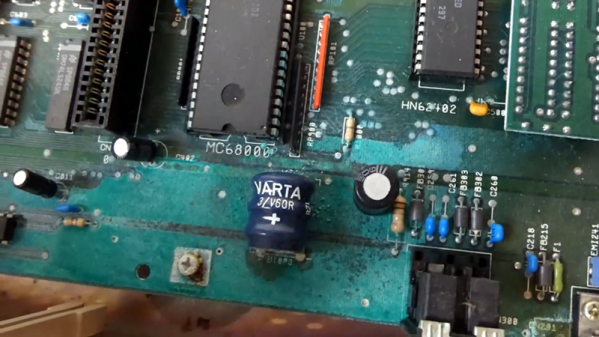
Big companies spend small fortunes on making sure their computers stay running and that they can be repaired quickly in an emergency. You wouldn’t expect an emergency repair on an Amiga 2000, though. [RETR-O-MAT] bought an Amiga 2000 that did boot, but was known to have a leaky battery on the motherboard. He wanted to rush to replace the battery before the leakage caused serious damage. You can see all this in the video below.

The computer looked lightly used over its 32-year lifespan, even when the case came off. The battery corrosion was evident, though. Even the bolt holding down the motherboard was clearly corroded from the leaking battery, causing it to be very difficult to remove.

The battery leakage also made unsoldering the battery a challenge. Several chips and sockets — including the CPU — were affected, so they had to come out. You can see a nice demonstration of the “old screwdriver trick” which might be eye-opening if you’ve only worked with SMD chips.

Even if you don’t care much about the Amiga 2000, it is interesting to see inside an old computer like this and note the differences — and similarities — to modern designs. The video is as much a tear down as it is a repair story. It also might be useful if you ever face having to tear out a leaky battery on any piece of gear. Continue reading “Amiga 2000 Emergency Repair”

Pinball Wizard Hacks Table For Tommy Stage Show

Ever since he was a young hacker
[Mark Gibson] has messed with the silver ball.
From Soho down to Denver
he must have fixed them all.
But we ain’t seen anything like this
in any amusement hall.
That darn devious hacker
sure hacks a mean pinball.

He hacks it like an expert,
Becomes part of the machine
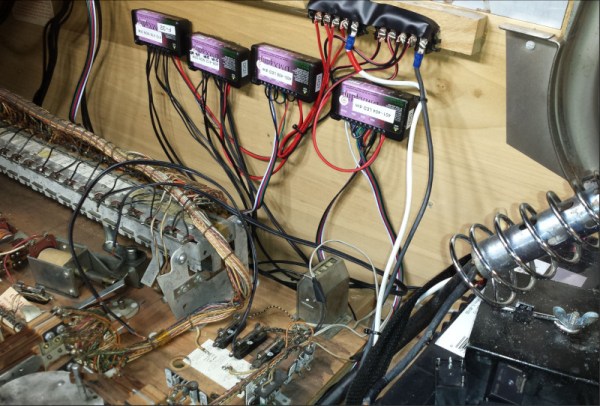
Automating all the bumpers
Always wiring clean
His table plays by automation,
And radio control for all
That darn devious hacker
sure hacks a mean pinball.

Continue reading “Pinball Wizard Hacks Table For Tommy Stage Show”

ESP8266 Keeps Tabs On The Kid’s Tablets

Assuming you have a child and it’s no longer womb-bound, there’s a fairly high chance they’ve already had some experience with the glowing beauty that is the LCD display; babies of only a few months old are often given a tablet or smartphone to keep them occupied. But as the child gets to the age where they are capable of going outside or doing something more constructive, staring slack-jawed and wide-eyed at their tablet becomes a concern for many parents.

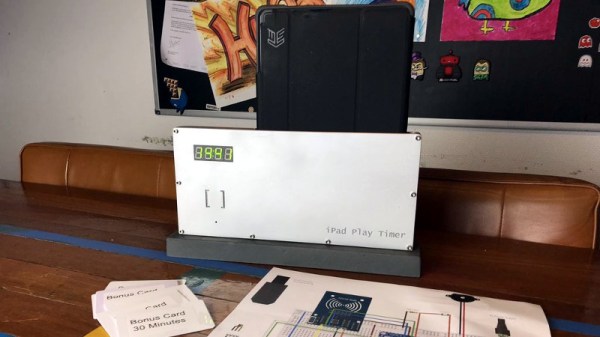
[Richard Garsthagen] is one such parent. He wanted a way to monitor and control how much time his children were using their iPad, so he came up with an automated system based on the ESP8266. Not only does it keep track of how long the tablet is being used, it even includes a reward system which allows the parent to add extra usage time for good behavior.

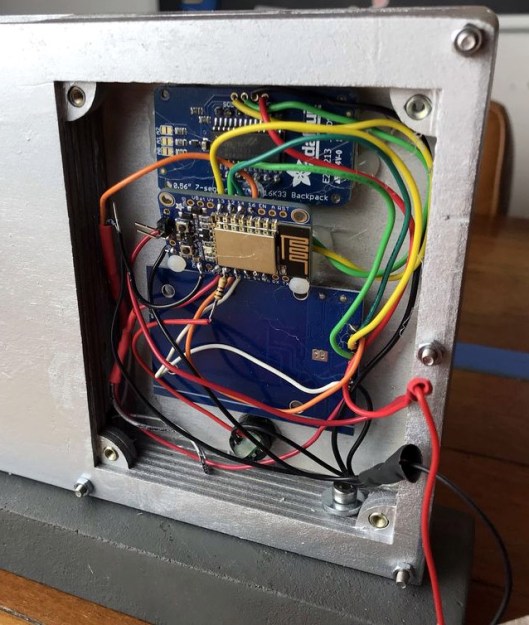
At the most basic level, the device is a sort of “holster” for the child’s tablet. When the tablet is placed in the slot, it presses a microswitch at the bottom of the cavity which stops the timer. When the switch is open, the LED display on the front of the device counts down, and the ESP8266 pushes notifications about remaining time to the child’s device via IFTTT.

Time can be added to the clock by way of RFID cards. The cards are given out as a reward for good behavior, completion of chores, etc. The child only needs to pass the card in front of the system to redeem its value. Once the card has been “spent”, the parent can reset it with their own special card.

It’s a very slick setup, making perfect use of the ESP8266. Reading the RFID cards, updating the timer, and using IFTTT’s API keeps the little board quite busy; [Richard] says it’s completely maxed out.

You might be wondering what happens when the clock reaches zero. Well, according to the video after the break…nothing. Once the time runs out, a notification simply pops up on the tablet telling them to put it away. Some might see this as a fault, but presumably it’s the part of the system where humans take over the parenting and give the ESP8266 a rest.

This isn’t the first time we’ve seen a microcontroller used to get the little hackers on schedule. At least (so far) none of them have gone full Black Mirror and started tracking when the kiddos are watching it.

Continue reading “ESP8266 Keeps Tabs On The Kid’s Tablets”