We’re used to attaching peripherals to our computers, when we have a need for them to interact with the world around them. An Arduino Uno needs a shield to turn on the lights, for example. Just sometimes though there is the potential for unintended interaction between a computer and the real physical world which surrounds it, and it’s one of those moments that [Alfredo Ortega] has uncovered in his talk at the EKO Party conference in Buenos Aires. He demonstrates how a traditional spinning-rust computer hard disk interacts with vibration in its surroundings, and can either become a rudimentary microphone, or be compromised by sound at its resonant frequency (PDF).
It seems that you can measure the response time of the hard drive head during a read operation without requiring any privilege escalation. This timing varies with vibration, so can be used to reconstruct the sound that the drive is facing. Thus it becomes a microphone, albeit not a very good one with a profoundly bass-heavy response. He goes on to investigate the effect of sound on the drive, discovering that it has a resonant frequency at which the vibration causes it to be unreadable.
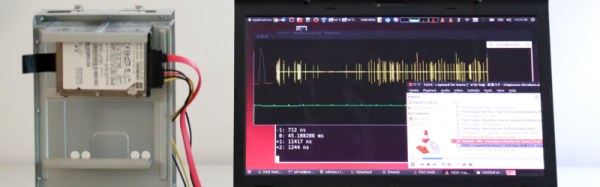
Sadly the talk itself appears not yet to be online, but given that previous years’ EKO talks are on YouTube it is likely that when the dust has settled you will be able to see it in full. Meanwhile he’s posted a video demonstration which we’ve posted below the break.
Continue reading “Your Hard Disk As An Accidental Microphone”