Touching Light With Haptic Feedback

Many of us have gone on a stationary romp through some virtual or augmented scape with one of the few headsets out in the wild today. While the experience of viewing a convincing figment of reality is an exciting sensation in itself, [Mark Lee] and [Kevin Wang] are figuring out how to tie other senses into the mix.

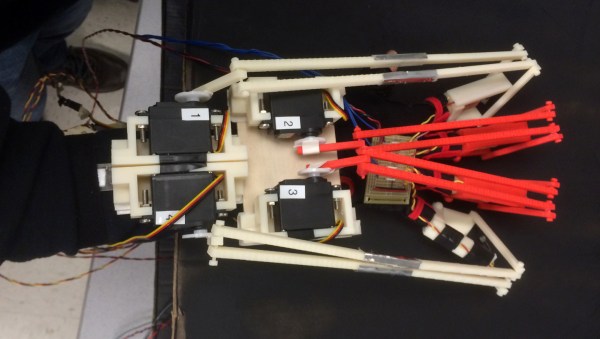
The duo from Cornell University have built a mechanical exoskeleton that responds to light with haptic feedback. This means the wearer can touch the sphere of light around a source as if it were a solid object. Photo resistors are mounted like antenna to the tip of each finger, which they filed down around the edges to receive a more  diffused amount of light. When the wearer of the apparatus moves their hand towards a light source, the sensors trigger servo motors mounted on the back of the hand to actuate and retract a series of 3D printed tendons which arch upward and connect to the individual fingers of the wearer. This way as the resistors receive varying amounts of light, they can react independently to simulate physical contours.

One of the goals of the project was to produce a working proof of concept with no more than 100 dollars worth of materials, which [Mark] and [Kevin] achieve with some cash to spare. Their list of parts can be found on their blog along with some more details on the project.
Continue reading “Touching Light With Haptic Feedback”

Crypto Photography And Custom Firmware

Imagine a camera that took encrypted pictures. If your camera is stolen, the only thing on the memory card would be random data that can only be unlocked with a key. If you hire a photographer, those images cannot be copied without the key. At the very least, it’s an interesting idea made impressive because this actually exists.

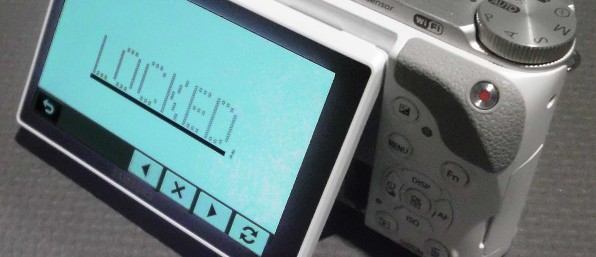
[Doug] recently got his hands on a Samsung NX300, a nice camera for the price that conveniently runs Linux and is kinda open-sourced by Samsung. With special firmware, [Doug] created public/private key encryption for this camera, giving only the person with the private key the ability to unlock the pictures taken with this camera.

[Doug] started his build by looking at the firmware for this camera, figuring out how to take everything apart and put it back together. With a few modifications that included encryption for all images taken with this camera, [Doug] repackaged the firmware and upgraded the camera.

The encryption firmware is available on the site, but considering how easily [Doug] was able to make this hack happen, and a great walkthrough of how to actually do it raises some interesting possibilities. The NX300 is a pretty nice camera that’s a little bit above the Canon PowerShot cameras supported by CHDK. It also runs Linux, so if you’re looking for something cool to do with a nice camera, [Doug] has a very good resource.

Counting Transistors In The Playstation

Over in Russia there are a few people doing extremely in-depth technical teardowns, and the latest is one of the most ambitious ever seen. The PSXDEV team is tearing into the heart of the original PlayStation (Google translatrix), looking at 300,000 transistors, and re-implementing the entire console in a logic level simulator.

While the CPU in the PSX is unique to that specific piece of hardware, a lot of this custom silicon can be found in other places. The core – a RISC LSI LR33300 – is documented in a few rare tomes that are somehow available for free on the Internet. Other parts of this chip are a little stranger. There is a bizarre register that isn’t documented anywhere, a Bus Unit that handles the access between various devices and peripherals, and a motion picture decompressor.

The reverse engineering process begins by de-encapsulating the CPU, GPU, sound processing unit, and CD-ROM controller, taking very high magnification photos of the dies, and slowly mapping out the semiconductors and metals to figure out what cells do what function, how they’re connected, and what the big picture is. It’s a painstaking process that requires combing through gigabytes of die shots and apparently highlight gates, wires, and busses with MS Paint.

The end result of all this squinting at a monitor is turning tracings of chips into logic elements with Logisim. From there, the function of the CPU can be understood, studied, and yes, eventually emulated down to the gate level. It’s an astonishing undertaking, really.

If this sort of thing sounds familiar, you’re right: the same team behind PSXDEV is also responsible for a similar effort focused on the Nintendo Entertainment System. There, the CPU inside the NES – the Ricoh 2A03 – was torn down, revealing the 6502 core, APU, DMA, and all the extra bits that made this a custom chip.

Thanks [Rasz] for the tip.

Hackaday Video: Wire Wrap 101 with Bil Herd

Wire Wrap 101

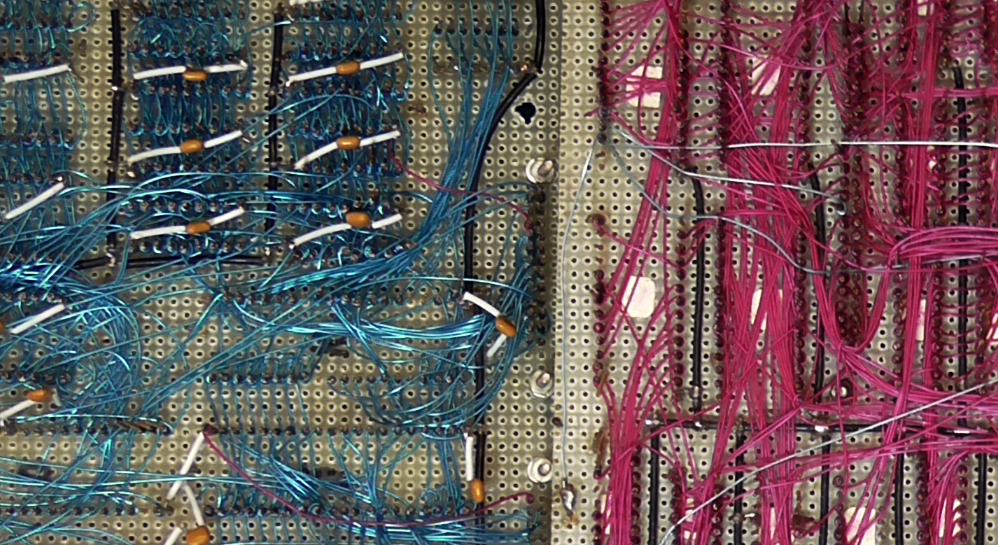
You might notice that many of my writings start with “Back in the day”. Not wanting to disappoint I will say that back in the day we used to use wire wrap technology when we needed a somewhat solid, somewhat reliably assembly. Given a readable schematic a good tech could return a working or near-working unit in a day or two depending on the completeness and accuracy of the schematic.

wire-wrap2

Properly done a wire wrap assembly is capable of fairly high speed and acceptable noise when the alternative option of creating a custom PCB would take too long or not allow enough experimentation.  Wire wrap is also used in several types of production, from telco to NASA, but I am all about the engineer’s point of view on this.

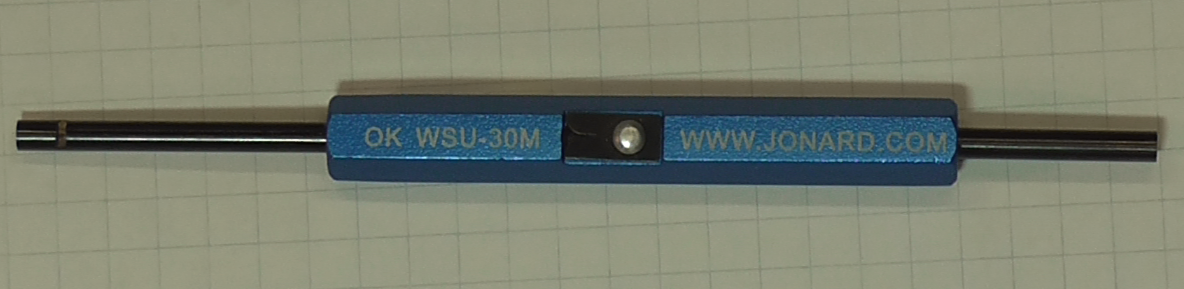
My first wire wrap tool and wire wrap wire came from Radio Shack in the mid 1970’s.  I still have the wire, because frankly its kind of cheap wire and I use it when it’s the only thing I can reach quickly when I need to make a jumper on a PCB. The tool is still around also, given the fact that I can’t find it at the moment the one shown here is my new wire wrap tool which is good for low quantity wrapping, unwrapping and stripping.

ww-tool2The skinny little wrap tool is okay for hobbyist as the wraps are fine with a little practice.  But I do recommend investing in high-quality wire.  A common wire available is Kynar® coated, a fluorinated vinyl that performs well as an insulator.

Before I go too much further, here’s the video walkthrough of wire wrap, its uses, and several demonstration. But make sure you also join me after the break where I cover the rest of the information you need to start on the road to wire wrap master.

Continue reading “Wire Wrap 101”

Meme Themed Pinball Machine – Much Flipping, Y U No Win?!

Summoning 4chans, 9gags, Reddits and other denizens of easily-digested content, Liberty Games stripped apart a dilapidated “Baby Doll” pinball arcade machine and turned it into this meme-spouting monstrosity. A complete redo of the vinyl and graphics to sport dozens of familiar internet tropes was first, then they had Shapeways create internal scenery and finally some electronics were added to spice things up.

We have seen PINMAME-based digital machines but this took a different path. Pinball machines this old pre-date common transistors so they rely on electro-mechanicals for everything. This made hacking the machine challenging so the team intercepted most of the signals and tied them into a Raspberry Pi with a Pi-face interface board. A videoscreen was added to the scoreboard, triggering all manner of memey videos and sounds according to actions performed and unlocked on the screen.

If you yearn for expired pranks of years gone by and are bad at pinball, you are in luck. Losing the game gets you Rickrolled – over and over again. On the plus side, Nyan Cat rockets away to bonuses and even the Admiral himself warns you of impending danger.

We resisted the urge to write this article as a chain of one meme to the next, you will get plenty of that from the well-documented project conversion and the following video. Someone in the comments will probably make a list of all memes.

Continue reading “Meme Themed Pinball Machine – Much Flipping, Y U No Win?!”

Towards More Interesting Instant Cameras

When [Ch00f] was getting jeans rung up at Nordstroms, he noticed how fast thermal receipt printers can put an image on a piece of paper. This observation isn’t unique to the circles [Ch00f] frequents – there are a few small receipt paper printers out there that connect to the Internet, iPhones, and a whole bunch of other Kickstarter-friendly keyword devices.

Nevertheless, a device that can make a hard copy of an image quickly and cheaply isn’t something you just stop thinking about. After rolling the concept around in his head for a few years, [Ch00f] finally came up with the perfect build – a camera.

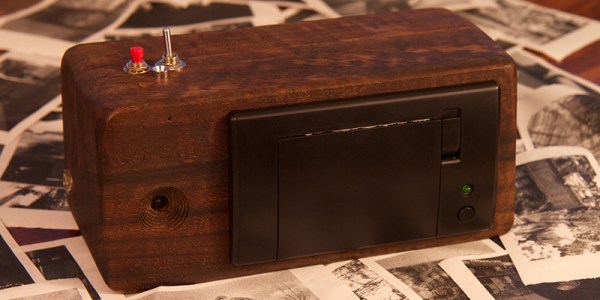
The hardware for the build is based around an STM32F4 Discovery board. It’s a bit overpowered for this sort of application, and this is one of [Ch00f]’s first adventures in ARM-land. The rest of the hardware consists of a thermal receipt printer and a JPEG camera, the latter of which replaced a cellphone CMOS camera module that was lost in a move.

A custom camera requires a custom enclosure, and for this [Ch00f] made something remarkable. The entire enclosure is CNC milled out of a beautiful piece of figured walnut. The end result looks far too good for a prototype, but it does polish up nicely with a bit of linseed oil.

Now [Ch00f] has an instant camera that takes the idea of a Polaroid and turns it into something that produces a print for tenths of a cent. There’s a time-lapse function – just a zip tie on the shutter button – filters with the help of highlighters, and the ability to record movies in flipbook format.

It’s a great project, and also something that will make for a great crowdfunding campaign. [Ch00f] has already started work on this. He already has a sleek, modern-looking website that requires far too much scrolling than should be necessary – the first step to a winning Kickstarter. [Ch00f] also learned a lot about ARMs, DMA, dithering, gamma correction, and the JPEG format, but that’s not going to get anyone to open up their wallet. You know what will? A slick video. You’ll find that below.

Continue reading “Towards More Interesting Instant Cameras”

Edge Lit Plastic Bike

Edge-Lit Clear Plastic Bike Combines Nighttime Riding Safety With Aurora Borealis Flair

Several years ago [dan] saw some plastic frame bikes designed by MIT students. Ever since he saw those bikes he thought it would be cool to make an edge-lit plastic framed bike.

The frame is made from 1/8″ and 3/8″ thick polycarbonate sheet. The parts were designed with tongue and grooves so they fit together nicely. The joints were glued to hold everything together. Holes were drilled in the edge of the plastic large enough to fit an LED. Once the LED was inserted in the hole, it was wired up and secured with hot glue. There are about 200 LEDs on the bike, powered by a constant current LED driver circuit that [dan] designed specifically for this project.

The build process was certainly not flawless. For example, the plastic holding the bottom bracket (where the crank and pedals attach) broke. This can be avoided by increasing the amount of material in that area prior to cutting out the pieces. [dan] was able to fiberglass his broken parts back together.

[dan] admits that the bike is heavy and a little wobbly, but is definitely ride-able. He did us a favor and made all his CAD files available to anyone that wants to make one themselves. If polycarbonate is too expensive for your blood, check out this bike make from cardboard.