Code Your Own Twitch Chat Controls For Robots — Or Just About Anything Else!

Twitch Plays Pokemon burst onto the then nascent livestreaming scene back in 2014, letting Twitch viewers take command of a Game Boy emulator running Pokemon Red via simple chat commands. Since then, the same concept has been applied to everything under the sun. Other video games, installing Linux, and even trading on the New York Stock Exchange have all been gameified through Twitch chat.
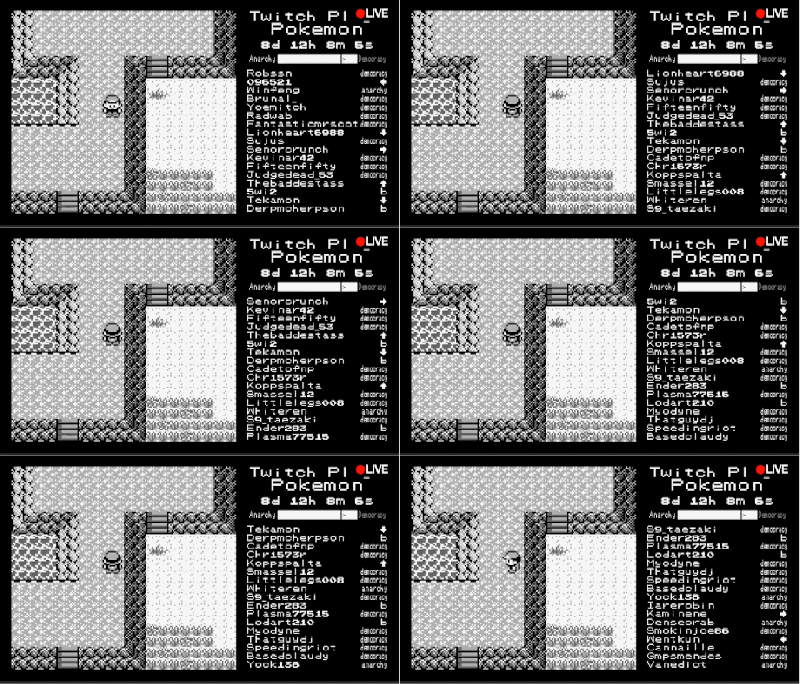
TwitchPlaysPokemon started a craze in crowdsourced control of video games, robots, and just about everything else.

You, thirsty reader, are wondering how you can get a slice of this delicious action. Fear not, for with a bit of ramshackle code, you can let Twitch chat take over pretty much anything in, on, or around your computer.

It’s Just IRC

The great thing about Twitch chat is that it runs on vanilla IRC (Internet Relay Chat). The protocol has been around forever, and libraries exist to make interfacing easy. Just like the original streamer behind Twitch Plays Pokemon, we’re going to use Python because it’s great for fun little experiments like these. With that said, any language will do fine — just apply the same techniques in the relevant syntax.

SimpleTwitchCommander, as I’ve named it on Github, assumes some familiarity with basic Python programming. The code will allow you to take commands from chat in two ways. Commands from chat can be tabulated, and only the one with the most votes executed, or every single command can be acted on directly. Actually getting this code to control your robot, video game, or pet viper is up to you. What we’re doing here is interfacing with Twitch chat and pulling out commands so you can make it do whatever you like. With that said, for this example, we’ve set up the code to parse commands for a simple wheeled robot. Let’s dive in.

Continue reading “Code Your Own Twitch Chat Controls For Robots — Or Just About Anything Else!”

The Sixtyforgan Proves That Church Organs Are Definitely Chiptune

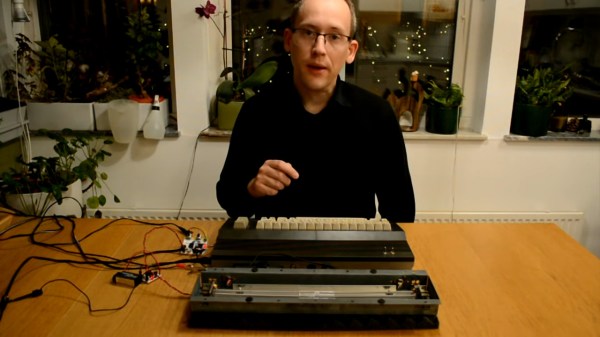
Church organs may be mechanically complicated and super old-school, but they share something in common with the earliest computer sound chips. In theory, and largely in practice, they produce very simple waveforms. The primary reason that church organs seem so full and rich compared to your old Commodore 64 is that they have the benefit of a whole church’s worth of reverb to fatten out the sound. [Linus] demonstrates this with the Sixtyforgan.

The Sixtyforgan is a Commodore 64 hooked up to a spring reverb tank. By running the relatively basic waveforms from the Commodore’s SID chip through this reverb, it’s possible to generate sounds that are eerily similar to those you might hear at your local Sunday service. While we won’t expect chiptune luminaries like [chipzel] to start busting out songs of praise at events like Square Sounds, it’s kind of awesome to think of the composers of antiquity rocking out to some mad Game Boy jams way back when.

It’s a great demonstration of the Commodore’s musical abilities, and we particularly like the application of the chromatic button layout borrowed from the accordion. We’d love to see this setup combined with an orchestra of the retro computers, like this demonstration playing The Sugar Plum Fairy. Alternatively, Billy Corgan on the Sixtyforgan playing Tiberius would be pretty great, too. Pretty sounding video after the break.

Continue reading “The Sixtyforgan Proves That Church Organs Are Definitely Chiptune”

A Milky Way Photo Twelve Years In The Making

Starting projects is easy. It’s the finishing part that many of us have trouble with. We can hardly imagine completing a project after more than a decade, but seeing the breathtaking results of [J-P Metsavainio]’s gigapixel composite image of our galaxy might just make us reconsider. The photograph, which we highly suggest you go check out in its full glory, has been in progress since 2009, features 1250 total hours of exposure time, and spans across 125 degrees of sky. It is simply spectacular.

Of course, it wasn’t an absolutely continuous effort to make this one image over those twelve years. Part of the reason for the extended time span is many frames of the mosaic were shot, processed, and released as their own individual pieces; each of the many astronomical features impressive in its own right. But, over the years, he’s filled in the gaps between and has been able to release a more and more complete picture of our galactic home.

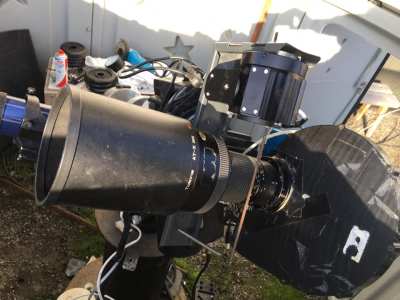
A project this long, somewhat predictably, eventually outlives the technology used to create it. Up until 2014, [Metsavainio]’s setup included a Meade 12-inch telescope and some modified Canon optics. Since then, he’s used a dedicated equatorial mount, astrocamera, and a Tokina lens (again, modified) with an 11-inch Celestron for longer focal lengths. He processes the frames in Photoshop, accounting for small exposure and color differences and aligning the images based on background stars. He’s had plenty of time to get his process down, though, so the necessary tweaking is relatively minor.

Amateur astronomy is an awesome hobby, and the barrier to entry is lower than it might seem. You can get started on a budget with the ubiquitous Raspberry Pi or with the slightly less practical Game Boy Camera. And if you’re just interested in viewing the cosmos, there are options for building your own telescope as well.

[via PetaPixel]

Hidden TV-Out On The Nintendo DS Lite

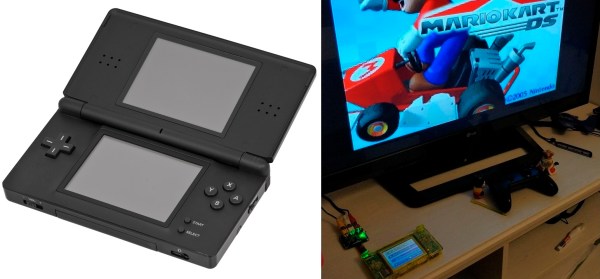
The DS Lite was one of Nintendo’s most popular handheld gaming consoles, but unbeknownst to all, it has a hidden feature that could have made it even more popular. Digging through the hardware and firmware, the [Lost Nintendo History] team discovered the System-on-Chip (SoC) in the DS Lite can output a composite video signal.

The SoC can output a 10-bit digital output running at 16.7 MHz, but it is disabled by the stock firmware early in the boot process, so custom firmware was required. It still needs to be converted to an analog signal, so a small adaptor board with a DAC (digital-analog converter) and op-amp is attached to the flex cable of the upper screen. A set of buttons on the board allow you to select which screen is displayed on the TV. The adaptor board is open source, and the Gerbers and schematics are available on GitHub.

The current version of the adaptor board disables the upper screen, but the [Lost Nintendo History] team is considering designing a pass-through board to eliminate this disadvantage. The TV-out mod can also be combined with the popular Macro mod, in which the upper screen is removed to turn it into a Game Boy Advance. The Nintendo DS is a popular hacking subject, and we’ve been covering them for well over a decade.

GBA Gets Homebrew USB Charging Upgrade

Sure there are pre-made kits to add a rechargeable battery and USB-C compatibility to Nintendo’s venerable Game Boy Advance, but [HorstBaerbel] thought he could throw together something similar for a fraction of the price. Plus, he wouldn’t have to wait on shipping. The end result might not be quite as polished, but it’s certainly impressive for what’s essentially a junk bin build.

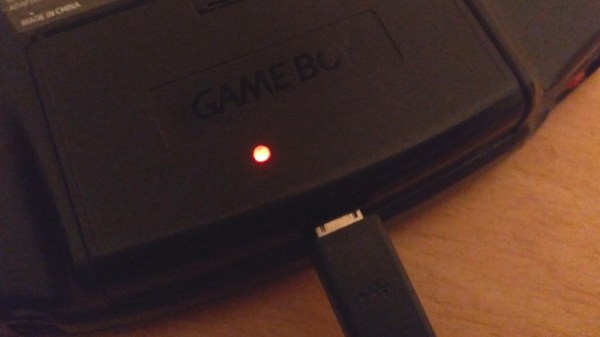
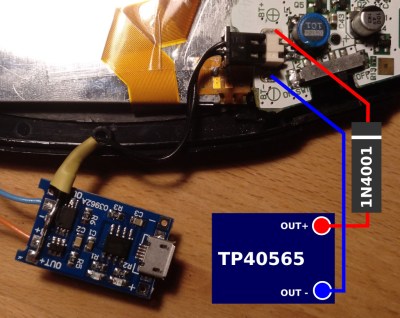
The star of the show is the popular TP4056 lithium-ion charger module. [HorstBaerbel] went with the more common micro USB version, but these boards are also available with USB-C should you want to embrace the future. The module fits nicely inside the original battery compartment while while still leaving room for a 1,000 mAh pouch cell. The 4.2 V output of the fully charged battery is a bit too high for the Game Boy’s liking, so he used the forward voltage drop of a diode to bring it down to a more acceptable 3.5 V.

Naturally this does waste a good deal of energy, especially compared to the DC-DC converters used in commercial offerings like the CleanJuice, but it still delivers a respectable seven hours of runtime. The only issue with this modification seems to be that you’ve got just five minutes to save your progress and shut down when the GBA’s low-battery light goes on; but what’s life without a little excitement?

While not nearly extreme as some of the other GBA modifications we’ve seen over the years, this project is yet another example of the seemingly unlimited hacking potential of Nintendo’s iconic Game Boy line.

A Look At How Nintendo Mastered Dual Screens

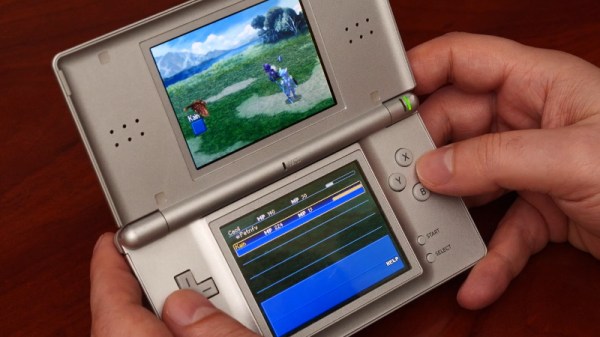
When it was first announced, many people were skeptical of the Nintendo DS. Rather than pushing raw power, the unique dual screen handheld was designed to explore new styles of play. Compared to the more traditional handhelds like the Game Boy Advance (GBA) or even Sony’s PlayStation Portable (PSP), the DS seemed like huge gamble for the Japanese gaming giant.

But it paid off. The Nintendo DS ended up being one of the most successful gaming platforms of all time, and as [Modern Vintage Gamer] explains in a recent video, at least part of that was due to its surprising graphical prowess. While it was technically inferior to the PSP in almost every way, Nintendo’s decades of experience in pushing the limits of 2D graphics allowed them to squeeze more out of the hardware than many would have thought possible.

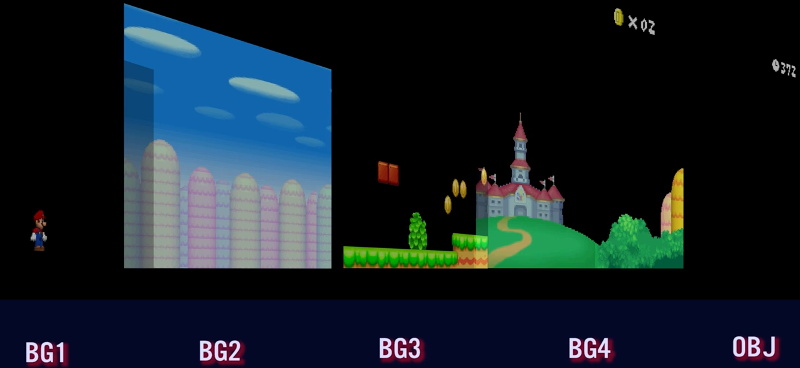
On one level, the Nintendo DS could be seen as a upgraded GBA. Developers who were already used to the 2D capabilities of that system would feel right at home when they made the switch to the DS. As with previous 2D consoles, the DS had several screen modes complete with hardware-accelerated support for moving, scaling, rotating, and reflecting up to four background layers. This made it easy and computationally efficient to pull off pseudo-3D effects such as having multiple backdrop images scrolling by at different speeds to convey a sense of depth.

On top of its GBA-inherited tile and sprite 2D engine, the DS also featured a rudimentary GPU responsible for handling 3D geometry and rendering. Hardware accelerated 3D could only used on one screen at a time, which meant most games would keep the closeup view of the action on one display, and used the second panel to show 2D imagery such as an overhead map. But developers did have the option of flipping between the displays on each frame to render 3D on both panels at a reduced frame rate. The hardware can also handle shadows and included integrated support for cell shading, which was a particularly popular graphical effect at the time.

By combining the 2D and 3D hardware capabilities of the Nintendo DS onto a single screen, developers could produce complex graphical effects. [Modern Vintage Gamer] uses the example of New Super Mario Bros, which places a detailed 3D model of Mario over several layers of moving 2D bitmaps. Ultimately the 3D capabilities of the DS were hindered by the limited resolution of its 256 x 192 LCD panels; but considering most people were still using flip phones when the DS came out, it was impressive for the time.

Compared to the Game Boy Advance, or even the original “brick” Game Boy, it doesn’t seem like hackers have had much luck coming up with ways to exploiting the capabilities of the Nintendo DS. But perhaps with more detailed retrospectives like this, the community will be inspired to take another look at this unique entry in gaming history.

Continue reading “A Look At How Nintendo Mastered Dual Screens”

A Miniature VT102 Running A Miniature PDP11

We spend a lot of time looking at retrocomputing in the form of gaming and home computers, but it’s true to say that minicomputers are less common than hardware projects. Perhaps it’s the size, cost, or even relative rarity of the original machines, but DEC minicomputers are a bit unusual around here. [Sprite_TM] hasn’t bought us a PDP11 or a VT102 terminal, but he’s done the next best thing in the form of a miniature working VT102 that also conceals a PDE11 emulator. It runs Tetris, which was originally developed on a Russian clone of the PDP11 architecture, and the 2.1BSD operating system.

Powering it all is an ESP32 module, and the PDP11 emulator is the well-known SIMH software. Porting this to the slightly limited environment of the microcontroller required a few compromises, namely the network stack and the configuration interface. In a particularly clever move [Sprite_TM] enabled BSD networking by writing an ESP32 layer that takes network packets via SIMD directly from BSD. It includes its own DHCP client and wireless network configuration tool, allowing an ancient UNIX-derived operating system from the 1970s to connect to the 21st century Internet through an emulator with its network code stripped out.

The case is a masterwork in OpenSCAD, a complete VT102 unit in miniature with a tiny LCD screen that when printed on a resin printer is a remarkable facsimile of the real thing. It doesn’t have a keyboard counterpart, but even with a miniature Bluetooth ‘board it still looks pretty impressive. In the video below the break he boots it into 2.1BSD, and importantly since it is a server operating system, logs into it from his laptop and plays a game of Zork.

[Sprite_TM] has brought us so many impressive projects over the years using the ESP32 and other parts. Maybe you have a favorite, but for us it’s the PocketSprite Game Boy-like tiny handheld console.

Continue reading “A Miniature VT102 Running A Miniature PDP11”