Hackaday Podcast 093: Hot And Fast Raspberry Pi, Dr. Seuss Drone, M&M Mass Meter, And FPGA Tape Backup

Hackaday editors Mike Szczys and Elliot Williams wrangle the epic hacks that crossed our screens this week. Elliot ran deep on overclocking all three flavors of the Raspberry Pi 4 this week and discovered that heat sinks rule the day. Mike exposes his deep love of candy-coated chocolates while drooling over a machine that can detect when the legume is missing from a peanut M&M. Core memory is so much more fun when LEDs come to play, one tiny wheel is the power-saving secret for a very strange multirotor drone, and there’s more value in audio cassette data transfer than you might think — let this FPGA show you how it’s done.

Take a look at the links below if you want to follow along, and as always, tell us what you think about this episode in the comments!

Direct download (~70 MB)

Places to follow Hackaday podcasts:

Continue reading “Hackaday Podcast 093: Hot And Fast Raspberry Pi, Dr. Seuss Drone, M&M Mass Meter, And FPGA Tape Backup”

Proper Cassettes For Your FPGA Retrocomputer

You can tell the age of someone in our community with a simple question: what were the first removable data storage media you used? Punched cards for the venerable, cassettes for the middle-aged, floppies for the thirtysomethings, Flash cards for the twentysomethings, and maybe even “What’s a removable storage medium?” for the kids brought up on cloud services.  Even with refreshed interest in retrocomputing the cassette hasn’t made a comeback, but maybe that owes something to the hardware. Createing a cassette interface for an FPGA is a task that’s often overlooked, and that’s a project [zpekic] has tackled.

Cassette data recordings are frequency shift keyed, with the 0 and 1 of the binary information represented by different tones. An expected solution to detect these might be to use a Fourier transform, but instead he opts for a simpler solution of counting zero crossings and timing their interval. The resulting stream of data is fed into a UART from which the data itself can be reconstructed. All this is implemented on a Mercury FPGA board which contains a Xilinx Spartan 3A FPGA, but it’s a technique that could be used on other devices too.

So your FPGA retrocomputer deserves an authentic cassette interface, and now it can have one. We’d be especially impressed if all this 2020s wizardry could produce a more stable chuntey field, but we guess that might take a bit more work.

As a final aside, the project is dedicated to the memory of the pioneering Yugoslavian broadcaster [Zoran Modli], whose innovative 1980s radio show featured broadcasts of tape software for the computers of the time including our Hackaday colleague [Voja Antonić]’s Galaksija. Broadcasting software over the radio? That’s a cool hack.

Throwing Down The FPGA Gauntlet

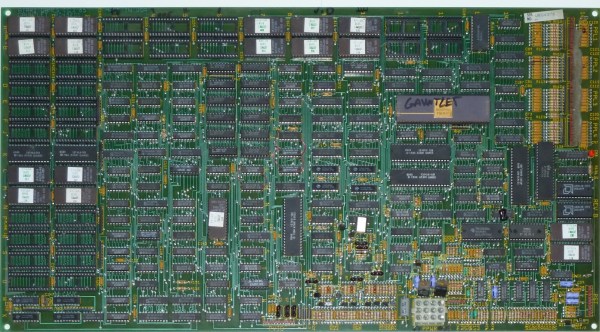
Gauntlet is a well-known arcade game from 1985 with many sequels and ports to more modern architectures such as Xbox and GameCube. Thanks to its popularity and relative age, the original arcade cabinet is well documented with the schematics available online. It was regarded as the most complex and ambitious hardware Atari had ever developed at the time it was released. In what can only be described as an absolute labor of love, [Alex] has recreated the arcade hardware on the Pipistrello FPGA board.

The project can actually play Gauntlet, Gauntlet II, and Vindicators II as they all ran on the same hardware. Four joysticks are supported so up to four players can play, though the EEPROM is emulated in RAM so high scores are reset when the device is powered down. The FPGA is almost out of space and can’t quite squeeze in the SRAM needed. So an SRAM expansion daughterboard is required; nothing a quick board run from our favorite purple PCB manufacturer can’t solve.

In the repo is an incredible write-up detailing the system, how it works, and the process of debugging it. This project also includes a complete simulation of the TMS5220 Voice Synthesis Processor, as Gauntlet was the first coin-operated arcade machine with a voice synthesizer. Getting the video correct was particularly tricky and it took several tries to get the color palette and motion looking right. Since [Alex] didn’t have access to an original Gauntlet arcade cabinet, they had to make do with MAME. After writing a test to make sure the FPGA was working correctly, there were differences between the MAME emulation and the FPGA output. To help out, [Colin Davies] came to the rescue. After [Colin] hooked up an original Gauntlet Arcade PCB with the motion test loaded up, the test showed that the FPGA had the correct behavior.

During development [Alex] actually simulated several frames of the game in ISIM (at a whopping 90 seconds per frame or 90 minutes per in-game second). Using ISIM allowed them to compare system state to MAME and validate the design much faster as they could better inspect the interworkings of the different modules. Using a clever trick of grabbing state from MAME after a few seconds, they primed the FPGA state and saved themselves a few hours of simulation.

If you’re looking to get into old hardware style arcade game development, give the browser-based 8bitworkshop IDE a spin. Or start with something a little smaller in scope and size with this adorable mini CRT arcade cabinet.

Continue reading “Throwing Down The FPGA Gauntlet”

Bunnie’s Betrusted Makes First Appearance As Mobile, FPGA-Based SoC Development Kit

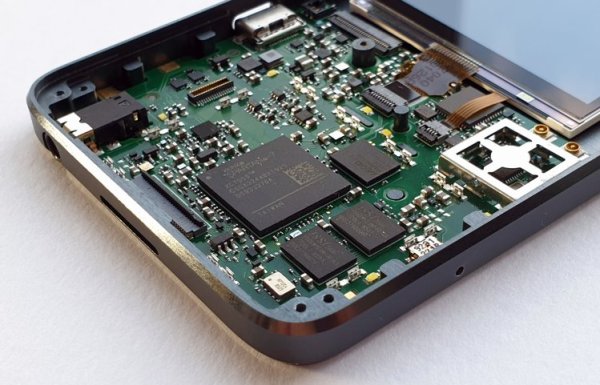
Recently, [Bunnie Huang] announced his Precursor project: a spiffy-looking case housing a PCB with two FPGAs, a display, battery and integrated keyboard. For those who have seen [bunnie]’s talk at 36C3 last year, the photos may look very familiar, as it is essentially the same hardware as the ‘Betrusted’ project is intended to use. This also explains the name, with this development kit being a ‘precursor’ to the Betrusted product.

In short, it’s a maximally open, verifiable, and trustworthy device. Even the processor is instantiated on an FPGA so you know what’s going on inside the silicon.

He has set up a Crowd Supply page for the Precursor project, which provides more details. The board features a Xilinx Spartan 7 (XC7S50) and Lattice iCE40UP5K FPGA, 16 MB SRAM, 128 MB Flash, integrated WiFi (Silicon Labs WF200-based), a physical keyboard and 1100 mAh Lio-Ion battery. The display is a 200 ppi monochrome 336 x 536 px unit, with both the display and keyboard backlit.

At this point [bunnie] is still looking at how much interest there will be for Precursor if a campaign goes live. Regardless of whether one has any interest in the anti-tamper and security features, depending on the price it might be a nice, integrated platform to tinker with.

An FPGA Video Player Built Just For Fun

Sometimes, projects are borne out of neccessity; a fix for a problem that needs to be solved. Other times, they’re done just for the love of creation and experimentation. [ultraembedded]’s FPGAmp media player falls under the latter, and served as a great learning experience along the way.

The aim of FPGAmp is to play back a variety of media files on the Arty A7 development board, based around the Xilinx Artix-7 FPGA. Capable of playing back MJPEG video at 800 x 600 resolution and 25 fps, it’s also able to play back MP3s as well for stereo audio. Demonstrating the device on Twitter, [ultraembedded] notes that the method of using an LED to do SPDIF optical audio output isn’t legit, but does work. A later update switches to using a dedicated audio output board with the Arty A7 platform, featuring an excellent song from The Cardigans.

Using a RISC V processor core and a hardware JPEG decoder, we imagine [ultraembedded] really sharpened their FPGA skills with this project. Particularly in the wake of the sale of ARM to NVIDIA, RISC V continues to gain relevance in the hardware community. We were lucky enough to feature a keynote at last year’s Supercon, with Megan Wachs speaking on the technology. Video after the break.

Continue reading “An FPGA Video Player Built Just For Fun”

What’s Inside An FPGA? Ken Shirriff Has (Again) The Answer

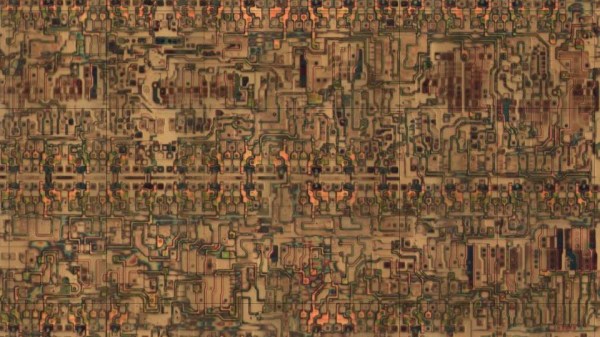
FPGAs are somewhat the IPv6 of integrated circuits — they’ve been around longer than you might think, they let you do awesome things that people are intrigued by initially, but they’ve never really broke out of their niches until rather recently. There’s still a bit of a myth and mystery surrounding them, and as with any technology that has grown vastly in complexity over the years, it’s sometimes best to go back to its very beginning in order to understand it. Well, who’d be better at taking an extra close look at a chip than [Ken Shirriff], so in his latest endeavor, he reverse engineered the very first FPGA known to the world: the Xilinx XC2064.

If you ever wished for a breadboard-friendly FPGA, the XC2064 can scratch that itch, although with its modest 64 configurable logic blocks, there isn’t all that much else it can do — certainly not compared to even the smallest and cheapest of its modern successors. And that’s the beauty of this chip as a reverse engineering target, there’s nothing else than the core essence of an FPGA. After introducing the general concepts of FPGAs, [Ken] (who isn’t known to be too shy to decap a chip in order to look inside) continued in known manner with die pictures in order to map the internal components’ schematics to the actual silicon and to make sense of it all. His ultimate goal: to fully understand and dissect the XC2064’s bitstream.

Of course, reverse engineering FPGA bitstreams isn’t new, and with little doubt, building a toolchain based on its results helped to put Lattice on the map in the maker community (which they didn’t seem to value at first, but still soon enough). We probably won’t see the same happening for Xilinx, but who knows what [Ken]’s up to next, and what others will make of this.

Write In PipelineC For FPGAs

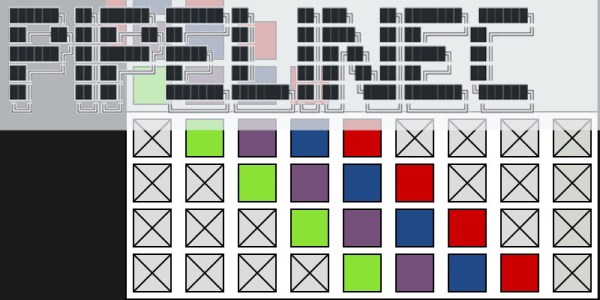
The best thing about field-programmable gate arrays (FPGAs), when you have a massively parallel application, is that everything runs in parallel. The worst thing about FPGAs, when you need a lot of stuff to happen in sequence, is that everything runs in parallel. If you have a multi-step computation, for example, you need to break it up into chunks, figure out the timing between them, and make sure that each chunk clears before it is fed new data. This is pipelining, and taking care of all the low-level details yourself is one of the things that can sometimes make FPGA a four-letter word beginning with “F”.

[Julian Kemmerer]’s PipelineC is a C-like language that compiles down into VHDL so that you can use it in an FPGA, and it does the pipelining for you. He has examples of how you’d use it to construct a simple state machine, and after you’ve written a few hundred state machines the long way, you’ll know why this is a good idea.

PipelineC isn’t the only high level synthesis language out there, but it sits in an interesting place. It doesn’t take care of memory or define interfaces. It just takes care of pipelining. We haven’t tried it out yet, but it looks like it would be interesting for moderately complex projects, where the mechanics of pipeline signalling is a hassle, but you don’t require the deluxe treatment. Check it out, and if you like it, let us (and [Julian], natch) know.

If you want to dive head-first into pipelining, give [Al Williams]’ two-part mini-series a look.

Pipeline graphic CC BY-SA 3.0 by CBurnett