Portable WiFi Penetration Testing

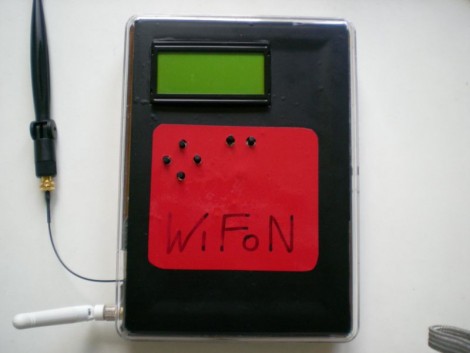
Inside this box you’ll find a La Fonera wireless access point. [Emeryth] and his band of miscreants built this portable device for WiFi security testing. The AP is running OpenWRT and has been set up to use the 16×4 character display as a terminal. An ATmega88 connects the LCD as well as six buttons to the UART of the La Fonera. From there, a set of Ruby scripts takes care of the communication protocol. As you can see after the break, this setup allows you to scan the area for WiFi, showing channel, SSID, and MAC information. Although not specifically outlined in the video we suspect there’s some more devious tricks up its sleeve too.
Continue reading “Portable WiFi Penetration Testing” →

RS232 And RS485 Networking – No Code Required

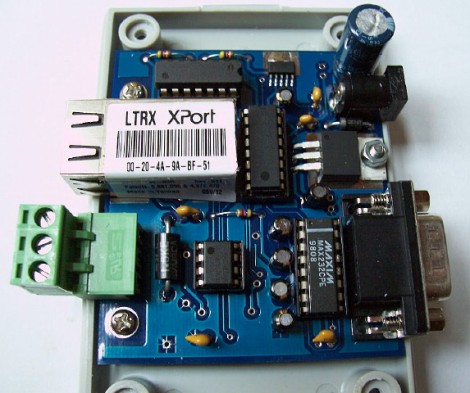
Here’s a serial to Ethernet module that you won’t have to write firmware to build. It uses a Lantronix XPORT module which takes care of all the work for you, including an embedded webserver. Both RS232 and RS485 data buses are connected to the XPORT serial input via a level converter to step the signal down to 3.3V. This solution comes at a price because of the ethernet module, but it would make a nice prototyping tool for testing projects that work on the two serial protocols.

Building A Yagi-Uda Antenna

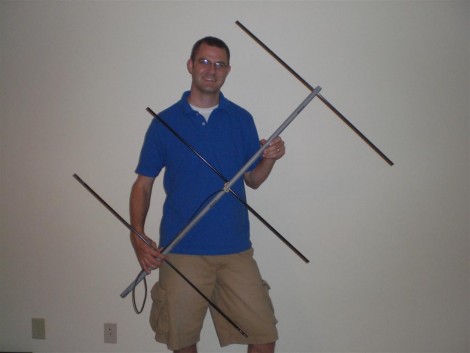
[Tommy Gober] built this Yagi-Uda antenna that has some handy design features. The boom is a piece of conduit with holes drilled in the appropriate places. The elements are aluminum arrow shafts; a good choice because they’re straight, relatively inexpensive, and they have #8-32 screw threads in one end. He used some threaded rod to connect both sides of the reflector and director elements. The driven elements are mounted offset so that a different machine screw for each can be connected to the appropriate conductor of the coaxial cable. The standing wave ratio comes in right where it should meaning he’ll have no trouble picking up those passing satellites as well as the International Space Station.

A Collection Of Quick Line-followers

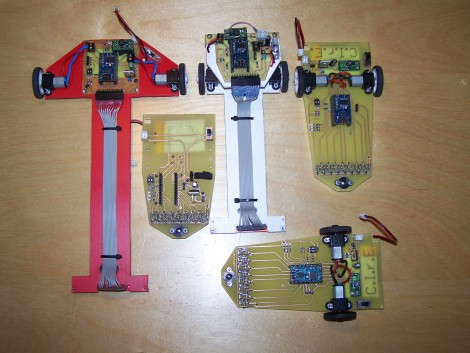
Here’s a nice collection of line-following robots (translated). They’re fast and they stay on track even through sharp turns. They center around a Baby Orangutan board which features an ATmega328 microcontroller and two motor driver channels. These drive the geared motors and use optical sensors to track a dark line on a light surface. There’s plenty of build and testing information (translated) if you’re interested in the gory details. Or just jump past the break to see the red on doing its thing.

Continue reading “A Collection Of Quick Line-followers” →

Making The Bulbdial Clock Touch Sensitive

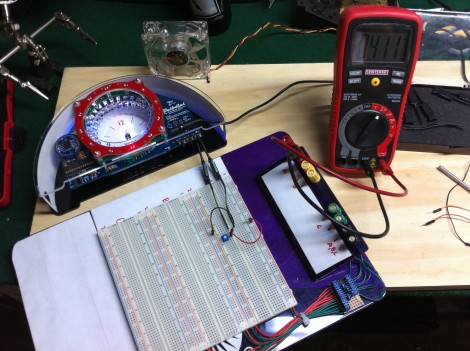
We never thought about it before, but having the controls on the bottom of a clock is a bit of an inconvenience. [Alex Whittemore] mutes the LEDs on his clock each night and after a while, decided he should make the mute button into a touch strip on the case. You’ll remember that the Bulbdial clock uses colored LEDs to create the effect of a sun-dial, casting colored shadows for each hand of the clock. It makes sense that this would put off a pretty good amount of light at night. [Alex’s] original thought was to use a capacitive touch sensor but complexity and cost were in his way. What he ended up with is a resistive touch switch based off of two metal strips. He used metal repair tape but suggests copper foil as he was unable to solder to tape. When your finger touches the two strips it completes the circuit for the base of a transistor, which in turn grounds the mute button on the clock. Cheap, simple, and illustrated in the video after the break.

Continue reading “Making The Bulbdial Clock Touch Sensitive” →

Porting Code To MSP430

I took a little time to look into porting code written for AVR in order to run it on the MSP430 architecture. It’s easier than you think, being mostly small differences like an extra step to enable pull-up resistors. But there is a lot to be learned in order to transition away from using EEPROM.

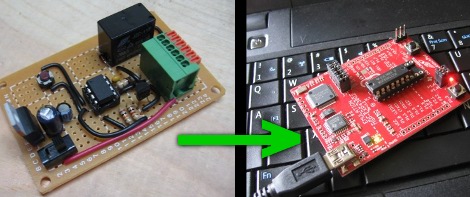
Since the TI chips don’t have EEPROM you need to use the Info Flash, a topic which I detail in the article linked at the top. This flash memory must be erased before writing because a write operation can only change high bits to low, not the other way around. And an erase operation clears an entire 64 kB segment, not just the bytes you want to write to. It’s different but manageable.

Oh, and if you were wondering, I ported the code I wrote for the garage door coded entry project.

EyeMario, Play Mario With Your Eye Movements

[youtube=http://www.youtube.com/watch?v=4j2kw5MJK24]

The folks at Waterloo Labs have delivered a quite amusing project where they built a system to control Mario with eye movements. Unlike the other eye movement systems we’ve seen that use imaging to detect where you are looking, this one is using electrodes on muscles in your face. Not only do they supply a fairly amusing video, they also have a pretty good amount of detail on the project site. Be sure to click on the links in the “additional resources” section at the bottom if you want hardware and software details on the build. The last time we saw these folks, they were using real guns to control video games.

[via Procrastineering]