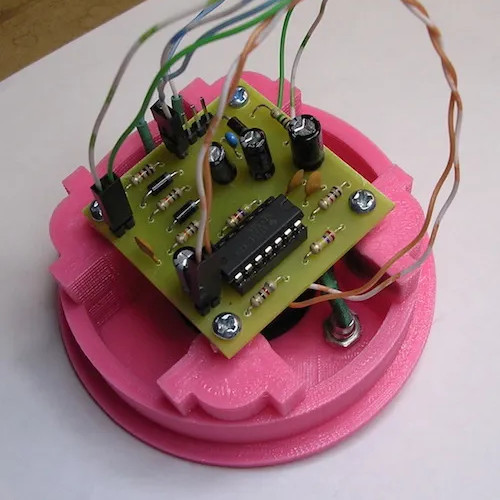
Plasma Cutting And 3D Printing Team Up To Make Bending Thick Sheet Steel Easier

Metalworking has always been very much a “mixed method” art. Forging, welding, milling, grinding; anything to remove metal or push it around from one place to another is fair game when you’ve got to make something fast. Adding in fancy new tools like CNC plasma cutting and computer-aided drafting doesn’t change that much, although new methods often do call for a little improvisation.

Getting several methodologies to work and play well together is what [tonygoacher] learned all about while trying to fabricate some brackets for an electric trike for next year’s EMF Camp. The parts would have been perfect for fabrication in a press brake except for the 4 mm thickness of the plate steel, which was a little much for his smallish brake. To make the bending a little easier, [tony] made a partial-thickness groove across the plasma-cut blank, by using a reduced power setting on the cutter. This worked perfectly to guide the brake’s tooling, but [tony] ran into trouble with more complicated bends that would require grooves on both sides of the steel plate.

His solution was to 3D print a couple of sacrificial guide blocks to fit the bed of the press brake. Each guide had a ridge to match up with a guide groove, this allowed him to cut his partial grooves for both bends on the same side of the plate but still align it in the press brake. Yes, the blocks were destroyed in the process, but they only took a few minutes to print, so no big deal. And it’s true that the steel tore a little bit when the groove ended up on the outside radius of the bend, but that’s nothing a bead of weld can’t fix. Good enough for EMF is good enough, after all.

The brief video below shows the whole process, including [tony]’s interesting SCARA-like CNC plasma cutter, which we’re a little in love with now. This isn’t the first time we’ve seen 3D prints used as tools in metalworking, of course, but we picked up some great tips from this one. Continue reading “Plasma Cutting And 3D Printing Team Up To Make Bending Thick Sheet Steel Easier”

Paperless RFID Tags Are Carbon-Based

RFID tags are great little pieces of technology, but unfortunately, the combination of paper, metal, and silicon means they are as bad as some modern pregnancy tests — single-use electronic devices that can’t be recycled.

Some prototypes of the RFID tags.

A team of design program graduates from London’s Royal College of Art aim to change that. They’ve devised a mostly-paper RFID tag that’s as safe to recycle as a piece of paper with a pencil doodle on it.

The team’s startup, PulpaTronics have created a design that uses paper as its only material. The circuitry is marked on the paper with a laser set to low power, which doesn’t burn or cut the paper, but instead changes to composition to be conductive.

PulpaTronics were also able to create a chip-less RFID tag much the same way, using a pattern of concentric circles to convey information. The company estimates that these tags will reduce carbon dioxide emissions by 70%, when compared with traditional RFID tags. They’ll also cost about half as much.

RFID is used in many industries, but it’s also great for hacking. Here’s an 8-track player that harnesses the power of RFID tags to play songs off of an SD card.

Thanks for the tip, [gir.st]!

Build An Easy Replica Of HAL 9000

Adafruit’s PropMaker Feather is a microcontroller board designed specifically for building props with electronic features. Thus, what better way to show it off than by building a nifty replica of the most menacing AI ever to roam this solar system? That’s right, it’s the Adafruit HAL9000 build!

Following the 80/20 rule, this version is intended to be reasonably authentic while remaining affordable and easy to build. It’s built around Adafruit’s existing Massive Red Arcade Button, which looks like a decent simulacra of HAL9000’s foreboding, perceptive lens. It’s placed in a case assembled from laser-cut acrylic, with a neat inkjet-printed label on top. Where previously, sound effects were courtesy of an Arduino Uno with a Wave Shield, this version uses the PropMaker Feather, based on the RP2040, instead. It’s actually possible to assemble with zero soldering thanks to quick-connect wires and screw terminals on the PropMaker Feather.

Fundamentally, if you’re building a simple prop that needs audio or LEDs, the PropMaker Feather could be a useful tool for the job. Alternatively, consider building a HAL replica with more capability, like controlling your home. Just don’t give it too much responsibility—we all know how that ends. Video after the break.

Continue reading “Build An Easy Replica Of HAL 9000”

The Many Ways To Play Colossal Cave Adventure After Nearly Half A Century

Born from a passion for caving and the wish to turn this into a digital adventure for all ages, Colossal Cave Adventure has grown from its quiet introduction in 1976 by William Crowther into the expanded game that inspired countless others to develop their own take on the genre, eventually leading to the realistically rendered graphical adventures we can play today. Yet even Colossal Cave Adventure has recently got a refresh in the form of a 3D graphical version, which has led [Bryan Lunduke] to take a look at how to best revisit the original text adventure.

Your Colossal Cave Adventure awaits... (Credit: Bryan Lunduke)
Your Colossal Cave Adventure awaits… (Credit: Bryan Lunduke)

For those who are on Linux or a BSD system, the easiest way is to hop over to the package manager and install Colossal Cave Adventure straight away with the package bsdgames on Debian-based systems, or colossal-cave-adventure on others. A port by Eric S. Raymond of the 1995 version of the game can also be found as Open Adventure, and there’s a 1990-era DOS version you can experience on real hardware or even in a browser window, if that’s your thing. Or get it for your Amiga, Macintosh or OS/2. These days you can even get ready-to-use maps of the entire cave and surroundings, which along with walkthroughs can make things far too easy. Continue reading “The Many Ways To Play Colossal Cave Adventure After Nearly Half A Century”

PC Fan Controller Works On Most Operating Systems

For better or worse, most drivers for PC-related hardware like RGB components and fan controllers are built for Windows and aren’t generally of the highest quality. They’re often proprietary and clunky, and even if they aren’t a total mess they generally won’t work on Linux machines at all, or even on a headless setup regardless of OS. This custom fan controller, on the other hand, eschews the operating system almost entirely in favor of an open source fan controller board that can be reached over a network instead.

The project’s creator, [Sasa Karanovic], experimented with fan splitters to solve his problems, but found that these wouldn’t be the ideal solution given the sheer number of fans he wanted in his various computers, especially in his network-attached storage machine. For that one he wanted ten fans, with control over them in custom groups that would behave in certain ways depending on what the computer was doing. His solution uses two EMC2305 five-fan controller chip which communicates over I2C on a custom PCB with a RP2040 at the center. This allows the hardware to communicate with USB to the host computer for updating firmware and controlling over the network. There’s also a 1-wire and I2C bus exposed in case any external sensors need to be integrated into this system as well. To get power for all of those fans, the board uses a SATA connector to get power from the computer’s power supply.

With the PCB built and all of the connections to the host computer made, the custom board is able to control up to 10 fans in any custom configuration without needing a monitor or a driver since it is accessible over the network through an API. It’s also open-source so any changes to the firmware or hardware can easily be made for most air-cooled PC situations. If you’re less concerned about the internal case temperature and more concerned about all the heat your PC is dumping into a living space, you might want to look into venting your PC outside instead.

Continue reading “PC Fan Controller Works On Most Operating Systems”

Mechanical Scorpion Robot Is A Cute Little Critter

Plenty of robots stick to a pair of driven wheels to keep locomotion simple. If you’re bold though, or just like creepy crawlies, you might instead appreciate this cute scorpion robot build.

Real scorpions have eight legs, but this design has just four legs, which keeps the parts count lower and control much simpler. It still looks a bit like a scorpion, though, by virtue of its cute little tail. It’s not just for show either—it mounts a camera which can be positioned at different angles via the tail’s servos. A Raspberry Pi Zero W is the brains of the operation, and allows the robot to be controlled via WiFi or Bluetooth.

Naturally, there is some additional complexity to the walking design. A full ten servos are used across the multiple legs and tail linkages. Most of the parts are 3D printed, however, so it’s quite easy to build at home once you’ve got all the parts to hand.

The robot critter has a shuffling gait, but we’d love to see it modified to walk and climb in different manners with the right programming and mechanical modifications. We’ve featured some other great creepy crawly builds over the years, too. Video after the break.

Continue reading “Mechanical Scorpion Robot Is A Cute Little Critter”

3D Printed Dump Truck Carries Teeny Loads

What do you do when you already have a neat little radio-controlled skid-steer loader? Well, if you’re [ProfessorBoots], you build a neat little dump truck to match!

The dump truck is built out of 3D printed components, and has proportions akin to a heavy-duty mining hauler. The dump bed and wheels were oversized relative to the rest of the body to give it a more cartoonish look.

An ESP32 is the brains of the operation. The build is powered by a nifty little 3.6 V rechargeable lithium-ion battery with an integral Micro USB charge port. It’s paired with a boost converter to provide a higher voltage for the servos and motors. Drive is to the rear wheels, thanks to a small DC gear motor. Unlike previous skid-steer designs from [ProfessorBoots], this truck has proper servo-controlled steering. The printed tires are wrapped in rubber o-rings, which is a neat way to make wheels that grip without a lot of fuss. The truck also has a fully-functional dump bed, which looks great fun to play with.

The final build pairs great with the loader that [ProfessorBoots] built previously.

Continue reading “3D Printed Dump Truck Carries Teeny Loads”