Low Cost Metal 3D Printing By Electrochemistry

[Billy Wu] has been writing for a few years about electrochemical 3D printing systems that can handle metal. He’s recently produced a video that you can see below about the process. Usually, printing in metal means having a high-powered laser and great expense. [Wu’s] technique is an extension of electroplating.

Boiling down the gist of the process, the print head is a syringe full of electroplating solution. Instead of plating a large object, you essentially electroplate on tiny areas. The process is relatively slow and if you speed it up too much, the result will have undesirable properties. But there are some mind-bending options here. By using print heads with different electrolytes, you can print using different metals. For example, the video shows structures made of both copper and nickel. You can also reverse the current and remove metal instead of depositing it.

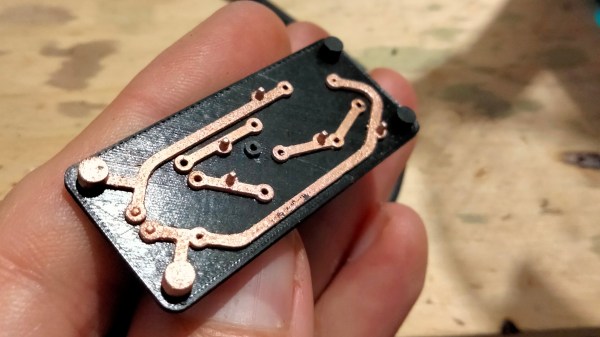
This looks like something you could pretty readily replicate in a garage. Electroplating is well-understood and the 3D motion parts could be a hacked 3D printer. Sure, the result is slow but, after all, slow is a relative term. You might not mind taking a few days to print a metal object compared to the cost and trouble of creating it in other ways. Of course, since this is copper, we also have visions of printing circuit board traces on a substrate. We imagine you’d have to coat the board with something to make it conductive and then remove that after all the copper was in place. When you build this, be sure to tell us about it.

We’ve seen electroplating pens before and that’s really similar to this idea. Of course, you can also make your 3D prints conductive and plate them which is probably faster but isn’t really fully metal.

Continue reading “Low Cost Metal 3D Printing By Electrochemistry”

The US Air Force Wants Your 3D Scanner Ideas

One key piece of technology from Star Trek is the replicator, a machine that 3D prints up almost anything using some hazily-defined high technology. You have to wonder though, how did the patterns for Earl Grey tea or a spare part for a shuttlecraft intercooler come to exist in the first place. Maybe someone designed them, or perhaps they scanned the real articles. The US Air Force is betting on the latter, and they’ve asked for white papers and proposals for innovative methods to scan objects for 3D printing.

It isn’t surprising military planners would like to have effective 3D printing. After all, you can’t carry every spare part you might need into a theater of operation. Not to mention spares for your friends in joint operations or for enemy gear you might happen to capture. Having a truck that could turn out whatever your troops need is an attractive proposition. Continue reading “The US Air Force Wants Your 3D Scanner Ideas”

Getting Closer To Metal 3D Printing

Most of our 3D printers lay down molten plastic or use photosensitive resin. But professional printers often use metal powder, laying out a pattern and then sintering it with a laser. [Metal Matters] is trying to homebrew a similar system (video, embedded below). And while not entirely successful, the handful of detailed progress videos are interesting to watch. We particularly enjoyed the latest installment (the second video, below) which showed solutions to some of the problems.

Because of the complexity of the system, there are small tidbits of interest even if you don’t want to build a metal printer. For example, in the most recent video, a CCD camera gives up its sensor to detect the laser’s focus.

Continue reading “Getting Closer To Metal 3D Printing”

3D Printed Gesture-Controlled Robot Arm Is A Ton Of Tutorials

Ever wanted your own gesture-controlled robot arm? [EbenKouao]’s DIY Arduino Robot Arm project covers all the bases involved, but even if a robot arm isn’t your jam, his project has plenty to learn from. Every part is carefully explained, complete with source code and a list of required hardware. This approach to documenting a project is great because it not only makes it easy to replicate the results, but it makes it simple to remix, modify, and reuse separate pieces as a reference for other work.

[EbenKouao] uses a 3D-printable robotic gripper, base, and arm design as the foundation of his build. Hobby servos and a single NEMA 17 stepper take care of the moving, and the wiring and motor driving is all carefully explained. Gesture control is done by wearing an articulated glove upon which is mounted flex sensors and MPU6050 accelerometers. These sensors detect the wearer’s movements and turn them into motion commands, which in turn get sent wirelessly from the glove to the robotic arm with HC-05 Bluetooth modules. We really dig [EbenKouao]’s idea of mounting the glove sensors to this slick 3D-printed articulated gauntlet frame, but using a regular glove would work, too. The latest version of the Arduino code can be found on the project’s GitHub repository.

Most of the parts can be 3D printed, how every part works together is carefully explained, and all of the hardware is easily sourced online, making this a very accessible project. Check out the full tutorial video and demonstration, embedded below.

Continue reading “3D Printed Gesture-Controlled Robot Arm Is A Ton Of Tutorials”

Cura Plugin Offers Custom Support

[Chuck] likes the ability of Simplify3D to add support to parts of a model manually. However, not everyone wants to spend $150 for a slicer, so he’s shared how to install a plugin that allows you to do the same trick in Cura.

The plugin is “Cylindric Custom Support.” That doesn’t sound very exciting, but you get five choices of shapes you can create custom supports easily. There are also size and angle parameters you can use to customize the effect.

Continue reading “Cura Plugin Offers Custom Support”

3D Printing Without Support Material Thanks To An Additional Axis

Fused Deposition Modelling (FDM) 3D printers which squirt out molten plastic layer by layer are by far the most popular type in general use. Most machines extrude plastic through a nozzle above print bed, and struggle to produce parts with overhangs without using support material. However, a German team of researchers have recently come up with a solution.

In a prototype built by researchers at the Zurich University of Applied Sciences (ZHAW), a standard Cartesian printer has a third rotary axis added, upon which the nozzle can rotate. Additionally, the nozzle is angled at 45 degrees to the print bed, rather than the usual perpendicular setup. This allows layers of a print to be built up in such a way that support material is not needed for the vast majority of typical overhangs. This is particularly useful for hollow parts, where removing support material can be particularly difficult.

The team believes that such technology could be implemented on existing printers by way of a simple upgrade kit, and we can imagine a few experimenters will be champing at the bit to try it out. If you do, be sure to drop us a line. Alternatively, consider using a marker to make removing supports easier. Video after the break.

Continue reading “3D Printing Without Support Material Thanks To An Additional Axis”

Programmable Filament For Multicolor Printing

A recent research paper shows a way to create multicolor 3D prints using a single extruder if you are too lazy to babysit the machine and switch filament. The concept: print your own “programmable” filament that has the right colors in the right place. This is the same idea as manually splicing filament but presumably is more efficient since the process works with one color at a time and doesn’t repeat. In other words, to print the 64 squares of a chessboard you’d swap filament at least 64 times on each layer. Using programmable filament, you’d load one spool, print half of the filament, load another spool, print the other half, and then finally load the newly created filament and print the chessboard. Notice that the first two operations aren’t printing the chessboard. They are printing the spool of filament you feed through on the third pass.

There are machines made to do this, of course, although they generally just splice lengths of filament together for you automatically. Using one filament solves the problems of keeping multiple heads in alignment as well as the added cost and complexity. However, you now have different problems such as the transition between materials and knowing exactly how much material will be at each point in the print.

Continue reading “Programmable Filament For Multicolor Printing”