DrawBot Badge Represents The CNC World In Badge Design

Badges come in all shapes and sizes, but a badge that draws on a stack of Post-It notes is definitely a new one. The design uses three of the smallest, cheapest hobby servos reasonably available and has a drawing quality that creator [Bart Dring] describes as “adorably wiggly”. It all started when he decided that the CNC and mechanical design world needed to be better represented in the grassroots demo scene that is the badge world, and a small drawing machine that could be cheaply made from readily available components seemed just the ticket.

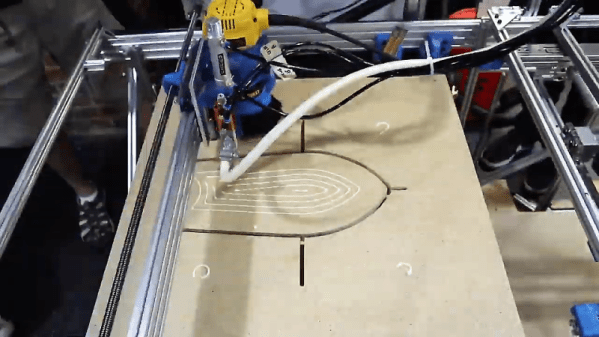
Two arms control the position of a pen, and a third motor lifts the assembly in order to raise or lower the pen to the drawing surface. Gravity does most of the work for pen pressure, so the badge needs to be hanging on a lanyard or on a tabletop in order to work. An ESP32 using [Bart]’s own port of Grbl does the work of motion control, and a small stack of Post-It notes serves as a writing surface. Without the 3D printed parts, [Bart] says the bill of materials clocks in somewhere under $12.

We’ve seen similar designs doing things like writing out the time with a UV LED, but a compact DrawBot on a badge is definitely a new twist and the fact that it creates a physical drawing that can be peeled off the stack also sets it apart from others in the badgelife scene.

Adding 3D Printer Power And Light Control To OctoPrint

OctoPrint is a great way to monitor your printer, especially with the addition of a webcam. Using a tablet or mobile phone, you can keep an eye on what the printer is doing from anywhere in the house (or world, if you take the proper precautions), saving you from having to sit with the printer as if it’s an infant. But simply watching your printer do its thing is only a small slice of the functionality offered by OctoPrint’s vast plugin community.

As [Jeremy S Cook] demonstrates, it’s fairly easy to add power control for the printer and auxiliary lighting to your OctoPrint setup. Being able to flick the lights on over the print bed is obviously a big help when monitoring it via webcam, and the ability to turn the printer off can provide some peace of mind after the print has completed. If you’re particularly brave it also means you could power on the printer and start a print completely remotely, but good luck if that first layer doesn’t go down perfectly.

In terms of hardware, you only need some 3.3V relays for the Raspberry Pi running OctoPrint to trigger, and an enclosure to put the wiring in. [Jeremy] uses only one relay in this setup to power the printer and lights at once, but with some adjustment to the software, you could get independent control if that’s something you’re after.

On the software side [Jeremy] is using an OctoPrint plugin called “PSU Control”, which is actually intended for controlling an ATX PSU from the Pi’s GPIO pins, but the principle is close enough to throw a relay. Other plugins exist which allow for controlling a wider away of devices and GPIO pins if you want to make a fully remote controlled enclosure. Plus you can always whip up your own OctoPrint plugin if you don’t find anything that quite meets your switching needs.

[Jeremy] previously documented his unique mount to keep his Raspberry Pi and camera pointed at his printer, which is naturally important if you want to create some cool videos with Octolapse.

Continue reading “Adding 3D Printer Power And Light Control To OctoPrint”

HP Rolls Out Metal 3D Printers

You normally think of HP as producing inkjet and laser printers. But they’ve been quietly building 3D printers aimed at commercial customers. Now they are moving out with metal printers called — predictably — the HP Metal Jet. The video (see below) is a little glitzy, but the basic idea is that print bars lay down powder on a 21-micron grid. A binding agent prints on the powder, presumably in a similar way to a conventional inkjet printer. A heat source then evaporates the liquid from the binder.

The process repeats for each layer until you remove the part and then sinter it using a third-party oven-like device. According to HP, their technique has more uniform material properties than fusing the powder on the bed with a laser. They also claim to be much faster than metal injection molding.

Continue reading “HP Rolls Out Metal 3D Printers”

Temperature Controlled Fan Keeps Printer Cool

There are many annoying issues associated with desktop 3D printers, but perhaps none are trickier than keeping the machine at the proper temperature. Too cold, and printed parts can warp or fail to adhere to the bed. Too hot, and the filament can get soft and jam, or the motors will start clanking and missing steps. High-end industrial 3D printers have temperature-controlled enclosures for precisely this reason, but the best you can hope for with a printer that’s little more than some aluminum extrusion and an Arduino is a heated bed that helps but is no substitute for the real thing.

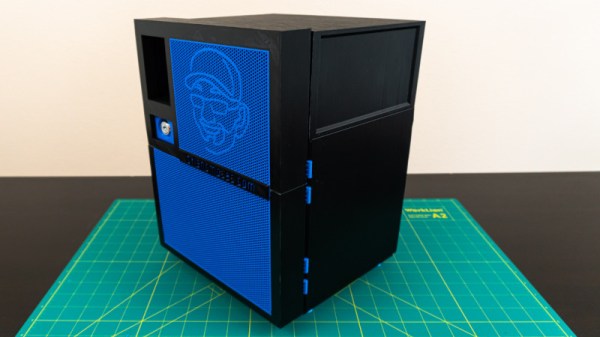
Like many 3D printer owners chasing perfect prints, [Steve Thone] ended up putting his machine into a DIY enclosure to help keep it warm. Unfortunately, there gets to be a point when things get a little too hot inside the insulating cube. To address this issue, he put together a simple but very elegant temperature controlled fan to vent the enclosure when the internal conditions go above the optimal temperature.

[Steve] picked up the digital temperature controller on Amazon for about $4 USD, and found a 60 mm fan in the parts bin. He then came up with a clever two-part printed enclosure that slides together to make the fan and controller one unit which he can place in a hole he cut in the enclosure.

A lot of attention was paid to the front panel of the device, including mid-print filament swaps to create highlighted text and separate buttons printed in different colors. The end result is a very professional looking interface that involved relatively little manual labor; often a problem when trying to come up with nice looking panels.

Whether it’s to keep from breathing ABS fumes, or to quiet the thing down enough so you can get some sleep, it looks like an enclosure of some type is becoming the latest must-have 3D printer accessory.

Northern Pike 3D printed plane

Awesome Looking 3D Printed RC Plane Is Full Of Design Considerations

Designing and 3D printing RC planes offer several interesting challenges, and so besides being awesome looking and a fast flier, [localfiend’s] Northern Pike build is definitely worth a look. Some details can be found by wading through this forum but there’s also quite a bit on his Thingiverse page.

Tongue-and-groove joint for the wing
Tongue-and-groove joint

Naturally, for an RC plane, weight is an issue. When’s the last time you used 0% infill, as he does for some parts? Those parts also have only one perimeter, making this thin-walled-construction indeed. He’s even cut out circles on the spars inside the wings. For extra strength, a cheap carbon fiber arrow from Walmart serves as a spar in the main wing section. Adding more strength yet, most parts go together with tongue-and-groove assembly, making for a stronger join than there would be otherwise. This slotted join also acts as a spar where it’s done for two wing sections. To handle higher temperatures, he recommends PETG, ABS, ASA, Polycarbonate, and nylon for the motor mount and firewall while the rest of the plane can be printed with PLA.

As you can tell from the videos below, [localfiend’s] flier is a high-performance 3D printed machine. But such machines don’t have to be relegated to the air as this RC jet boat demonstrates. Though some do hover on a thin cushion of air.

Continue reading “Awesome Looking 3D Printed RC Plane Is Full Of Design Considerations”

3D Printed Radius Gauge, Just Add Calipers (And A Wee Bit Of Math)

With 3D printed arms of fixed measurements, the depth reading from a set of digital calipers can be used to calculate the radius of a curve.

Specialized tools that focus on one particular job tend to get distilled right down to their essentials and turned in an economical consumer product. One example of this is radius (or fillet) gauges: a set of curves in different sizes that one uses to measure the radius of a curved surface by trial and error. To some, such products represent solved problems. Others see opportunities for a fresh perspective, like this caliper-enabled 3D printed radius gauge by [Arne Bergkvist].

[Arne]’s 3D printed radius gauge is a simple object; a rigid attachment for a nearly ubiquitous model of digital caliper. By placing the curve to be measured between the two arms of the device and using the depth measurement of the caliper to measure distance to the curve’s surface, a simple calculation (helpfully printed on the unit itself) of radius = distance * 2.414 reveals the radius of the curve. However, this shortened calculation makes a number of assumptions and only works for [Arne]’s specific design.

Another version by [Fredrik Welander] represents a more flexible take on the same concept. His RadGauge design (pictured up top) has a few different sizes to accommodate a variety of objects, and his Git repository provides a calculator tool as well as some tips on fine tuning to allow for variations in the dimensions of the printed attachment.

3D printing has opened a lot of doors, and items like this show that the plastic doodads created aren’t always the end result in and of themselves; sometimes they are the glue that enables a tool or part to work in a different way. To help get the most out of 3D printing, check out the in-depth coverage of how to best tap 3D printed parts for fasteners, and [Roger Cheng]’s guide to using 3D printed brackets and aluminum extrusion to make just about anything.

Cheap FPV Goggles Turned Pocket Sized Display

Thanks to the exploding popularity of First Person View (FPV) RC flying over the last couple of years, the cost of the associated hardware has dropped rapidly. Today you can get entry-level FPV goggles for under $40 USD on various import sites. For the money you’re getting a 5.8 GHz receiver, battery, and an LCD display; even if the components themselves aren’t exactly high end, at that price it’s essentially an impulse buy.

[nomand] didn’t necessarily have a use for a cheap FPV headset, but he did like the idea of having a pocket sized display that he could pass off to others so they could see what he’s seeing during flights. So he harvested the principle components from a Eachine VR006 headset and designed a new 3D printed enclosure for them. The final result looks fantastic, and is much cheaper than commercial alternatives on the market.

He’s created an exceptionally detailed step-by-step guide on how you can perform the conversion yourself in the project’s GitHub repository, and has also put together a video where he goes over the modification and discusses the end result. [nomand] clearly intends for this to be a project for others to duplicate instead of a one-off build, and given the price and final results, we wouldn’t be surprised if this conversion becomes popular in FPV circles.

Perhaps the best part of this project is that it requires almost no modification of the original hardware; just soldering two wires because the original connector is too large. Otherwise just need to take the headset apart carefully, and transplant the components into the 3D-printed case [nomand] has meticulously designed. The case is so well designed it doesn’t even need any fasteners, it slides together and everything is held in with some strategically placed pieces of foam.

Between this modification and the custom built spectator display we covered recently, it looks like there’s a clear demand for sub-$50 portable FPV monitors. Seems odd that no manufacture is trying to fill this niche so far.

Continue reading “Cheap FPV Goggles Turned Pocket Sized Display”