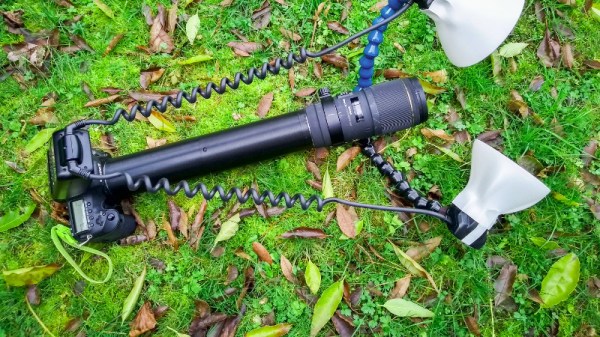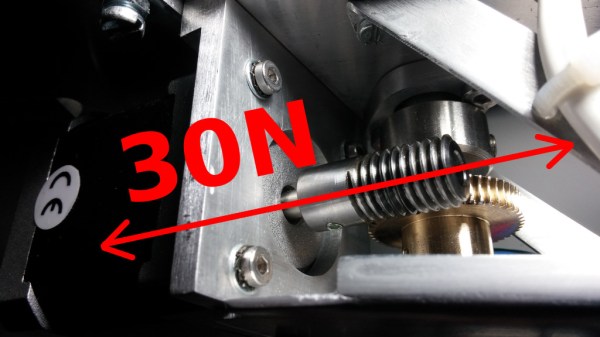
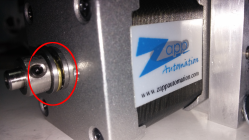
These days, it’s common among us hackers to load a stepper motor with forces in-line with their shaft–especially when we couple them to leadscrews or worm gears. Unfortunately, steppers aren’t really intended for this sort of loading, and doing so with high forces can destroy the motor. Fear not, though. If you find yourself in this situation, [Voind Robot] has the solution for you with a dead-simple-yet-dead-effective upgrade to get your steppers tackling axial loads without issue.
In [Voind Robot’s] case, they started with a worm-gear-drive on a robot arm. In their circumstances, moving the arm could put tremendous axial loads onto the stepper shaft through the worm–as much as 30 Newtons. Such loads could easily destroy the internal stepper motor bearings in a short time, so they opted for some double-sided reinforcement. To alleviate the problem, the introduced two thrust bearings, one on either side of the shaft. These thrust bearings do the work of redirecting the force off the shaft and directly onto the motor casing, a much more rigid place to apply such loads.
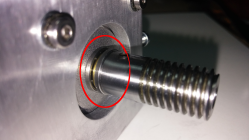
This trick is dead simple, and it’s actually over five years old. Nevertheless, it’s still incredibly relevant today for any 3D printer builder who’s considering coupling a leadscrew to a stepper motor for their Z-axis. There, a single thrust bearing could take out any axial play and lead to an overall rigid build. We love simple machine-design nuggets of wisdom like these. If you’re looking for more printer-design tricks, look no further than [Moritz’s] Workhorse Printer article.
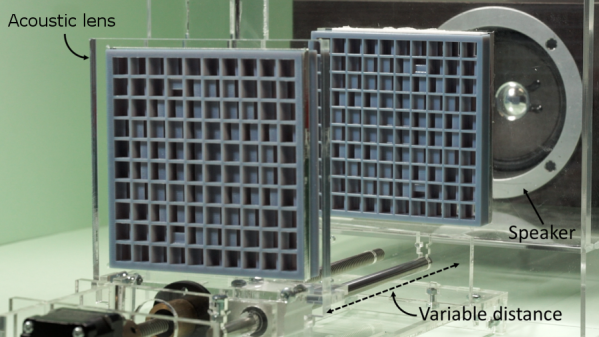
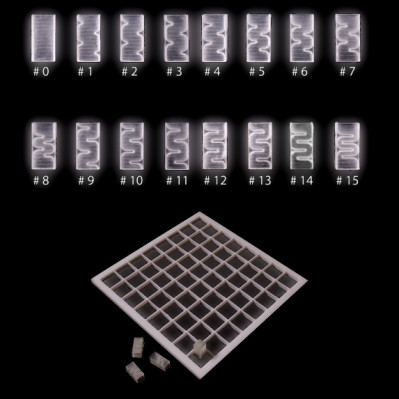 Researchers from the University of Sussex used 3D printing for a modular approach to acoustic lens design. 16 different pre-printed “bricks” (shown here) can be assembled in various combinations to get different results. There are limitations, however. The demonstration lenses only work in a narrow bandwidth, meaning that the sound they work with is limited to about an octave at best. That’s enough for a simple melody, but not nearly enough to cover a human’s full audible range.
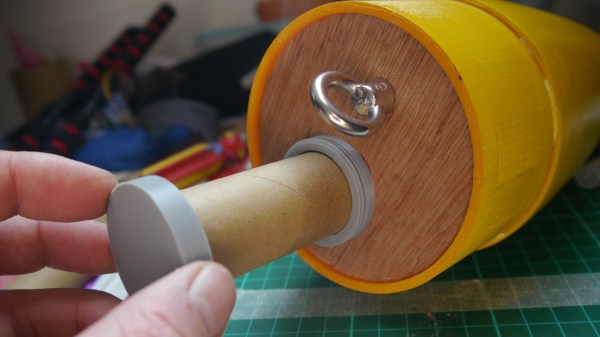
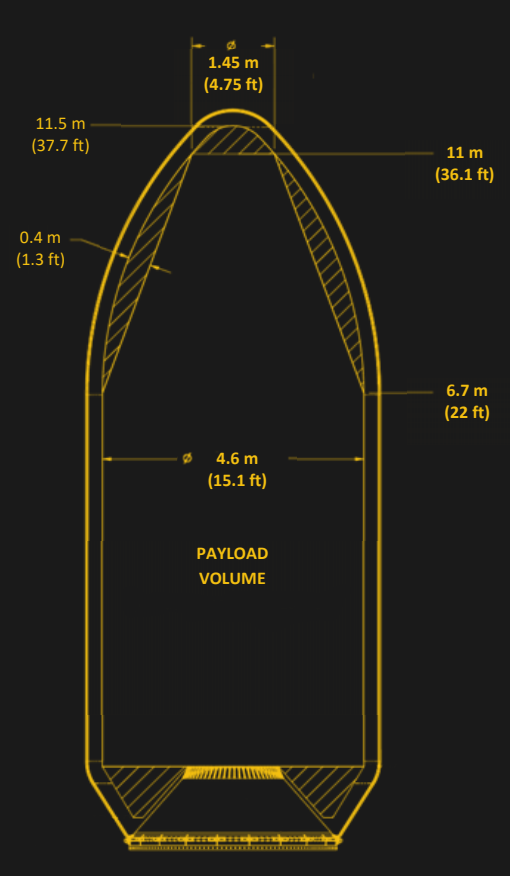
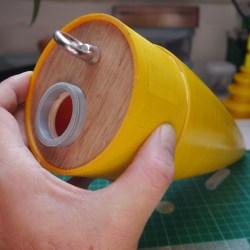 The payload container is a hollow tube with a 3D printed threaded adaptor attached to one end. Payload goes into the tube, and the tube inserts into a hole in the bulkhead, screwing down securely. The result is an easy way to send up something like a GPS tracker, possibly with a LoRa module attached to it. That combination is a popular one with high-altitude balloons, which, like rockets, also require people to retrieve them after not-entirely-predictable landings. LoRa wireless communications have very long range, but that doesn’t help if there’s an obstruction like a hill between you and the transmitter. In those cases,