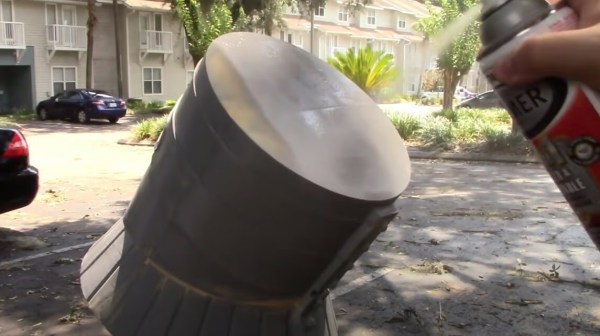
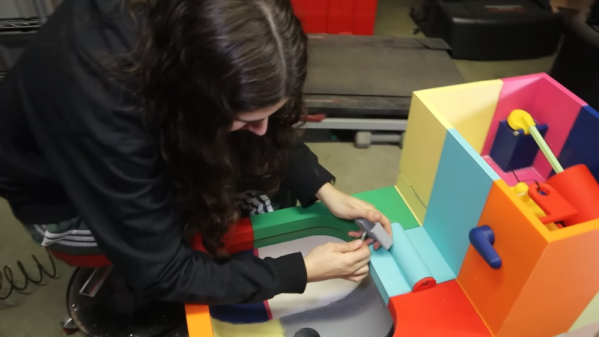
Mobile phone reading an NFC tag with information on a garden plant

NFC Puts A Stake In The Ground

Sometimes we have a new part or piece of tech that we want to use, and it feels like a solution looking for a problem. Upon first encountering NFC Tags, [nalanj] was looking for an application and thought they might make a great update to old-fashioned plant markers in a garden. Those are usually small and, being outside 24/7, the elements tend to wear away at what little information they hold.

traditional plant marker

[nalanj] used a freeform data structuring service called Cardinal to set up text information fields for each plant and even photos. Once a template has been created, every entry gets a unique URL that’s perfect for writing to an NFC tag. See the blog post on Cardinal’s site for the whole process, the thought behind the physical design of the NFC tag holder, and a great application of a pause in the 3D print to encapsulate the tags.

NFC tags are super hackable, though, so you don’t have to limit yourself to lookups in a plant database. Heck, you could throw away your door keys.

Enhance Your Enclosures With A Shadow Line

Some design techniques and concepts from the injection molding world apply very nicely to 3D printing, despite them being fundamentally different processes. [Teaching Tech] demonstrates designing shadow lines into 3D printed parts whose surfaces are intended to mate up to one another.

This is a feature mainly seen in enclosures, and you’ve definitely seen it in all kinds of off-the-shelf products. Essentially, one half of the part has a slight “underbite” of a rim, and the other half has a slight “overbite”, with a bit of a standoff between the two. When placed together, the combination helps parts self-locate to one another, as well as providing a consistent appearance around the mating surfaces.

Why is this necessary? When a plastic part is made — such as an enclosure in two halves — the resulting surfaces are never truly flat. Without post-processing, the two not-quite-flat surfaces result in an inconsistent line with a varying gap between them.

By designing in a shadow line, the two parts will not only self-locate to each other for assembly, but will appear as a much more consistent fit. There will be a clear line between the two parts, but no actual visible gaps between them. Watch the whole thing explained in the video, embedded below.

This isn’t the only time design techniques from the world of injection molding have migrated to 3D printing. Crush ribs have been adapted to the world of 3D printed parts and are a tried-and-true solution to the problem of reliably obtaining a tight fit between plastic parts and hardware inserts.

Continue reading “Enhance Your Enclosures With A Shadow Line”

Tensioning 3D Prints For Lightweight, Strong Parts

Desktop 3D printers have come a long way over the past decade. They’re now affordable for almost anyone, capable of printing in many diverse materials, and offer a level of rapid prototyping and development not feasible with other methods. That said, the fact that they are largely limited to printing different formulations of plastic means there are inherent physical limitations to what the machines are capable of, largely because they print almost exclusively in plastic. But augmenting prints with other building techniques, like this method for adding tensioning systems to 3D printed trusses can save weight and make otherwise unremarkable prints incredibly strong.

The build from [Jón Schone] of Proper Printing consists of printed modular sections of truss which can be connected together to make structural components of arbitrary length. To add strength to them without weight, a series of Kevlar threads are strung from one end of the truss to the other on the interior, and then tensioned by twisting the threads at one end. Similar to building with prestressed concrete, this method allows for stronger parts, longer spans, less building material, and lighter weight components. The latter of which is especially important here, because this method is planned for use to eventually build a 3D printer where the components need to be light and strong. In this build it’s being used to make a desk lamp with a hinged joint.

For other innovative 3D printer builds, [Jón] has plenty of interesting designs ranging from this dual extrusion system to this 3D printed wheel for a full-size passenger vehicle. There’s all kinds of interesting stuff going on at that channel and we’ll be on the edge of our seats waiting to see the 3D printer he builds using this tensioned truss system.

Continue reading “Tensioning 3D Prints For Lightweight, Strong Parts”

3D Print Your Best Friend A Wheelchair

We all know that 3D printing has been a boon for people with different life challenges. But the Ford Motor Company in Mexico wants to help dogs that need mobility assistance. They’ve designed and released P-Raptor (we presume the P is for perro), a wheelchair for pooches with rear leg issues. The web page is in Spanish, and translating it didn’t seem to work for some reason, but if you have any Spanish, you can probably work it out or cut and paste just the text into your favorite translator.

The design is modular to adapt to different size dogs and different problems. It contains an electric motor in the tires. The tires themselves are oversized to help your friend cover rugged terrain. Dogs want to look cool, too, so a grill with lighting is included.

Continue reading “3D Print Your Best Friend A Wheelchair”

If The Shoe Doesn’t Fit, Print It!

Usually when we talk about flip-flops here we mean the circuit. But in this case, it is [Jeandre Groenewald’s] 3D-printed shoe design called Sloffies. The shoes use TPU, and the matching package prints in PLA. Of course, you have to pick the size to fit your feet, and there’s an OpenSCAD file that allows you to customize the strap.

Unlike some 3D apparel we’ve seen, these look like a commerical product. Of course, the cool product packaging doesn’t hurt any. Are they comfortable? We don’t know, but our guess is it is no worse than other similar shoes that are made of one material.

Continue reading “If The Shoe Doesn’t Fit, Print It!”

Metal Forming With A 3D Printer

How do you use a 3D printer to bend metal? One way would be to take it to a machine shop and offer to trade the owner your printer for some time in their shop. A smarter way is to do like [Jaba 3D], and print dies using the printer. You can then use those dies in a press to make the shapes you want.

In the case of [Jaba], the Harbor Freight press uses a hydraulic cylinder to develop about 6 tons of pressure. We don’t think Harbor Freight carries this particular press, but for between $150 and $250, you can get a 12-20 ton press, and, of course, there are other suppliers, as well.

The target object, in this case, was an automotive bracket. The process of grabbing an image, converting it to an SVG, and then creating a 3D part has many uses. Apparently, PLA is sufficient for this purpose, although the print uses ten top and bottom layers along with 80% infill. That does make the prints take a long time.

As you might expect, the dies don’t last very long. In this case, they needed two shots, and they got them, but PLA is probably not the right material if you wanted to go for mass production.

Metal forming does occur at large scales, too. If you want to make your own press-forming tools, we have advice for you.

Better 3D Prints, Courtesy Of A Simple Mass-Produced Bracket

On the “hack/not-a-hack” scale, a 3D printed bracket for aluminum extrusions is — well, a little boring. Such connectors are nothing you couldn’t buy, and even if you insisted on printing them instead, Printables and Thingiverse are full of ready-to-use designs. So why would you waste your precious time and effort rolling your own?

According to production 3D printing company [Slant 3D], a lot of times, we forget to take advantage of the special capabilities of 3D printing. The design progression of the L-bracket shown is a perfect example; it starts as a simple L, moves on to a more elaborate gusseted design, and eventually into a sturdy sold block design that would be difficult to make with injection molding thanks to shrinkage but is no problem for a 3D printer. Taking that a step further, the bracket morphs into a socketed design, taking advantage of what 3D printers can do by coming up with a part that reduces assembly time and fastener count while making a more finished, professional look.

Again, this isn’t really about the bracket. Rather, it’s about a different way of thinking about your designs and leveraging the unique capabilities of 3D printers relative to other mass-production methods, like injection molding. We’ve covered some of [Slant 3D]’s high-volume design insights before, such as including living hinges and alternatives of pins and holes for assembling printed parts. Continue reading “Better 3D Prints, Courtesy Of A Simple Mass-Produced Bracket”