A neat little hacker project that’s flying off the workbenches recently is the Arduboy. This tiny game console looks like a miniaturized version of the O.G. Game Boy, but it is explicitly designed to be hacked. It’s basically an Arduino board with a display and a few buttons, anyway.
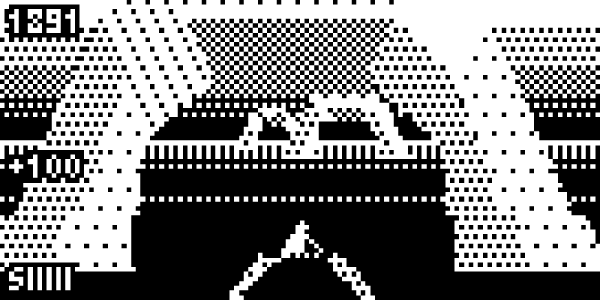
[rv6502] got their hands on an Arduboy and realized that while there were some 3D games, there was nothing that had filled polygons, or really anything resembling a modern 3D engine. This had to be rectified, and the result is pretty close to Star Fox on a microcontroller.
This project began with a simple test on the Arduboy to see if it would be even possible to render 3D objects at any reasonable speed. This test was just a rotating cube, and everything looked good. Then began a long process of figuring out how fast the engine could go, what kind of display would suit the OLED best, and how to interact in a 3D world with limited controls.
Considering this is a fairly significant engineering project, the fastest way to produce code isn’t to debug code on a microcontroller. This project demanded a native PC port, so all the testing could happen on the PC without having to program the Flash every time. That allowed [rv] to throw out the Arduino IDE and USB library; if you’re writing everything on a PC and only uploading a hex file to a microcontroller at the end, you simply don’t need it.
One of the significant advances of the graphics capability of the Arduboy comes from exploring the addressing modes of the OLED. By default, the display is in a ‘horizontal mode’ which works for 2D blitting, but not for rasterizing polygons. The ‘vertical addressing mode’, on the other hand, allows for a block of memory, 8 x 128 bytes, that maps directly to the display. Shove those bytes over, and there’s no math necessary to display an image.
This is, simply, one of the best software development builds we’ve seen. It’s full of clever tricks (like simply not doing math if you’ll never need the result) and stuffing animations into far fewer bytes than you would expect. You can check out the demo video below.
Continue reading “The Arduboy, Ported To Desktop And Back Again” →