Who says it’s too early to get in the holiday spirit? We say it’s not. After all, people need time to get in the spirit before it comes and goes. And what better way to count down the days until Christmas than an electronic Advent calendar?
 [Tom Goff]’s kids had some pretty cool ideas for building a decoration, like a musical, lighted sleigh complete with robotic Santa Claus. While that’s a little much to pull off for this year, they did salvage the music and lights part for their Hackvent calendar.
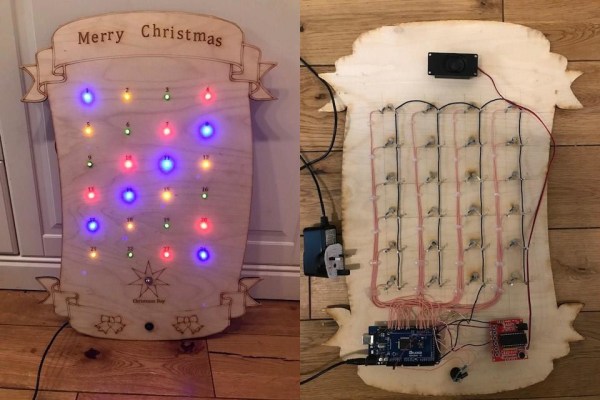
There are 24 small LEDs for December 1st through the 24th, and a big white star for December 25th. Each day, the kids just push the button and the day’s LED lights up. On the big day, all the small lights cascade off and the white one lights up, then it plays Jingle Bells through a sound playback module.
Each LED is connected directly to an input on an Arduino Mega. While there are several ways of lighting up 25 LEDs, this one is pretty kid-friendly. We think the coolest part of this build is that [Tom] and the kids did it old school, with nails hammered into the laser-cut plywood and used as connection terminals. Be sure to check it out in action after the break.
The more time you have, the more you can put into your Advent calendar build. Like chocolates, for instance.
Continue reading “Hackvent Calendar Will Open The Door And Get Your Kids Soldering”