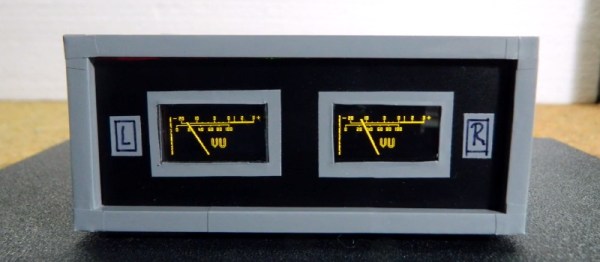
Eyecam Is Watching You In Between Blinks

We will be the first to admit that it’s often hard to be productive while working from home, especially if no one’s ever really looking over your shoulder. Well, here is one creepy way to feel as though someone is keeping an eye on you, if that’s what gets you to straighten up and fly right. The Eyecam research project by [Marc Teyssier] et. al. is a realistic, motorized eyeball that includes a camera and hangs out on top of your computer monitor. It aims to spark conversation about the sensors that are all around us already in various cold and clinical forms. It’s an open source project with a paper and a repo and a how-to video in the works.

The eyebrow-raising design pulls no punches in the uncanny department: the eye behaves as you’d expect (if you could have expected this) — it blinks, looks around, and can even waggle its brow. The eyeball, brow, and eyelids are actuated by a total of six servos that are controlled by an Arduino Nano.

Inside the eyeball is a Raspberry Pi camera connected to a Raspi Zero for the web cam portion of this intriguing horror show. Keep an eye out after the break for the Eyecam infomercial.

Creepy or fascinating, it succeeds in making people think about the vast amount of sensors around us now, and what the future of them could look like. Would mimicking eye contact be an improvement over the standard black and gray oblong eye? Perhaps a pair of eyes would be less unsettling, we’re not really sure. But we are left to wonder what’s next, a microphone that looks like an ear? Probably. Will it have hair sprouting from it? Perhaps.

Yeah, it’s true; two eyes are more on the mesmerizing side, but still creepy, especially when they follow you around the room and can shoot frickin’ laser beams.

Continue reading “Eyecam Is Watching You In Between Blinks”

Hacking The Classroom

With so many students attending class virtually these days, how can you give kids — or adults — some hands on experience with electronics projects? [Ben Finio] says you can by moving your lab to the virtual world using — of all things — Tinkercad. [Ben] should know something about a classroom since he is a lecturer at Cornell.

Of course, you could do this trick with any online simulator, but Tinkercad is nice because it is easy to use, looks real, and doesn’t cost the students a dime. [Ben] mentions there are some scenarios where it is especially useful like large classes or online classes. There are probably some cases where it doesn’t make sense, like teaching RF design, for example. Even then, maybe you just need a different tool.

Continue reading “Hacking The Classroom”

Arduino Plots Your Portrait With Style

Around these parts, we see plenty of plotter builds. They’re a great way to learn about CNC machines and you get to have fun making pictures along the way. [Ben Lucy] was undertaking just such a build of his own, but wanted to do something standalone that served a purpose. The result is the impressive Portable Portrait Painter.

What sets [Ben]’s project apart is how complete it is. Unlike other plotters that simply follow G-code instructions or process external images, the Portable Portrait Painter is a completely standalone machine. Fitted out with an OV7670 camera, hooked up to an Arduino, it’s capable of taking its own photos and then drawing them out as well.

Through some clever code from [Indrek Luuk], the Arduino Mega2560 is able to display a 20fps video preview on a color LCD screen. When the user presses a button, the current frame is captured and sent to the pen plotter. The plotting algorithm is particularly impressive, with images first processed with histogram compensation to maximise contrast. The pen is then drawn across the page line by line, and pressed into the page by varying amounts depending on the color value of each pixel. The darker the pixel, the thicker the stroke made by the pen. This more analog approach produces a much more detailed image than more basic plotters which either leave a mark or don’t.

The portraits produced by the plotter are impressive, and we like the edge-of-page artifacts, which add a little style to the final results. The Portrait Painter would make a great conversation piece at any Maker Faire or hackerspace night.

It’s a project that reminds us of some of the painting robots we’ve seen over the years. Video after the break.

Continue reading “Arduino Plots Your Portrait With Style”

A Magnetic Field Strength Meter Using An Arduino

We’re used to Hall effect devices as proximity sensors in mechanical systems, used to provide detection of something that has a magnet attached to it. However it’s easy to forget that the devices that provide a magnet-or-not digital output are only part of the story, and linear Hall effect devices provide a handy way to measure a static magnetic field. It’s something [mircemk] demonstrates, with an Arduino-powered magnetic field strength meter that uses a UGN 3503U Hall effect device.

The circuit is extremely simple, comprising the sensor, an Arduino Nano, and an OLED display. This device is handy because its voltage output has a known relationship to the gauss level the sensor is experiencing, so while the accuracy of its calibration isn’t verified it can at least give a believable reading derived from the Arduino’s ADC.

The whole is wrapped up in an attractive case that looks as though it has been made from PCB material, with the sensor protruding on what seems to be the shell of a plastic ballpoint pen. It makes a handy instrument that provides a useful function for not a lot of money, so what’s not to like! Take a look at the video below the break for the full story.

Surprisingly such projects are few and far between here at Hackaday, however it’s not the first magnetic field measurement we’ve seen.

Continue reading “A Magnetic Field Strength Meter Using An Arduino”

Nixie Shot Timer Adds Useful Elegance To Espresso Machine

Once you’ve ground the beans and tamped the grounds just so, pulling the perfect shot of espresso comes down to timing. Ideally, the extraction should last 20-30 seconds, from the first dark drips to the tan and tiger-striped crema on top that gives the espresso a full aftertaste.

[Marco] has a beautiful espresso machine that was only missing one thing: an equally beautiful shot timer with a Nixie tube display. Instead of messing with the wiring, [Marco] took the non-invasive approach and is using a DIY coil to detect the magnetic field of the espresso machine’s pump and start a shot timer.

An LM358-based op-amp magnifies the current induced by the machine and feeds it to an Arduino Nano, which does FFT calculations. [Marco] found a high-voltage interface driver to switch 170 V to the Nixies instead of using two handfuls of transistors. Grab yourself a flat white and check it out after the break.

The last Nixies may have been mass-produced in the 1980s, but never fear — Dalibor Farny is out there keeping the dream alive and making new Nixies.

Continue reading “Nixie Shot Timer Adds Useful Elegance To Espresso Machine”

The Future’s So Bright, You Gotta Wear Arduglasses

Tiny OLED displays are an absolute must-have in the modern parts bin, so what better way to show your allegiance to the maker movement than with a pair of Arduino-compatible OLED glasses? Created by Arduboy mastermind [Kevin Bates], these digital spectacles might not help you see any better — in fact, you’ll see a bit worse — but they’ll certainly make you stand out in the crowd at the next hacker con. (Whenever we can have one of those again, anyway.)

The key to this project is a pair of transparent CrystalFonts OLED displays, just like the ones [Sean Hodgins] recently used to produce his gorgeous volumetric display. In fact, [Kevin] says it was his success with these displays that inspired him to pursue his own project. With some clever PCB design, he came up with some boards that could be manufactured by OSH Park and put together with jewelry box hinges. Small flexible circuits, also from OSH Park, link the boards and allow the frames to fold up when not being worn.

The Arduglasses use the same ATmega32U4 microcontroller as the Arduboy, and with a few basic controls and a small 100 mAh rechargeable battery onboard, they can technically run anything from the open source handheld’s extensive software library. Of course, technically is the operative word here. While the hardware is capable of playing the games, [Kevin] reports that the OLED displays are too close to the wearer’s eyes to actually focus on them. That said the ability to easily create software for these glasses offers plenty of opportunity for memes, as we see in the video below.

For reasons that are probably obvious, [Kevin] considers the Arduglasses an experiment and isn’t looking to turn them into a commercial product or kit. But if there’s interest, he’s willing to put the design files up on GitHub for anyone who wants to add a pair of Arduino glasses to their cyberpunk wardrobe.

Continue reading “The Future’s So Bright, You Gotta Wear Arduglasses”

Arduino CLI For I/O Pin Testing

Need to quickly toggle or read some logic signals without the hassle of writing a quick program? [Thor_x86], aka [Eric], built an Arduino sketch that does just that — and he threw in the ability to send (or receive) serial messages, too. This is a neat idea — kind of a simplified Bus Pirate.

We should warn you that this is an early release, and there are a few minor issues which we are sure [Eric] will iron out soon. We discovered the function strtol() was misspelled in cmd_send.cpp, and there are some configuration #defines which need to be sorted out in file parsePin.cpp, depending on which Arduino module you are running. We got it running on an Arduino Leonardo the quickest, because it has support for Serial1().

Don’t be discouraged by these glitches in this rev 0 deployment — [Eric] has really made quite a nice tool here. Check his GitHub repository for updates (or submit corrections yourself). All in all, it’s a good addition to your digital tool box. On a completely unrelated note, we really like [Eric]’s USB cable with the right-angle micro connector, grungy though it may be.

Besides the standard tools like Bus Pirate, GreatFET, FTDI modules, etc., are there any similar tools you like to use for bit banging and serial testing? Let us know in the comments below.