A Flag-Waving Hat For All Occasions

When [Taste the Code] saw that his YouTube channel was approaching 1,000 subscribers, it was time to do something special. But celebration is no reason to be wasteful. This flag-waving celebratory hat has endless possibilities for the future.

The build is simple, which is just right for these strange times of scarcity. An Arduino Uno hot-glued to the back of the hat is directly driving a pair of 9g servos on the front. [Taste the Code] made the flags by sticking two stickers back to back with a bamboo skewer in between. The code is flavored such that the flags will wave in one of three randomly-chosen patterns — swing around, swing in reverse, and wild gesticulations.

After the novelty of the whole 1k subs thing wears off, [Taste the Code] can change the flags over to Jolly Rogers to help with social distancing. And someday in the future when things are really looking up, they can be changed over to SARS-CoV-2 victory flags, or fly the colors of a local sports team. We think it would be way cool to program some kind of real semaphore message into the flags, though the mobility might be too limited for that. Check out the build video after the break, which happens picture-in-picture as [Taste the Code] dishes out a channel retrospective and lays out a course for the future.

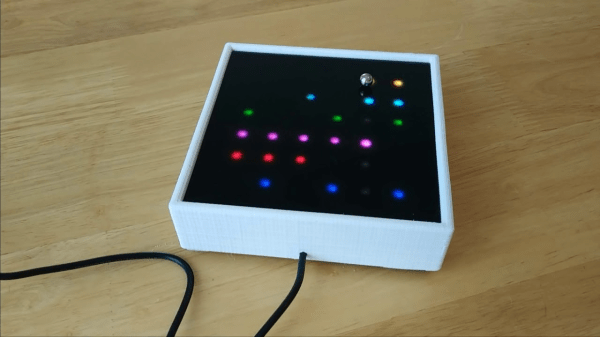
Even though YouTube messed with subscriber counts, we think it’s still worth making a cool counter. Here’s one with a Tetris twist.

Continue reading “A Flag-Waving Hat For All Occasions”

Watch The Day Inch Along With A Tape Measure Clock

If we asked you to rattle off all the tools at your own personal disposal, you’d probably leave your timepieces off the list. But we say clocks are definitely tools — cool tools that come in countless forms and give meaning to endless days.

A clock form we hadn’t considered was that of an actual tool. So we were immeasurably delighted to see [scealux]’s clock made from a measuring tape. At least, the time-telling part of the clock is made from a measuring tape. The case isn’t really from a tape measure — it’s entirely printed, Bondo’d, sanded, and painted so well that it’s quite easy to mistake it for the real thing.

Tightly packed inside this piece of functional art is an Arduino Nano and a DS3231 precision RTC module, which we think is fitting for a tool-based clock. The Nano fetches the time and drives a stepper motor that just barely fits inside. There’s just enough tape wound around the printed hub to measure out the time in increments of one hour per inch. Take 1/16″ or so and watch the demo and brief walk-through video after the break.

Not all tools are sharp, and not all clocks are meant to be precise. Here’s a clock for the times that gives you the gist.

Continue reading “Watch The Day Inch Along With A Tape Measure Clock”

Build The Baddest Keypad On The Block With LEGO

Like so many of us, [EducatedAce] has been quelling the quarantine blues by resurrecting old projects and finding new challenges to fill the days. He’s just finished building this blocky macro keypad to hold a bunch of shortcuts for Photoshop, thus continuing and compounding the creative spree.

[EducatedAce] already had everything on hand except the Arduino Micro. Instead of standard key switches, this macro block uses 16 of the loudest, crunchiest tactile buttons out there — those big ones with the yellow stems that sound like small staplers.

And don’t worry — no LEGO or LEGO accessories were harmed in the making of this macro pad — the base plate and switch plate are 3D printed. [EducatedAce] has the STL files posted along with great build instructions if you want to wire one up for yourself.

This is a great project because it’s sturdy, it gets the job done without a lot of expense, and still looks like something you’d want on your desk. [EducatedAce] plans to rebuild it with uniformly colored bricks, but we think it looks great as-is, especially with those vented 1×2 pieces. If it were ours, we might use a different color for each row or column to help keep the shortcuts straight.

What? You’ve never printed your own interlocking building blocks before? Well, don’t limit yourself to 1:1 scale, otherwise the minifigs have won. Build a go-kart big enough for humans!

Automate Your Xbox

First the robots took our jobs, then they came for our video games. This dystopian future is brought to you by [Little French Kev] who designed this adorable 3D-printed robot arm to interface with an Xbox One controller joystick. He shows it off in the video after the break, controlling a ball-balancing physics demonstration written in Unity.

Hats off to him on the quality of the design. There are two parts that nestle the knob of the thumbstick from either side. He mates those pieces with each other using screws, firmly hugging the stick. Bearings are used at the joints for smooth action of the two servo motors that control the arm. The base of the robotic appendage is zip-tied to the controller itself.

The build targets experimentation with machine learning. Since the computer can control the arm via an Arduino, and the computer has access to metrics of what’s happening in the virtual environment, it’s a perfect for training a neural network. Are you thinking what we’re thinking? This is the beginning of hardware speed-running your favorite video games like [SethBling] did for Super Mario World half a decade ago. It will be more impressive since this would be done by automating the mechanical bit of the controller rather than operating purely in the software realm. You’ll just need to do your own hack to implement button control.

Continue reading “Automate Your Xbox”

Servo-Powered 7-Segments Choreograph This Chronograph

Good clocks are generally those that keep time well. But we think the mark of a great clock is one that can lure the observer into watching time pass. It doesn’t really matter how technical a timepiece is — watching sand shimmy through an hourglass has its merits, too. But just when we were sure that there was nothing new to be done in the realm of 7-segment clocks, [thediylife] said ‘hold my beer’ and produced this beauty.

A total of 28 servos are used to independently control four displays’ worth of 3D-printed segments. The servos pivot each segment back and forth 90° between two points: upward and flat-faced to display the time when called upon, and then down on its side to rest while its not needed.

Circuit-wise, the clock’s not all that complicated, though it certainly looks like a time-consuming build. The servos are controlled by an Arduino through a pair of 16-channel servo drivers, divided up by HH and MM segments. The Arduino fetches the time from a DS1302 RTC module and splits the result up into four-digit time. Code-wise, each digit gets its own array, which stores the active and inactive positions for each servo. Demo and full explanation of the build and code are waiting after the break.

When it comes to 7-segment displays, we say the more the merrier. Here’s a clock that uses pretty much all of them.

Continue reading “Servo-Powered 7-Segments Choreograph This Chronograph”

KVM Uses Many Arduinos

The Arduino platform is one of the most versatile microcontroller boards available, coming in a wide variety of shapes and sizes perfect for everything from blinking a few LEDs to robotics to entire home automation systems. One of its more subtle features is the ability to use its serial libraries to handle keyboard and mouse duties. While this can be used for basic HID implementations, [Nathalis] takes it a step further by using a series of Arduinos as a KVM switch; although admittedly without the video and mouse functionality yet.

To start, an Arduino Uno accepts inputs from a keyboard which handles the incoming serial signals from the keyboard. From there, two Arduino Pro Micros are attached in parallel and receive signals from the Uno to send to their respective computers. The scroll lock key, which doesn’t do much of anything in modern times except upset Excel spreadsheeting, is the toggle switch between the two outputs. Everything is standard USB HID, so it should be compatible with pretty much everything out there. All of the source code and schematics are available in the project’s repository for anyone who wants to play along at home.

Using an Arduino to emulate a USB input device doesn’t have to be all work and no play, the same basic concept can also be used to build custom gaming controllers.

Model Rocket Launcher Is So Serious, It Has A Briefcase

What could be more thrilling than launching a complex rocket that you built yourself? For starters, launching it with literally anything better than the stock ignition system would be a step in the right direction. How about a briefcase full of fantastically fun overkill?

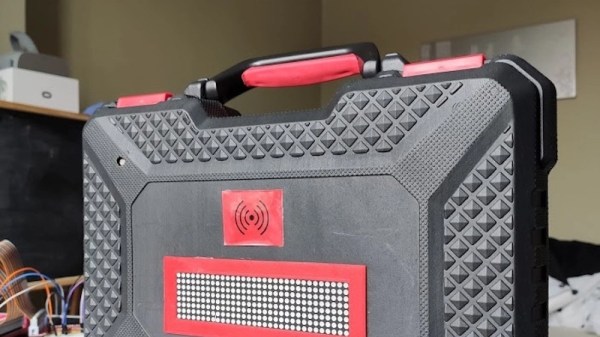
[FastEddy59] is in the middle of building a model rocket complete with a Thrust Vector Control (TVC) system to help with stabilization. Much to our delight, he’s designed an equally ambitious controller to spice up the launch sequence with security codes and a physical key. And what’s a launch controller without a giant emergency stop button to shut down everything? Incomplete, if you ask us.

Under the carbon fiber-wrapped acrylic hood, there’s an Arduino MEGA engine and an NRF24 LoRa module for transmission to the rocket. There’s even a DHT11 temperature sensor to verify that launch conditions are ideal. It’s still a work in progress with plenty of features to come, like fancier labels and plenty of launch-appropriate sound files for the hidden speaker. There’s a lot to this case, and [FastEddy59]’s video brief is ready and waiting on the pad after the break.

[FastEddy59] plans to hold the first launch in a few months, and we sincerely hope he outfits the rocket with a camera.

Continue reading “Model Rocket Launcher Is So Serious, It Has A Briefcase”