Core Rope Memory Makes One Of The Oddest LED Flashers We’ve Ever Seen

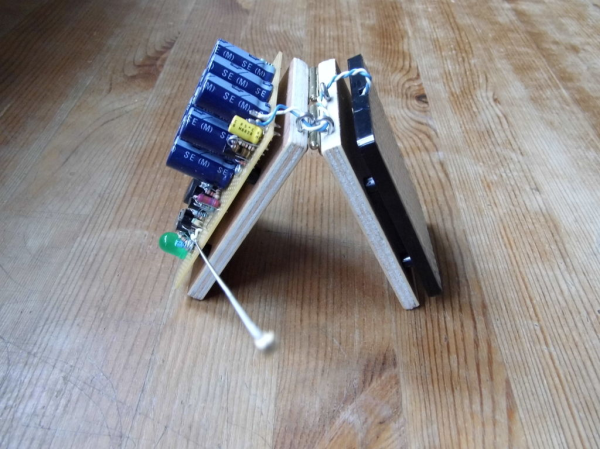
If you’ve heard of core rope memory, it will probably be in the context of vintage computing equipment such as Apollo-era NASA hardware. A string of magnetic cores and sense wires form a simple ROM arrangement, which though long-ago-superceded by semiconductor memory remains possible to recreate by the experimenter. It’s a path [Nicola Cimmino] has trodden, as he’s not only made a few nibbles of core rope memory, but incorporated it with an Arduino as part of one of the most unusual LED flashers we’ve ever seen. The memory holds a known sequence of bits which is retrieved in sequence by the Arduino, and the LED is kept flashing as long as the read values conform to those expected.

The memory itself is simple enough (and not to be confused with magnetic core memory). The cores are ferrite rings that form a sequence of small transformers that become the bits of the memory. Individual bits are set high or low by either passing a sense wire through a core to create a primary, or bypassing it. Multiple sense wires can be used for separate nibbles in the same cores, so for example his four nibbles all share the same four cores. Pulses are sent down the wires, either passing through a core or not, and equivalently picked up or not on sense lines.

In this case the sense wire is driven directly to ground by Arduino pins which means that the circuit is relying upon the current limiting of the ATmega328 to avoid destroying itself, it’s possible we’d add a driver transistor. The bits are read meanwhile from the secondary windings through a diode rectifier and capacitor to an Arduino analogue pin.

Core memory has been paired with an Arduino before on these pages, though of the RAM variety.

Kinetic Lamp Sheds Light On Scientific Principles

This thing right here might be the coolest desk toy since Newton’s Cradle. It’s [Stephen Co]’s latest installment in a line of mesmerizing, zodiac-themed art lamps that started with the water-dancing Aquarius.  All at once, it demonstrates standing waves, persistence of vision, and the stroboscopic effect. And the best part? You can stick your finger in it.

This intriguing lamp is designed to illustrate Pisces, that mythological pair of fish bound by string that represent Aphrodite and her son Eros’ escape from the clutches of Typhon. Here’s what is happening: two 5V DC motors, one running in reverse, are rotating a string at high speeds. The strobing LEDs turn the string into an array of optical illusions depending on the strobing rate, which is controlled with a potentiometer. A second pot sweeps through eleven preset patterns that vary the colors and visual effect. And of course, poking the string will cause interesting interruptions.

The stroboscopic effect hinges on the choice of LED. Those old standby 2812s don’t have a high enough max refresh rate, so [Stephen] sprung for APA102Cs, aka DotStars. Everything is controlled with an Arduino Nano clone. [Stephen] has an active Kickstarter campaign going for Pisces, and one of the rewards is the code and STL files. On the IO page for Pisces, [Stephen] walks us through the cost vs. consumer pricing breakdown.

We love all kinds of lamps around here, from the super-useful to the super-animated.

TinyGo Brings Go To Arduino

Go — a modern programming language with roots at Google — is one of the new generation languages that would like to unseat C (and C++) for what we think of as traditional programming. It is only for PCs, though, right? Not so fast! TinyGo provides a compiler that — in their words — is for small places. How small? They can target code for the Arduino Uno or the BBC micro:bit. It can also produce code for x86 or ARM Linux (both 32- and 64-bit) as well as WebAssembly. They claim that a recent project to add ESP8266 and EPS32 support to LLVM will eventually enable TinyGo to target those platforms, too.

As you would expect, there are some subtle differences between TinyGo and the full-blown version. The compiler handles the entire program at once which is slower but offers more for optimization. Certain optimizations for interface methods are not used in TinyGo, and global variable handling changes to accommodate moving data from flash to RAM efficiently. TinyGo passes parameters in registers.

Continue reading “TinyGo Brings Go To Arduino”

An Arduino Pro Micro With USB-C

USB-C versus USB Micro connectors are turning into one of the holy wars of our time. Rather than be left on the wrong side of the divide [Stefan S] has come up with his own USB-C version of of an Arduino Pro Micro to avoid having to always find a different cable.

Home made Arduinos come in all shapes and sizes from the conventional to the adventurous, and from the pictures it seems that this one is firmly in the former camp. The USB-C is present in connector form alone as the device is only capable of talking at the much slower speed of the ATMEGA32U4 processor, but having the newer connector should at least make cabling more accessible.

This is one of the most practical Arduino clones we’ve ever seen, but one of our other favourites is also a bit impractical.

A Pocket QWERTY For Arduino And More

If you want to add a keypad to your Arduino project, the options are pretty limited. There’s that red and blue 4×4 membrane we’ve all seen in password-protected door lock projects, and the phone layout version that does pretty much all the same tricks. Isn’t it time for a full Arduino-compatible keyboard? [ELECTRONOOBS] thinks so.

This 41-button Arduino keyboard PCB is a stepping stone to his next project, a pair of two-way texting machines. (Which is nice, because we were totally going to suggest that). It’s based on that ubiquitous red/blue keypad, but it has a full QWERTY layout. There’s also a shift button that opens up special characters and uppercase, and the addition of return, ok, and send keys puts it over the top. The best part of this keyboard, hands down, is the soft, soundless buttons. Though you trade clicky feedback for comfort, it will be well worth it after a few dozen presses.

The keypad uses an onboard ATMega328P to scan the matrix for button presses, decode them, and send them via UART or I²C to an Arduino. [ELECTRONOOBS] has the PCB files available via Patreon for now, though they will be open in the future. The code is already available for download on his website.

Future plans include an LED to indicate when shift is pressed, and adding the special characters next to the numbers on the silkscreen (whoops!). Be sure to check out the build video after the break.

Want an Arduino-driven keyboard for longer hauls across the alphabet? Saddle up and ride this candy-colored mechanical unicorn.

Continue reading “A Pocket QWERTY For Arduino And More”

Force Sensitive Resistor Takes The Pain Out Of Bed Leveling

How do you know if your 3D printer bed is levelled? Oh, don’t worry – you’ll know. Without a level bed, filament won’t stick properly to the build surface and you’ll run into all sorts of other problems. Knowing how tricky it can be to get the bed just right, [Antzy] built a tool to help.

The device, which he calls the FS-Touch, is based around an Arduino Pro Micro fitted with a force sensitive resistor. This allows the distance between the bed and nozzle to be measured based on the force read by the resistor when placed in between the two.

Using the tool is simple. First, the bed is brought roughly into alignment using the typical paper method. Then, a reading is taken from one corner of the bed, and the measurement saved for reference. The other corners can then be set to the same level, with the aid of LEDs to guide the user in which direction to turn the adjustment knobs.

Measuring force in this way has the potential of being more repeatable than the somewhat difficult paper method. It promises to ease the task for users that may be struggling to get their bed in proper shape. Of course, automated bed levelling makes things even easier again. Video after the break.

Continue reading “Force Sensitive Resistor Takes The Pain Out Of Bed Leveling”

Voice Chess Uses Phone, Arduino, And An Electromagnet

[Diyguypt] may be an altruist to provide the means for people who can’t manipulate chess pieces to play the game. Or he may just have his hands too busy with food and drink to play. Either way, his voice command chessboard appears to work, although it has a lot of moving parts both figuratively and literally. You can check out the video below to see how it works.

The speech part is handled by an Android phone and uses Google’s voice services, so if you don’t want Google listening to your latest opening gambit, you’ll want to pass this one up. The phone uses an app that talks to the Arduino via Bluetooth, which means the Arduino needs a Bluetooth module.

Continue reading “Voice Chess Uses Phone, Arduino, And An Electromagnet”