Starlink Ground Stations Successfully Hacked

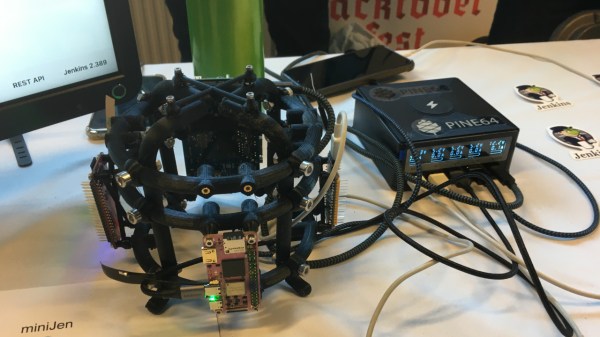
Belgian security researcher [Lennert Wouters] has gotten his own code running on the Starlink “Dishy McFlatface” satellite terminals, and you can too! The hack in question is a “modchip” with an RP2040 and a MOSFET that crowbars the power rails, browning out the main CPU exactly when it’s verifying the firmware’s validity and bypassing that protection entirely. [Lennert] had previously figured out how to dump the Starlink firmware straight from the eMMC, and with the ability to upload it back, the circle of pwnership is closed. This was a talk at DEFCON, and you can check out the slides here. (PDF)

The mod chip itself was a sweet piece of work, being tailored to fit into the Starlink’s motherboard just so, and taking good advantage of the RP2040’s PIOs, which are probably the microcontroller’s superpower.

[Lennert] says he submitted his glitch attack to Starlink and they took some precautions to make the glitching harder. In particular, [Lennert] was triggering his timing off of the USART port coming up on the Starlink unit, so Starlink just shut that down. But it’s not like he couldn’t trigger on some other timing-relevant digital signal, so he chose the eMMC’s D0 data line: they’re not going to be able to boot up without it, so this hack is probably final. No shade against Starlink here. It’s almost impossible to shield a device against an attacker who has it on their bench, and [Lennert] concludes that he found no low-hanging fruit and was impressed that he had to work so hard to get root.

What can you do with this? Not much, yet. But in principle, it could be used to explore the security of the rest of the Starlink network. As reported in Wired, Starlink says that they’ve got a defence-in-depth system and that just getting into the network doesn’t really get you very far. We’ll see!

Thanks [jef] for the tip!

The Orbtrace debugger hardware connected to a development board t hrough a 20-pin ribbon cable. The development board has a green LED shining.

ORBTrace Effort: Open Tool For Professional Debugging

There are some fairly powerful debugging facilities available on today’s microcontrollers — if your code crashes mysteriously, chances are, there’s a debugging interface that could let you track down the exact crash circumstances in no time. Sadly, debugging tools for these powerful interfaces tend to be prohibitively expensive and highly proprietary, thus, not friendly for hobbyists. Now, there’s a community-driven high-capability debugging platform called ORBTrace, brought to us by [mubes] and [zyp].

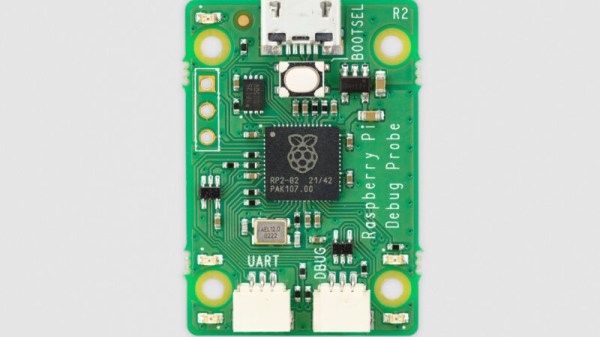
With parallel trace, you get a constant stream of consciousness, every exact instruction executed by your CPU. [mubes] and [zyp] set out to tap into the power of parallel trace debugging for Cortex-M processors. and the ORBTrace project was born. Relying on the Orbuculum project’s software capabilities, this FPGA-based debugger platform can do parallel trace and the more popular high-speed SWO trace – and way more. ORBTrace has the potential to grow into a powerful debug helper tool, with enough capabilities for anyone to benefit. And of course, it’s fully open-source.

The ORBTrace board, with a FPGA in the center of it, a USB-C connector on the left, and two IDC debug connectors on the right (one ten-pin and one twenty-pin)The ORBTrace platform has plenty of untapped potential. There’s the battle-tested JTAG and SWD that you can already use with all the open tools you could expect. However, there’s also plenty of available resources on the FPGA, including even a currently unutilized RISC-V softcore. If you wanted to add support for any other family of devices to this debugger, sky’s the limit! And, of course, there’s cool software to go with it – for example, orbmortem, which keeps a ring buffer of instructions in memory and shows you the last code executed before your CPU stops, or orbstat, a tool for profiling your embedded code.

If you’re looking to purchase effortless feature parity with Segger or Lauterbach devices, the ORBTrace doesn’t promise that. Instead, it’s an open debugging toolkit project, with hardware available for purchase, and software just waiting for you take control of it. This project’s community hangs out in the 1BitSquared discord’s #orbuculum channel, and gateware’s advancing at a rapid pace – welcoming you to join in on the fun.

ORBTrace is a powerful tool for when your goals become large and your problems become complex. And, being a community-driven experimental effort, we’ll undoubtedly see great things come out of it – like the Mooltipass project, originally developed by Hackaday community members, and still going strong.

Bare-Metal STM32: Adding An Analog Touch With ADCs

An Analogue to Digital Converter (ADC) is at its core a straight-forward device: by measuring an analog voltage within a set range and converting the measured level to a digital value we can use this measurement value in our code. Through the use of embedded ADCs in microcontrollers we can address many essential use cases, ranging from measuring the setting on a potentiometer, to reading an analog output line on sensors, including the MCU’s internal temperature and voltage sensors.

The ADCs found in STM32 MCUs have a resolution between 12 to 16 bits, with the former being the most common type. An ADC can be configured to reduce this resolution, set a specific sampling speed, and set up a multi-mode configuration depending on the exact ADC peripheral. STM32 MCUs feature at least a single ADC peripheral, while some have multiple. In this article we will take a look at how to configure and use the basic features of the ADCs in STM32 MCUs, specifically the ADCs found in F0 and the ADC5_V1_1 type as found in most F3-family MCUs.

Continue reading “Bare-Metal STM32: Adding An Analog Touch With ADCs”

Linux Fu: The Infinite Serial Port

Ok, the title is a bit misleading. Like most things in life, it really isn’t infinite. But I’m going to show you how you can use a very interesting Linux feature to turn one serial port from a microcontroller into a bunch of virtual ports. In theory, you could create over 200 ports, but the reality is you will probably want to stick with fewer.

The feature in question is what’s known as pseudoterminal or sometimes a pty or pts. These special files were made to feed data to programs that expect to accept data from a terminal. The files provide two faces. To the client, it looks like any other terminal device. To the creator, though, it is just another file. What you write to that file goes to the fake terminal and you can read anything that is sent from the program connected to the terminal. You use these all the time, probably, without realizing it since running a shell under X Windows, for example, doesn’t attach to a real terminal, after all.

You could, of course, do the same trick with a composite USB device, assuming you have one. Also assuming you can find a working driver and get it working. However, many microcontrollers have a serial port — even one with a USB converter built-in — but fewer have full-blown USB hardware. Even the ones that do are often at odds with strange drivers on the PC side. Serial ports work and work well even on the simplest microcontrollers.

The Plan

The plan is simple enough. A Linux program listens to a real serial port and watches for special character sequences in the data stream. Those sequences will allow you to switch data so that the data stream will go to a particular terminal. Data coming back from the terminals will go to the real serial port after sending a sequence that identifies its source.

Continue reading “Linux Fu: The Infinite Serial Port”

A Rotary Encoder: How Hard Can It Be?

As you may have noticed, I’ve been working with an STM32 ARM CPU using Mbed. There was a time when Mbed was pretty simple, but a lot has changed since it has morphed into Mbed OS. Unfortunately, that means that a lot of libraries and examples you can find don’t work with the newer system.

I needed a rotary encoder — I pulled a cheap one out of one of those “49 boards for Arduino” kits you see around. Not the finest encoder in the land, I’m sure, but it should do the job. Unfortunately, Mbed OS doesn’t have a driver for an encoder and the first few third-party libraries I found either worked via polling or wouldn’t compile with the latest Mbed. Of course, reading an encoder isn’t a mysterious process. How hard can it be to write the code yourself? How hard, indeed. I thought I’d share my code and the process of how I got there.

There are many ways you can read a rotary encoder. Some are probably better than my method. Also, these cheap mechanical encoders are terrible. If you were trying to do precision work, you should probably be looking at a different technology like an optical encoder. I mention this because it is nearly impossible to read one of these flawlessly.

So my goal was simple: I wanted something interrupt driven. Most of what I found required you to periodically call some function or set up a timer interrupt. Then they built a state machine to track the encoder. That’s fine, but it means you eat up a lot of processor just to check in on the encoder even if it isn’t moving. The STM32 CPU can easily interrupt with a pin changes, so that’s what I wanted.

The Catch

The problem is, of course, that mechanical switches bounce. So you have to filter that bounce either in hardware or software. I really didn’t want to put in any extra hardware more than a capacitor, so the software would have to handle it.

I also didn’t want to use any more interrupts than absolutely necessary. The Mbed system makes it easy to handle interrupts, but there is a bit of latency. Actually, after it was all over, I measured the latency and it isn’t that bad — I’ll talk about that a little later. Regardless, I had decided to try to use only a pair of interrupts.

Continue reading “A Rotary Encoder: How Hard Can It Be?”

Arm Pumps Up The Volume With Mbed And A Potentiometer

Last time, I told you how to get started with the “Black Pill” STM32F411 board using the Mbed OS. The example program, admittedly, didn’t use many of the features of the OS, unless you count what the USB serial port driver uses behind the scenes. However, this time, we’ll make a practical toy that lets you adjust your PC’s volume level with a pot.

The Black Pill module on a breadboard.

The Black Pill is a good choice for this application since it has analog inputs and can act as a USB keyboard. In fact, the Mbed OS has drivers for all kinds of USB devices. We’ve seen the serial port, but you can also look like a mass storage device or a mouse, for example. Just for practice, we’ll create two threads of execution. One will read the pot and send a message over to the other thread. That thread will communicate with the PC as a USB keyboard. Any computer that understands media keys on a keyboard should work with the device.

Threads

Creating threads is very simple. For many cases, you just define a void function that takes no arguments and use it with a Thread object:

readknobThread.start(vol_thread);

Of course, the function shouldn’t return unless you want the thread to end. As I mentioned in the last post, you can sleep with the ThisThread::sleep_for call. There is also a yield call if you simply want to give up the time slice without sleeping for a specific amount of time.

Continue reading “Arm Pumps Up The Volume With Mbed And A Potentiometer”

Arming With An OS

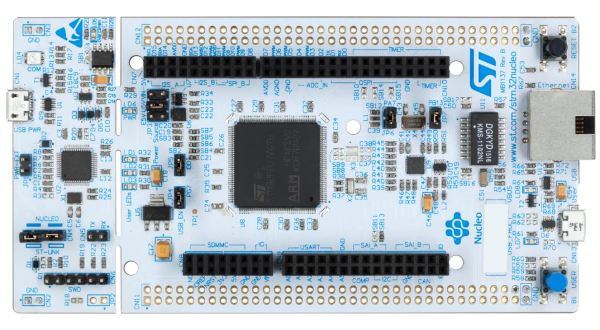
We see tons of projects with the infamous “Blue Pill” STM32 boards. They are cheap and plentiful and have a lot of great features, or at least they were before the chip shortage. I recently picked up a “Black Pill”, which is very similar but has an even more powerful processor. For a few bucks, you get an ARM CPU that can run at 100 MHz (but with USB, probably 96 MHz). There’s 512 kB of flash and 128 kB of RAM. There’s a USB type C port, and even a button and an LED onboard. The thing fits on a breadboard and you can program it with a cheap STLink dongle which costs about $10.

The Black Pill module on a breadboard.

Of course, you then have to consider the software. The STM32Cube stuff is a lot to set up and learn but it does let you do just about anything you can imagine. Then there is the STM32Duino plug-in that lets you use it as a beefy Arduino. That works and is easy enough to set up. However, there’s also Mbed. The only problem is that Mbed doesn’t work right out of the box. Turns out, though, it isn’t that hard to set up. I’ll show you how easy it is to get things going and, next time, I’ll show you a practical example of a USB peripheral that uses the mBed RTOS features.

First Steps

Obviously, you are going to need a Black Pill. There are at least two choices but for as cheap as they are there is little reason not to get the STM32F411 version that has more memory. The DIP form factor will fit in whatever breadboard you happen to have and a USB C cable will power the board so unless you are driving a lot of external circuitry, you probably don’t need an external supply.

Continue reading “Arming With An OS”