One of the biggest advantages of electronic paper is that it doesn’t require a constant power source to display a static image. Depending on the application, this can lead to a massive energy savings compared to more traditional display technologies. Of course, the electronics that actually drive the display are another story entirely. You need to reduce the energy requirements of the whole system if you really want to stretch your battery life.
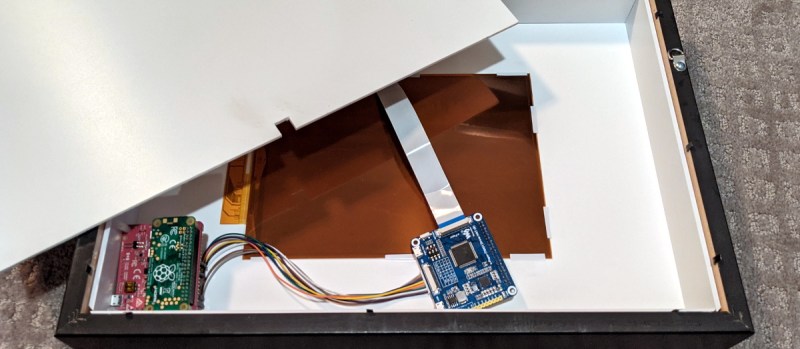
So when [Giacomo Miceli] wanted to put together this solar powered e-paper photo frame, he had to come up with some creative ways to curb the energy consumption of the Raspberry Pi Zero that runs the show. While the 10.3 inch 1872 × 1404 panel would only require the occasional burst of power to flick over to a new image, the Pi would be a constant drain on the internal battery pack. Considering he wanted the frame to recharge from ambient light with an array of small solar panels, that simply wouldn’t do.
The solution came in the form of a PiJuice HAT and some scripts that decide how often the Pi is to be powered on based on the current battery level. If there’s enough power, it might be every hour or so. But the lower the charge, the longer the delay. When the energy situation is particularly dire, the Pi might only be turned on every couple of days. With the Pi off and the e-paper not drawing any power, all of the energy produced by the solar panels can be devoted to recharging the frame’s 1,000 mAh battery.
When the Pi does get booted up, it quickly connects to a server to download a new image and update the display. After that, it ascertains the current battery level and determines how long the PiJuice should wait before turning it back on. After these tasks are complete, it will turn itself off until the next scheduled event. All told, [Giacomo] says the Pi is only up and running for about a minute each time the image is refreshed on the e-paper. He says the system has been running for six weeks now, with the battery level occasionally dipping down to 40% or so before it climbs back up.
Admittedly the energy consumption of the frame could be cut drastically by replacing the Raspberry Pi with a simple microcontroller, but we appreciate the creativity. Besides, the power and flexibility afforded by the Pi means this frame could be taught quite a few new tricks with some updated software.