The insides of a coffee machine replaced with new smart electronics

Add Smarts To Your Old Capsule Coffee Maker

Everyone has their preferred method of making (and consuming) coffee. While modern coffee makers are starting to come standard with IoT and ‘smart’ capabilities, owners of older models should fear not, as [Andreas Skoglund] shows how just about any old machine can be upgraded with the latest automation wizardry.

The most involved part of this conversion is removing the electronic guts of the Dolce Gusto donor machine, leaving just the original heater, pump and the control levers. With safety in mind, the user must make the machine ‘hot’ by configuring the levers and replacing the coffee capsule manually, otherwise no automated coffee magic can take place.

A low-tech relay powers on the coffee maker, with the entire logic supported by an off-the-shelf microcontroller. If you’re using a Particle.io controller, the provided instructions offer some helpful tips on automatically brewing your first beverage. From there it’s trivial to start using Home Assistant to set up various rules and schedules for your coffee drinking pleasure. You can even select whether you want a small or large cup.

There’s a few improvements that our coffee-starved hero suggests implementing, such as upgrading the power supply, as well as investing in refillable capsules to spite a certain global conglomerate corporation (plus it’s cheaper and much better for the environment). We’re not short on coffee-inspired hacks, so why not also check out this AI Powered Coffee Maker.

Continue reading “Add Smarts To Your Old Capsule Coffee Maker”

Wii Meets Its End In Breadcrumb Jail

One of often encountered traits of a hacker is an ability to build devices into places where they don’t belong. Perhaps, [sonictimm]’s self-descriptive WiiinToaster was somewhat of an inevitability. Inspired by the legendary Nintoaster project which used a NES, this is a modern take on the concept, putting a Wii inside what used to be an ordinary bread-making kitchen appliance. [Sonictimm] has taken care to make it as functional while reusing the user interface options commonly found in a toaster, with some of the Wii’s connections routed to the original buttons and the lever. It’s compatible with everything that the Wii supports in its standard, non-toaster form – the only function that had to be sacrificed was the “making toast” part of it, but some would argue it’d be a bit counterproductive to leave in.

[Sonictimm] says it took five years from building the WiiinToaster to documenting it, which sounds about right for an average project. If you, like many, have a Wii laying around that you haven’t been using for years, building it into a toaster (or any other place a Wii shouldn’t be) is a decent weekend project. Perhaps, a spacier chassis will also help with the overheating problems plaguing some earlier Wii models. One thing we would not recommend, however, is building a toaster into a Wii case – unless you like to see your creations self-immolate, in which case, make sure to film it and grace our Tips line with a YouTube link. There’s also a challenge for the achievement-minded hackers out there – making a rebuild so daring, it gets a DMCA notice from Nintendo.

It wouldn’t be the first time we feature a Nintendo console reborn in a toaster’s shell, with NES and SNES projects coming to mind. If you’re interested in other directions of Wii rebuilds, perhaps you could make an Altoids-sized FrankenWii, or an unholy hybrid of three consoles. And if you do build a Switchster, or a ToaDSter (perhaps, best suited for a waffle iron), we’d love to take a look!

Continue reading “Wii Meets Its End In Breadcrumb Jail”

Vacuum Forming With 3D Printer Filament

Even if they don’t have one themselves, we’d wager the average Hackaday reader is at least vaguely aware of how a vacuum former works on a fundamental level. You heat up a plastic sheet until it’s soft, then use a vacuum pump to pull the ductile material down onto an object and hold it there while it cools off. It’s easy to build a vacuum forming rig yourself, but small commercial units are cheap enough that it might not be worth your time. If everything goes to plan, the technique is a quick and effective way of duplicating items around the home and shop.

But we were recently tipped off to a variation of this classic technique that’s certainly worth further research. As demonstrated in a recent video, [Nathan Martinez] shows how 3D printed sheets can be used in place of the 5″ x 5″ squares of thermoplastic film that his imported vacuum former was designed to use. It’s easy enough to do: just model up a square with the appropriate 2D dimensions in your CAD package of choice, and extrude it to a height of about .5 mm.

A printed mesh pattern could be used to form custom shaped filters or strainers.

So what’s the advantage? Well for one thing, it’s cheaper. Though admittedly, not by much. Going rate on Amazon seems to be about 90 cents per sheet for the real stuff, and some back of the envelope math shows the printed version coming in at around 30 cents given nominal filament costs. Whether or not those savings are worth the extra effort is certainly debatable.

But that’s not really the most interesting part. With printed sheets loaded into the vacuum former, you’ve got access to a much wider array of materials to work with. For example, [Nathan] shows off some very interesting flexible pieces he was able to produce using sheets of TPU. You can also experiment with different surface textures. These can not only be used to give your vacuum formed pieces a bit of interesting visual flair, but could actually have some practical applications. In the video we see how a printed mesh could be formed over a piece to create a conformal air vent or filter.

To be sure, there’s some room for improvement here. Not all the pulls were successes, and [Nathan] says getting the printed sheets up to the proper temperature can be tricky. But when it works, it works quite well, and we think there could be some untapped potential in this unexpected melding of new and old methods of at-home plastic production.

Continue reading “Vacuum Forming With 3D Printer Filament”

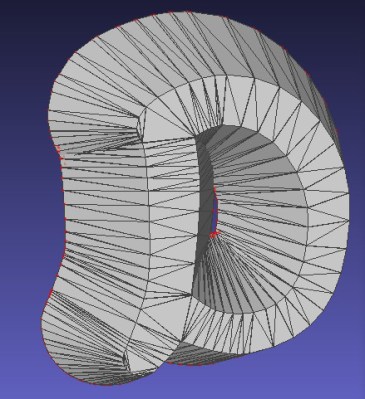
The supersonic trebuchet being modeled in software

Supersonic Projectile Exceeds Engineers Dreams: The Supersonic Trebuchet

Have you ever sat down and thought “I wonder if a trebuchet could launch a projectile at supersonic speeds?” Neither have we. That’s what separates [David Eade] from the rest of us. He didn’t just ask the question, he answered it! And he documented the entire build in a YouTube video which you can see below the break.

The trebuchet is a type of catapult that was popular for use as a siege engine before gunpowder became a thing. Trebuchets use a long arm to throw projectiles farther than traditional catapults. The focus has typically been on increasing throwing distance for the size of the projectile, or vice versa. But of course you’re here to read about the other thing that trebuchets can be used for: speed.

How fast is fast? How about a whip-cracking, sonic-booming speed in excess of 450 meters per second! How’d he do it? Mostly wood and rubber with some metal bits thrown in for safety’s sake. [David]’s video explains in full all of the engineering that went into his trebuchet, and it’s a lot less than you’d think. There’s a very satisfying montage of full power trebuchet launches that make it audibly clear that the projectile being thrown is going well past the speed of sound, with a report quite similar to that of a small rifle.

[David]’s impressive project and presentation makes it clear that all one has to do to build a supersonic trebuchet is to try. Just be careful, and watch where you shoot that thing before you put somebody’s eye out, ok?

Speaking of things that can go unexpectedly fast, check out these unpowered RC gliders that approach the speed of sound just feet off the ground. And thanks to [Keith] for the awesome Tip!

Continue reading “Supersonic Projectile Exceeds Engineers Dreams: The Supersonic Trebuchet”

Urgon solders close up to see the work

Vision Impaired Electronics Engineer Shows The Way To Get Things Done

A funny thing happens as the average electronics hobbyist gets older: Their eyes- well they just don’t work the same as they used to. But what if your life started out with compromised vision? In this epic forum post (Google translated from Polish to English), we meet nearly blind hacker [Urgon]. He goes into great detail about his condition and how it affects not just his daily life, but also his abilities as an electronics engineer. Or conversely, how it doesn’t.

[Urgon]’s origin story is familiar. At eight years old, he disassembled his first television. His self-education continued by using his remaining vision to soak up every bit of literature about electronics that he could get his hands on. A well-intentioned but protective mother kept him away from soldering irons, fearing that the close proximity to his good eye might not bode well for his remaining vision.

If Urgon can solder 0805's, so can you!
If Urgon can solder SOIC’s 0805’s, so can you!

Despite a failed eye, and his other having quite severe glaucoma, [Urgon] has persevered. He uses assistive technologies as you’d expect, but notes that in more recent times some excellent free software has surpassed some of the commercial products he used in the past.

While even the sighted among us often shy away from SMD components, [Urgon] dives right in. SOIC packages and 0805 parts don’t hold him back. Bright LED flashlights, zooming in with his smart phone, and surely a healthy dose of patience make his hackery possible.

That’s not to say that [Urgon] hasn’t had some noteworthy incidents. He’s suffered electric shock from the 400 V capacitors in an ATX PSU, burned his face with his soldering iron, and even managed to step on a DIP package. Barefoot. Yes, the pins were facing up.

But wait- there’s more! In this follow-up post, [Urgon] discusses more assistive/adaptive technologies and how hackers like you and I can focus our efforts on things the vision impaired will find most helpful.

Our hats are off to [Urgon] and those like him who persevere despite the odds. We can all learn from [Urgon]’s hacker spirit and his dedication to the craft. We recently covered some blind software hackers who have taken it upon themselves to fly passenger jets– virtually, of course!

Thanks to [Moryc] for the excellent tip!


A Rotary Phone As A Computer Peripheral

It’s an age-old conundrum for anyone working with retro hardware: preserve its original condition or not? The answer depends so often on a complex mix of how rare, obsolete or unusable the device is in its original form , and what the intended use for the device will be. For [Typhon Mind] who needed a novelty method of recording best wishes at a wedding through an old dial phone there was no need for it to be entirely original, so the solution was to turn it into a USB device for a host computer.

Out went the original circuitry, and in came a USB hub, a USB audio interface, and an Arduino. The original earpiece would suffice, but the microphone was replaced with a more modern one. The Arduino will register the cradle switch, and also power a set of LED addressable lights under the unit.

The result is a phone that retains all its looks, but has a new life as a PC peripheral. We’d venture to suggest that also using the Arduino to read the dial and produce DTMF tones might make it a valid peripheral for a VOIP application and complete the transformation, but that’s something that could be done at a later date. Maybe it could even be given a GSM makeover.

The Pros And Cons Of A Power Flush Toilet

By and large, toilet design hasn’t radically changed in a good long time. The problem was considered solved, and society moved on. However, [Handy Geng] was tasked by a friend to build a toilet with an extra-powerful flush, so he went ahead and did just that.

The concept is simple; the water tank in the custom-built toilet can be charged with pressurized air from a compressor when an more powerful flush is needed. Then, when the lever is pulled on that flush, the water will blast into the bowl with significantly more ferocity than usual.

[Handy Geng] also notes a further benefit from the system. By bolting down the toilet lid, using a gasket to seal it to the toilet bowl, the air pressure system can be used to blast out blockages and clogs.

However, there are some drawbacks. The toilet is nearly entirely constructed out of steel, a material that generally isn’t the first choice when working with water or bodily fluids. Additionally, the power flush mode tends to end up with water spraying out of the bowl due to the intensity of the spray.

Regardless, it goes to show that the toilet design is still an active area of research, and that we needn’t settle for the toilets we have today. More powerful, more capable models are just around the corner if we want them. Video after the break.

Continue reading “The Pros And Cons Of A Power Flush Toilet”