Robotic Ball-Bouncing Platform Learns New Tricks

[T-Kuhn]’s Octo-Bouncer platform has learned some new tricks since we saw it last. If you haven’t seen it before, this device uses computer vision from a camera mounted underneath its thick, clear acrylic platform to track a ball in 3D space, and make the necessary (and minute) adjustments needed to control the ball’s movements with a robotic platform in real time.

We loved the Octo-Bouncer’s mesmerizing action when we saw it last, and it’s only gotten better. Not only is there a whole new custom ball detection algorithm that [T-Kuhn] explains in detail, there are also now visualizations of both the ball’s position as well as the plate movements. There’s still one small mystery, however. Every now and again, [T-Kuhn] says that the ball will bounce in an unexpected direction. It doesn’t seem to be a bug related to the platform itself, but [T-Kuhn] has a suspicion. Since contact between the ball and platform is where all the control comes from, and the ball and platform touch only very little during a bounce, it’s possible that bits of dust (or perhaps even tiny imperfections on the ball’s surface itself) might be to blame. Regardless, it doesn’t detract from the device’s mesmerizing performance.

Design files and source code are available on the project’s GitHub repository for those who’d like a closer look. It’s pretty trippy watching the demonstration video because there is so much going on at once; you can check it out just below the page break.

Continue reading “Robotic Ball-Bouncing Platform Learns New Tricks”

Video De-shaker Software Measures Linear Rail Quality

Here’s an interesting experiment that attempts to measure the quality of a linear rail by using a form of visual odometry, accomplished by mounting a camera on the rail and analyzing the video with open-source software usually used to stabilize shaky video footage. No linear rail is perfect, and it should be possible to measure the degree of imperfection by recording video footage while the camera moves down the length of the rail, and analyzing the result. Imperfections in the rail should cause the video to sway a proportional amount, which would allow one to characterize the rail’s quality.

To test this idea, [Saulius] attached a high-definition camera to a linear rail, pointed the camera towards a high-contrast textured pattern (making the resulting video easier to analyze), and recorded video while moving the camera across the rail at a fixed speed. The resulting video gets fed into the Deshaker plugin for VirtualDub, of which the important part is the deshaker.log file, which contains X, Y, rotate, and zoom correction values required to stabilize the video. [Saulius] used these values to create a graph characterizing the linear rail’s quality.

It’s a clever proof of concept, especially in how it uses no special tools and leverages a video stabilizing algorithm in an unusual way. However, the results aren’t exactly easy to turn into concrete, real-world measurements. Turning image results into micrometers is a matter of counting pixels, and for this task video stabilizing is an imperfect tool, since the algorithm prioritizes visual results instead of absolute measurements. Still, it’s an interesting experiment, and perfectly capable of measuring rail quality in a relative sense. Can’t help but be a bit curious about how it would profile something like these cardboard CNC modules.

Homemade EDM Machine Moves From Prototype To Production

Of all the methods of making big pieces of metal into smaller pieces of metal, perhaps none is more interesting than electrical discharge machining. EDM is also notoriously fussy, what with having to control an arc discharge while precisely positioning the tool relative to the workpiece. Still, some home gamers give it a whirl, and we love to share their successes, like this work-in-progress EDM machine. (Video, embedded below.)

We’ve linked [Andy]’s first videos below the break, and we’d expect there will be a few more before all is said and done. But really, for being fairly early in the project, [Andy] has made a lot of progress. EDM is basically using an electric arc to remove material from a workpiece, but as anyone who has unintentionally performed EDM on, say, a screwdriver by shorting it across the terminals in a live outlet box, the process needs to be controlled to be useful.

Part 1 shows the start of the build using an old tap burning machine, a 60-volt power supply, and a simple pulse generator. This was enough to experiment with the basics of both the mechanical control of electrode positioning, and the electrical aspects of getting a sustained, useful discharge. Part 2 continues with refinements that led very quickly to the first useful parts, machined quickly and cleanly from thin stock using a custom tool. We’ll admit to being impressed — many EDM builds either never get to the point of making simple holes, or stop when progressing beyond that initial success proves daunting. Of course, when [Andy] drops the fact that he made the buttons for the control panel on his homemade injection molding machine, one gets the feeling that anything is possible.

We’re looking forward to more on this build. We’ve seen a few EDM builds before, but none with this much potential.

Continue reading “Homemade EDM Machine Moves From Prototype To Production”

A $50 CNC

In theory, there’s isn’t much to building a CNC machine. Hook a bit to a motor and move the motor around with some lead screws and stepper motors. Easy. But, of course, the devil is in the details. [DAZ] made a nice-looking and inexpensive rig that probably isn’t the most precise CNC in the world, but it looks like it does a good enough job and he claims he spent about $50 on it. The video below shows some of the work it has done, and it doesn’t look bad.

This isn’t a rainy afternoon project. You’ll need to cut some wood and 3D print many parts. The drives use M8 threaded rod. Electronics is just an Arduino running standard software.

The steppers looked pretty light duty, and we wondered if it would have been worthwhile to trade them out for beefier ones instead of modifying the ones used for bipolar operation. Still, the results did look good for $50. The 775 spindle is another place you could probably spend a little more and get something better. Non-printed linear rails, and a better screw? The point is that you’ve got a basis to build from.

Continue reading “A $50 CNC”

Stepper Motor Analyzer Reveals All

In theory, you really don’t need much to work with electronics. A scope ought to do everything. However, for special purposes, it is handy to have meters, logic analyzers, and other special-purpose instruments. If you work on motion systems like 3D printers and CNC machines, you ought to have a way to look at stepper motors. You don’t? [Zapta] has a great Simple Stepper Motor Analyzer and [Teaching Tech] has a great video (see below) that shows some of the great things it can do.

What can it do? It analyzes the motor in place and can visualize what’s happening during stepping, microstepping, and other operating modes. Connecting the instrument is easy since you just use a four-pin pass-through connector.

Continue reading “Stepper Motor Analyzer Reveals All”

Hacking An Air Assist For The Ortur Laser

Getting great results from a laser cutter takes a bit of effort to make sure all of the settings are just right. But even then, if the air between the material and the laser source is full of smoke and debris it will interfere with the laser beam and throw off the results. The solution is to add air assist which continuously clears that area.

Earlier this year I bought an Ortur laser engraver/cutter and have been hacking on it to improve the stock capabilities. last month I talked about putting a board under the machine and making the laser move up and down easily. But I still didn’t have an air assist. Since then I found a great way to add it that will work for many laser cutter setups.

I didn’t design any of these modifications, but I did alter them to fit my particular circumstances. You can find my very simple modifications to other designs on Thingiverse. You’ll also find links to the original designs and you’ll need them for extra parts and instructions, too. It is great to be able to start with work from talented people and build on each other’s ideas.

Continue reading “Hacking An Air Assist For The Ortur Laser”

CNC Chainsaw

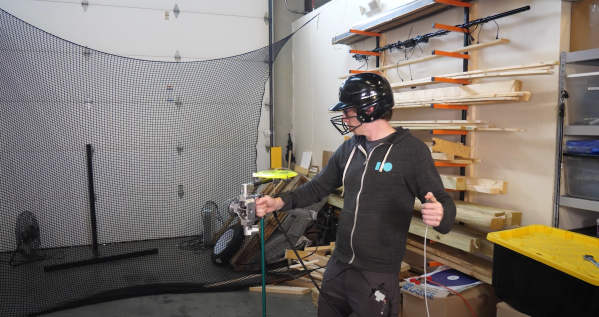
You can spend a lot of time trying to think of a clever title for a post about a CNC chainsaw. But you’ll finally realize, what else can you say but “CNC Chainsaw?” [Stuff Made Here] actually built such a beast, and you can watch it go in the video embedded below. A custom chainsaw on a Tormach robotic arm. So it is more like a robot using a chainsaw than a conventional CNC machine.

Instead of an XY motion, the machine uses what the video calls an “apple peeler” method and uses the Minkowski algorithm to adjust for the size of the chainsaw. The video is an odd juxtaposition of advanced topics like the Minkowski and basic things like G code.

Continue reading “CNC Chainsaw”