Through-hole resistors come on tape that we’re now calling bandoliers. Since [Spencer] is selling a boatload of his RC2014 backplane computer kits on Tindie, he’s been chopping up a lot of resistor bandoliers. It’s a boring and monotonous job.
Fortunately, a lot of people have had a bandolier cutting problem over the years, and there are some hobbyist-grade robots that will do this work for you. One of the more popular robots tasked for bandolier cutting is a laser cut robot. However, if you already have a laser cutter, why not just use the laser to cut the bandoliers? It’s brilliant in its simplicity.
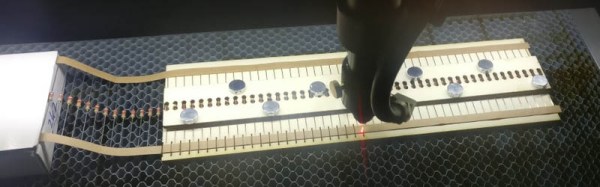
[Spencer] spent a little bit of time designing a template to turn his laser cutter into a cutter for through hole resistors. No, he’s not trimming the leads — this is just a device to cut resistors into groups mini bandoliers of a handful of resistors. The tool is made out of plywood, with a smaller top piece held down with magnets to keep the resistors aligned.
The entire template is up on Thingiverse, and it’s great if you need to cut hundreds of resistors to kit dozens of projects. If you’re only doing one or two, scissors will be the way to go, but if you’re cursed with the monotony of trimming hundreds there’s no better way to get things done than to put a robot to work.