A CNC You Could Pop-Rivet Together

You have to be careful with CNC; it’s a slippery slope. You start off one day just trying out a 3D printer, and it’s not six months before you’re elbow deep in a discarded Xerox looking for stepper motors and precision rods. This is evident from [Dan] and his brother’s angle aluminum CNC build.

Five or six years ago they teamed up to build one of those MDF CNC routers. It was okay, but really only cut foam. So they moved on to a Rostock 3D printer. This worked much better, and for a few years it sated them. However, recently, they just weren’t getting what they needed from it. The 3D printer had taught them a lot of new things, 3D modeling, the ins of running a CNC, and a whole slew of making skills. They decided to tackle the CNC again.

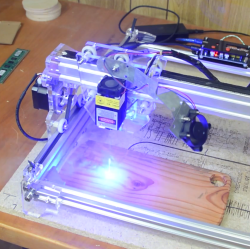
The new design is simple and cheap. The frame is angle aluminum held together with screws. The motion components are all 3D printed. The spindle is just an import rotary tool. It’s a simple design, and it should serve them well for light, low precision cuts. We suspect that it’s not the last machine the pair will build. You can see it in action in the video after the break.

Continue reading “A CNC You Could Pop-Rivet Together”

Build A Shapeoko The Hard Way

[Caleb Peters] looked at the Shapeoko 3 CNC kit, a kit designed to make building an entry level CNC router a possibility for anyone, a kit to take the guesswork out of the equation, a kit that removes all those difficult technical barriers. He looked at all of that ease and thought, “nah.” He wanted to learn! So he decided to build one the hard way. Like the early American Pioneers, he’d build his Shapeoko from scratch, suffering piously all the while.

His goal was to build an improved iteration of the Shapeoko 3, for less than the price of the kit. The first problem was the rails the gantry would run on. Inventables wasn’t going to sell him the rails, and he wasn’t sure if the delrin wheels used would be able to hold the weight of his heavier design. After some strife he determined that aluminum hard coat rails and steel wheels should last long enough, and if the aluminum wore away, the more expensive steel rails were a drop-in replacement.

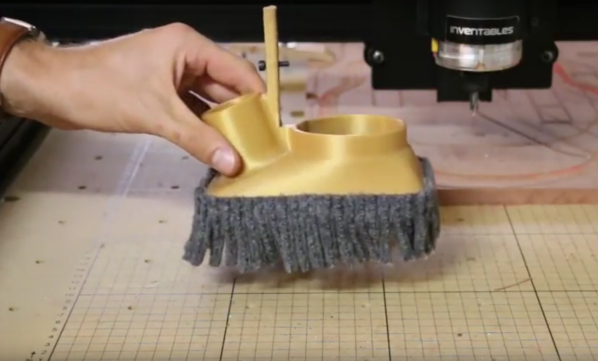
Similar problems were overcome at each step. He couldn’t exactly copy the Shapeoko design. The Shapeoko’s steel pieces can only be made on a larger machine like a waterjet or industrial laser. He did have a knee mill and managed to cleverly avoid the need with some slight redesign. He kept at it, doing cool things like drilling a hole through the housing of a wood router, used as the spindle, and putting a hall-effect sensor just behind the commutator and brush assembly to get a spindle rpm reading.

Fortunately for us, he documented it all very well and filmed a nine part video series; the last of which you can see after the break.

Continue reading “Build A Shapeoko The Hard Way”

Hackaday Prize Entry: DIY Automatic Tool Changer

Choosing between manually changing endmill bits on a CNC machine and investing in an expensive automated solution? Not for [Frank Herrmann], who invented the XATC, an eXtremely simple Automated Tool Changer. [Frank’s] ingenious hack achieves the same functionality as an industrial tool changer using only cheap standard hardware you might have lying around the workshop.

xatc_carouselLike many ATCs, this one features a tool carousel. The carousel, which is not motorized, stores each milling bit in the center bore of a Gator Grip wrench tool. To change a tool, a fork wrench, actuated by an RC servo, blocks the spindle shaft, just like you would do it to manually change a tool. The machine then positions the current bit in an empty Gator Grip on the carousel and loosens the collet by performing a circular “magic move” around the carousel. This move utilizes the carousel as a wrench to unscrew the collet. A short reverse spin of the spindle takes care of the rest. It then picks another tool from the carousel and does the whole trick in reverse.

The servo is controlled via a WiFi connected NodeMCU board, which accepts commands from his CNC controller over HTTP. The custom tool change sequences are provided by a few JavaScript macros written for the TinyG workspace on chilipeppr.com, a browser-based G-code host. Enjoy the video of [Frank Herrmann] explaining his build!

Thanks to Smoothieboard creator [Arthur Wolf], who is currently working on a similar project, for the tip!

The HackadayPrize2016 is Sponsored by:

CNC Upgrade To Guitar Pickup Winding Machine

The idea of winding inductive guitar pickups by hand is almost unthinkable. It uses extremely thin wire and is a repetitive, laborious process that nevertheless requires a certain amount of precision. It’s a prime candidate for automation, and while [Davide Gironi] did exactly that, he wasn’t entirely satisfied with his earlier version. He now has a new CNC version that is more full-featured and uses an ATMega8 microcontroller.

[Davide Gironi]’s previous version took care of winding and counting the number of turns, but it was still an assisted manual system that relied on a human operator. The new upgrade includes a number of features necessary to more fully automate the process, such as a wire tensioner, a wire guide and traverse mechanism (made from parts salvaged from a broken scanner), and an automatic stop for when the correct number of turns has been reached.

guitar_pickup_winding_sample_microscope

All kinds of small but significant details are covered in the build, such as using plastic and felt for anything that handles the wire — the extremely fine wire is insulated with a very thin coating and care must be taken to not scratch it off. Also, there is the need to compute how far the traverse mechanism must move the wire guide in order to place the new wire next to the previously-laid turn (taking into account the winding speed, which may be changing), and doing this smoothly so that the system does not need to speed up and slow down for every layer of winding.

This system is still programmed by hand using buttons and an LCD, but [Davide Gironi] says that the next version will use the UART in order to allow communication with (and configuration by) computer – opening the door to easy handling of multiple winding patterns. You can see video of the current version in action, below.

Continue reading “CNC Upgrade To Guitar Pickup Winding Machine”

[HomoFaciens] Shows Off With DIY Paper Printer

[HomoFaciens] is always making us feel silly about our purchases. Did we really need to buy a nice set of stepper motors for that automation project? Couldn’t we have just used some epoxy and a threaded rod to make an encoder? Did we need to spend hours reading through the documentation for an industrial inkjet head? Couldn’t we just have asked ourselves, “What would [HomoFaciens] do?” and then made a jailhouse tattoo gun attached to a broken printer carriage and some other household tech trash?

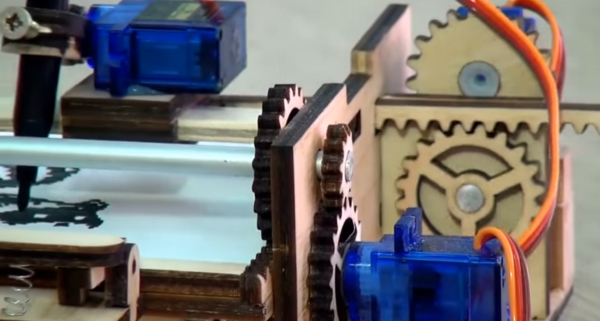
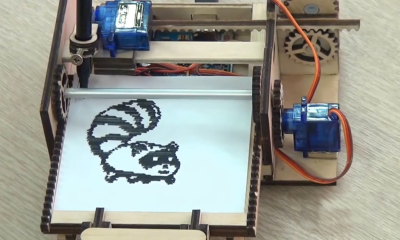
In his continuing work for his Hackaday prize entry, which we have covered before, his latest is a ink (…drop? ) printer. We think the goal is a Gingery book for CNC.  He begins to combine all his previous work into a complete assembly. The video, viewable after the break, starts by explaining the function of a salvaged printer carriage. A motor attached to a belt moves the carriage back and forth; the original linear encoder from the printer is used for positional feedback.

The base of the printer is a homemade y-carriage with another salvaged printer motor and encoder driving a threaded rod. The positional feedback for this axis is provided by a optical mouse gliding on a sheet of graph paper.  The printer nozzle is a cup of ink with a solenoid actuated needle in it. When the needle moves in a hole at the bottom, it dispenses ink.

As always, [HomoFaciens] makes something that is the very definition of a hack. Commenters will have to go elsewhere to leave their favorite debasement.

Continue reading “[HomoFaciens] Shows Off With DIY Paper Printer”

The Almost Useful Machine

[Alex] is no stranger to making machines of negligible utility. A few years ago he made the Almost Useless Machine, a solar-powered system that cuts through a 20mm dowel rod while you wait (and wait, and wait). Enamored by the internet’s bevy of powered hacksaws, he sought to build a sturdier version that’s a little more useful. Approximately five months of free time later, he had the Almost Useful Machine.

It runs on a wiper motor and a recycled power supply from a notebook computer. [Alex] rolled his own board for controlling the motor with an ATtiny25. The circuit turns potentiometer movement into PWM, which controls the motor through a MOSFET. After the cut is finished, an endstop microswitch  immediately cuts the motor.

Every bit of the chassis is aluminum that [Alex] machined by hand. Don’t have that kind of setup? How about a powered hacksaw with a 3D-printed linkage? Make the jump to see it in action, and stick around for the two-part time-lapse build video.

Continue reading “The Almost Useful Machine”

New CNC Machine? DIY Machinable Wax!

The folks at Leeds Hackspace have built themselves a shiny new C-beam based CNC mill. As you might expect everyone wants to try the machine out, but there’s a problem. A CNC machine presents a steep learning curve, and a lot of raw materials (not to mention cutting bits) can be used in a very short time. Their solution is simple: mix themselves some machinable wax from LDPE pellets and paraffin wax, then easily recycle their swarf and failed objects back into fresh machinable wax stock.

Making the wax recipe is not for the faint-hearted, and involves melting the LDPE pellets and wax to 130 degrees Celcius in a cheap deep-fat fryer. They bought the cheapest fryer they could find at the British catalogue retailer Argos, you really wouldn’t want to risk an appliance you cared about in this exercise.

Colouring came from an orange wax crayon, though they note recycling of mixed colours will inevitably result in a muddy brown. The finished mixture was poured into Tupperware lunchboxes to set, and the resulting blocks were trimmed to square on a bandsaw. The Tupperware proved not to have a flat bottom, so later batches were cast in a loaf tin which proved much more suitable.

We’ve mentioned the machinable wax recipe before here at Hackaday, but it’s worth returning to the topic here with a description of it being used in the wild. Having watched other environments get through learning materials at an alarming rate with very little to show for their effort, we can see it makes a lot of sense as a training material.