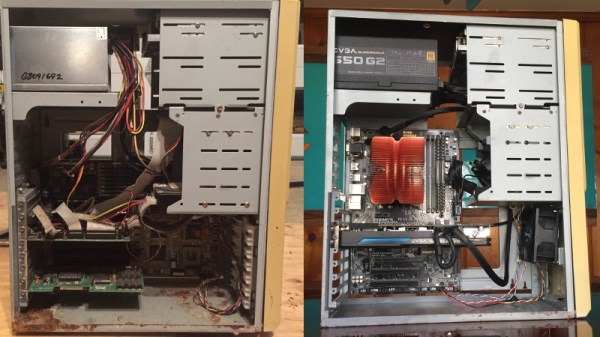
Until a flood claimed its life, the 386 tower [Tylinol] found on the side of the road served him well as a DOS gaming rig. In the aftermath of the flood, the machine was left with ruined internals and a rusted case; it ended up being tossed in storage where it was slowly rotting away. But a recent idea got him to drag this old dinosaur back out into the light of day and give it a new lease on life with some modern gear.
 For our viewing pleasure [Tylinol] documented the restoration of the computer, dubbed SErEndIPITy, from start to finish. The rebuild starts with tearing the machine down to the steel frame and sanding all the rust off. Luckily it looks like no structural damage was done, and a coat of engine enamel got the frame looking more or less like new. The original motherboard mounting solution wouldn’t work for his modern board, so he ended up riveting a piece of sheet metal in and drilling new holes for standoffs to thread into.
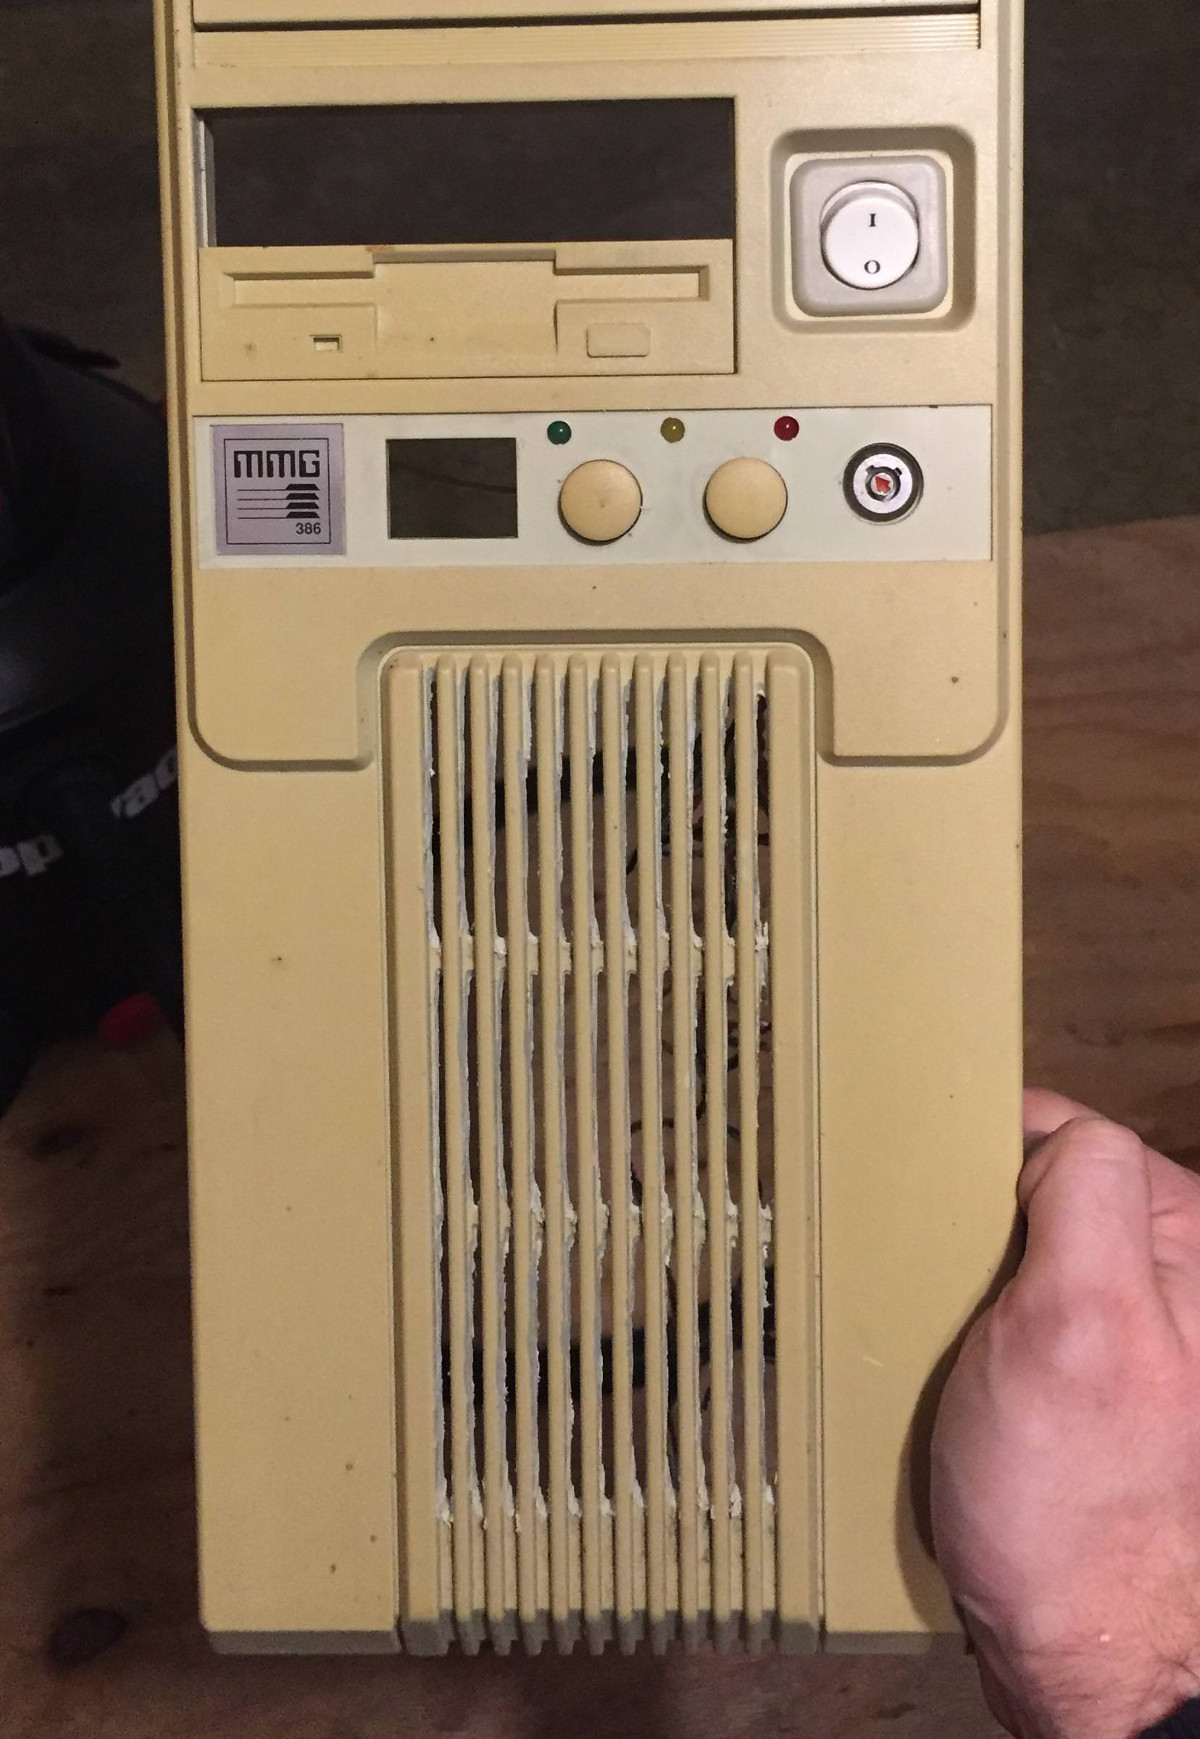
A nice element of this rebuild is that [Tylinol] didn’t want to drastically change the outward appearance of the machine. The customary yellowed plastic was left alone, and wherever possible the original hardware was reused. Rather than blow a hole in the case, he took his Dremel to the decorative ribbed design of the front panel and turned it into a stock-looking vent.
The real star of this rebuild is the LED CPU “Speed” display on the front of the case. In its original form, this was a fake display that simply cycled through predefined digits when you pressed the “Turbo” button on the front panel. By grounding them one at a time, [Tylinol] figured out which lines on the PCB controlled each segment of the display and wired it up to a Teensy 3.5. He was then able to write a C# plugin for CoreTemp to display the temperature.
The rebuilt machine is packing an i5-6500 processor, GTX 970 video card, and 8 GB of DDR4 RAM. Not exactly a speed demon compared to some of the modern desktops out there, but it certainly beats the original hardware. Incidentally, so does the Teensy 3.5 controlling the front panel display. There’s a certain irony there…
Cramming modern hardware into the carcass of an outdated computer is nothing new, of course. But we especially like the builds that take the time to make it all look stock.
[via /r/DIY]