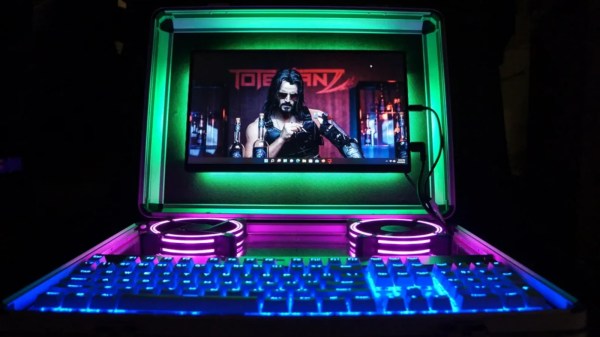
There are plenty of gaming laptops on the market these days, but none quite fit the requirements of one [ParticularlyPippin]. Thus, they set out on building their own portable computer, ending up with a rig in a briefcase with a decidedly cyberpunk feel.
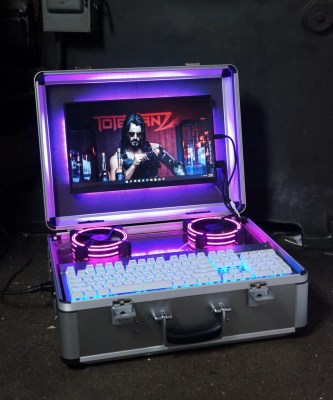
The design relies on desktop components, with the idea being to make a machine with better upgradability than a typical laptop. The briefcase itself is a nice deep-shell unit, and was given a wooden baseboard to hold all the components. It was then provided with standoffs and mountings for a Mini-ITX motherboard, as well as all the necessary add-ons like fans and storage. As in many odd-form-factor builds, a PCI-E riser cable comes in handy to hook up the GPU.
As for the user interface, a USB portable monitor is paired with a mechanical keyboard for the appropriate amount of clackity-clack when hacking out in the field. The icing on the cake, however, are the RGB strip backlights controlled via MSI’s software that really make the final result pop.
It’s a tidy portable build and one that hopefully provides [ParticularlyPippin] with the necessary grunt for their work wherever they can tote a briefcase. It’s not the first homebrew luggable we’ve seen, and it won’t be the last; there’s simply something compelling about the briefcase form factor. If you’re cooking up your own in the home lab, don’t hesitate to drop us a line.