The Pixel Pump is an open source manual pick & place assist tool by [Robin Reiter], and after a long road to completion, it’s ready to ship. We first saw the Pixel Pump project as an entry to the 2021 Hackaday Prize and liked the clean design and the concept of a completely open architecture for a tool that is so valuable to desktop assembly. It’s not easy getting hardware off the ground, but it’s now over the finish line and nearly everything — from assembly to packaging — has been done in-house.
Because having parts organized and available is every bit as important as the tool itself, a useful-looking companion item for the Pixel Pump is the SMD-Magazine. This is a container for parts that come on SMD tape rolls. These hold components at an optimal angle for use with the pickup tool, and can be fixed together on a rail to create project-specific part groups.
A tool being open source means giving folks a way to modify or add features for better workflows, and an example of this is [Robin]’s suggestion of using a foot pedal for hands-free control of the interactive BoM plugin. With it, one can simply use a foot pedal to step through a highlighted list of every part for a design, an invaluable visual aid when doing hand assembly.
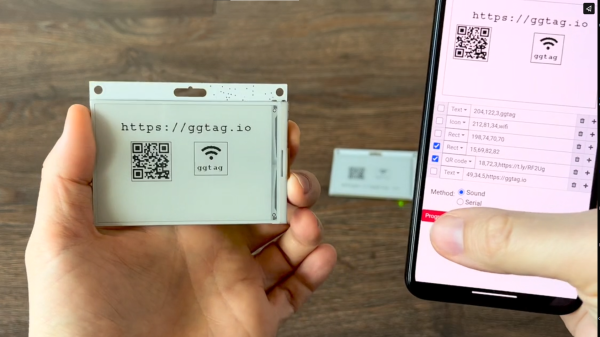
In a way, an e-paper display makes an excellent foundation for a reprogrammable RFID card. The display only needs power during a refresh, and 125 kHz RFID tags are passive in the sense that the power for the RFID transaction comes from the reader itself. [Georgi Gerganov] has put those together in the GGtag, an open-source project for a 3.52″ e-paper badge with a trick or two up its sleeve.
One clever function is that it is programmable with sound, a feature built off another project of [Georgi]’s called ggwave, a data-to-sound (and vice-versa) framework that has been ported to just about every hardware platform one cares to imagine — including mobile phones — and can reliably send data through the air.
Transmitting data over sound is limited in throughput but has a number of advantages, not least of which is the huge range of compatible devices. There’s a web-based tool for programming the GGtag with sound available at ggtag.io that will give you a preview and let you hear how it works. The data encoding method gives transmissions a charming beep-boop quality that’s a bit reminiscent of an analog modem handshake. GGtag can also be programmed over USB serial, a faster (but somewhat less exciting) option.
The project’s GitHub repository contains GGtag’s code and technical details, and the CrowdSupply project is in the works for anyone who would prefer to buy one once they become available.
There’s no denying that while railroads have switched to diesel and electric as their primary power sources, there’s a certain allure to the age of steam. With that in mind, a group of Pennsylvania train fans are bringing the alleged fastest steam train back from extinction.
It takes real dedication to build a 428-ton device from scratch, but these rail aficionados seem to have it in spades. Armed only with the original blueprints and a lot of passion, this team has already finished construction of the boiler and nose of the Class T1 replica which is no small feat. This puts the train at approximately 40% complete.
Some changes are planned for the locomotive including a change to fuel oil from coal and replacing the poppet valves prone to failure with camshaft-driven rotary valves. While not original hardware, these changes should make the train more reliable, and bring the world record for the fastest steam locomotive within reach. If the T1 replica can reach the 140 MPH storied of the originals, it will smash the current record of 126 MPH held by a British train, the A4 Mallard, which would be exciting indeed.
Speaking of Pennsylvania and steam, a trip to Scranton is a must for anyone interested in the age of rail.
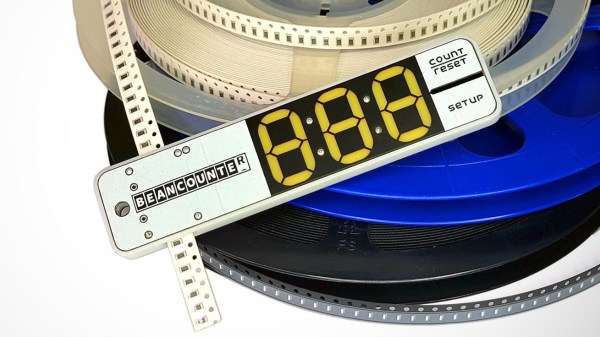
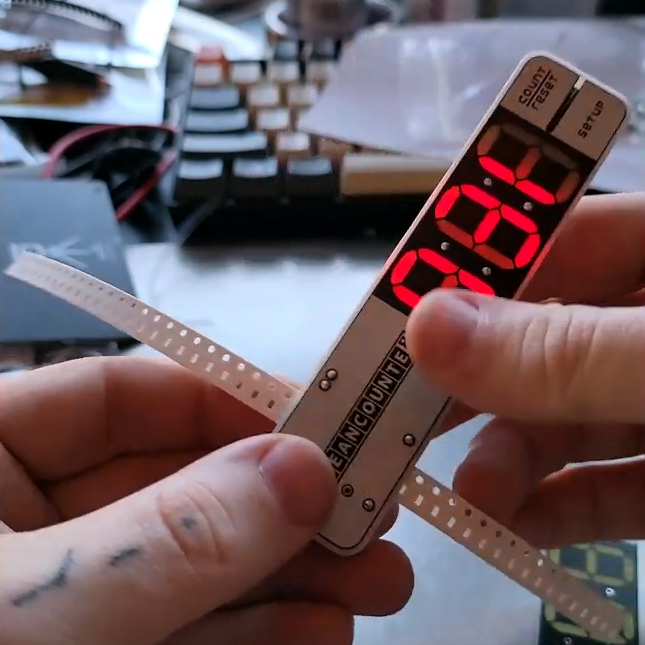
[Nick Poole] has an interesting idea for a new tool, one that has the simple goal of making accurate part counts of SMT reels as easy as pulling tape through a device. That device is the BeanCounter, an upcoming small handheld unit of his own design that counts parts as quickly as one can pull tape through a slot. The device is powered by a CR2032 cell and and works with 8 mm wide tapes up to 2 mm in height, which [Nick] says covers most 0805 or smaller sized parts, as well as things like SOT-23 transistors.
Why would one want to make such a task easier? Two compelling reasons for such a tool include: taking inventory of parts on partial reels or cut tape, and creating segments that contain a known number of parts.
The first is handy for obvious reasons, and the second is useful for things like creating kits. In fact, the usefulness of this tool for creating tape segments of fixed length is perhaps not obvious to anyone who hasn’t done it by hand. Sure, one can measure SMT tape with a ruler or a reference mark to yield a segment containing a fixed number of parts, but that involves a lot of handling and doesn’t scale up very well. In fact, the hassle of cutting tape segments accurately and repeatedly is a common pain point, so making the job easier has value.
If you looked at the photos and suspected that the big, 7-segment numeric display is done with clever PCB fabrication options (making segments by shining LEDs through PCB layers, a trick we always like to see) you’re not alone. After all, [Nick] has a lot of experience in getting clever with board fabrication, and eagle-eyed readers may even suspect that the reset and setup buttons on the edge of the tool are created by using flex PCB segments as switches. Want the nitty-gritty details? Visit the GitHub repository for the project and see it all for yourself at the CAD level.
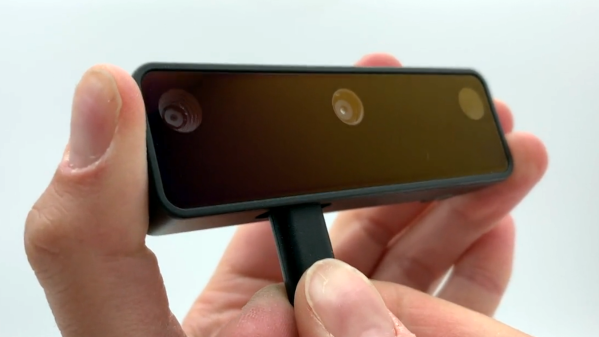
The OAK-D is an open-source, full-color depth sensing camera with embedded AI capabilities, and there is now a crowdfunding campaign for a newer, lighter version called the OAK-D Lite. The new model does everything the previous one could do, combining machine vision with stereo depth sensing and an ability to run highly complex image processing tasks all on-board, freeing the host from any of the overhead involved.
The OAK-D Lite camera is actually several elements together in one package: a full-color 4K camera, two greyscale cameras for stereo depth sensing, and onboard AI machine vision processing with Intel’s Movidius Myriad X processor. Tying it all together is an open-source software platform called DepthAI that wraps the camera’s functions and capabilities together into a unified whole.
The goal is to give embedded systems access to human-like visual perception in real-time, which at its core means detecting things, and identifying where they are in physical space. It does this with a combination of traditional machine vision functions (like edge detection and perspective correction), depth sensing, and the ability to plug in pre-trained convolutional neural network (CNN) models for complex tasks like object classification, pose estimation, or hand tracking in real-time.
So how is it used? Practically speaking, the OAK-D Lite is a USB device intended to be plugged into a host (running any OS), and the team has put a lot of work into making it as easy as possible. With the help of a downloadable application, the hardware can be up and running with examples in about half a minute. Integrating the device into other projects or products can be done in Python with the help of the DepthAI SDK, which provides functionality with minimal coding and configuration (and for more advanced users, there is also a full API for low-level access). Since the vision processing is all done on-board, even a Raspberry Pi Zero can be used effectively as a host.
There’s one more thing that improves the ease-of-use situation, and that’s the fact that support for the OAK-D Lite (as well as the previous OAK-D) has been added to a software suite called the Cortic Edge Platform (CEP). CEP is a block-based visual coding system that runs on a Raspberry Pi, and is aimed at anyone who wants to rapidly prototype with AI tools in a primarily visual interface, providing yet another way to glue a project together.
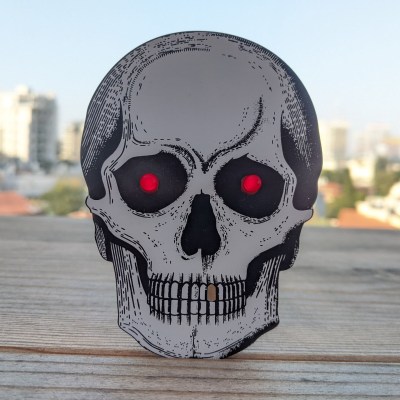
[Uri]’s project was The Skull CTF, an electronic hardware puzzle that came in the shape of a PCB skull, and his detailed look behind the scenes covers just about every angle, from original concept to final wrap-up, along with his thoughts and feedback at every stage. His project reached its funding goal, got manufactured and shipped, and in the end was a success.
[Uri] started with a working project, but beyond that was virtually a complete novice when it came to crowdfunding. He eventually settled on using Crowd Supply to make his idea happen, and his writeup explains in great detail every stage of that process, including dollar amounts. What’s great to see is that not only does [Uri] explain the steps and decisions involved, but explains the research that went into each, and how he feels each of them ended up working out.
The entire thing is worth a read, but [Uri] summarizes the experience of crowdfunding a hardware project thus: an excellent way to test out the demand for an idea and bring a product into existence, but be aware that unless a project is a runaway success it probably won’t be much of an income generator at that stage. It was a great learning experience, but involved a lot of time and effort on his part as well.
Regular readers will know that Hackaday generally steers clear of active crowdfunding campaigns. But occasionally we do run across a project that’s unique enough that we feel compelled to dust off our stamp of approval. Especially if the campaign has already blasted past its funding goal, and we don’t have to feel bad about getting you fine folks excited over vaporware.
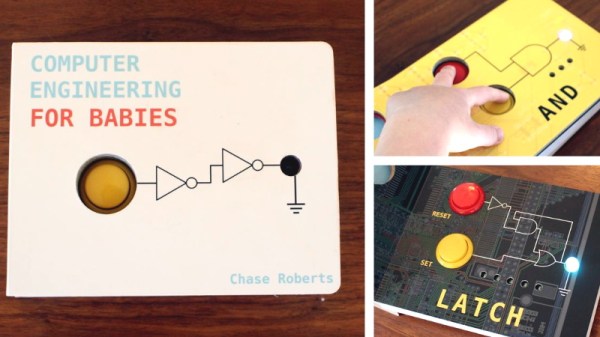
It’s with these caveats in mind that we present to you Computer Engineering for Babies, by [Chase Roberts]. The product of five years of research and development, this board book utilizes an internal microcontroller to help illustrate the functions of boolean logic operations like AND, OR, and XOR in an engaging way. Intended for toddlers but suitable for curious minds of all ages, the book has already surpassed 500% of its funding goal on Kickstarter at the time of this writing with no signs of slowing down.
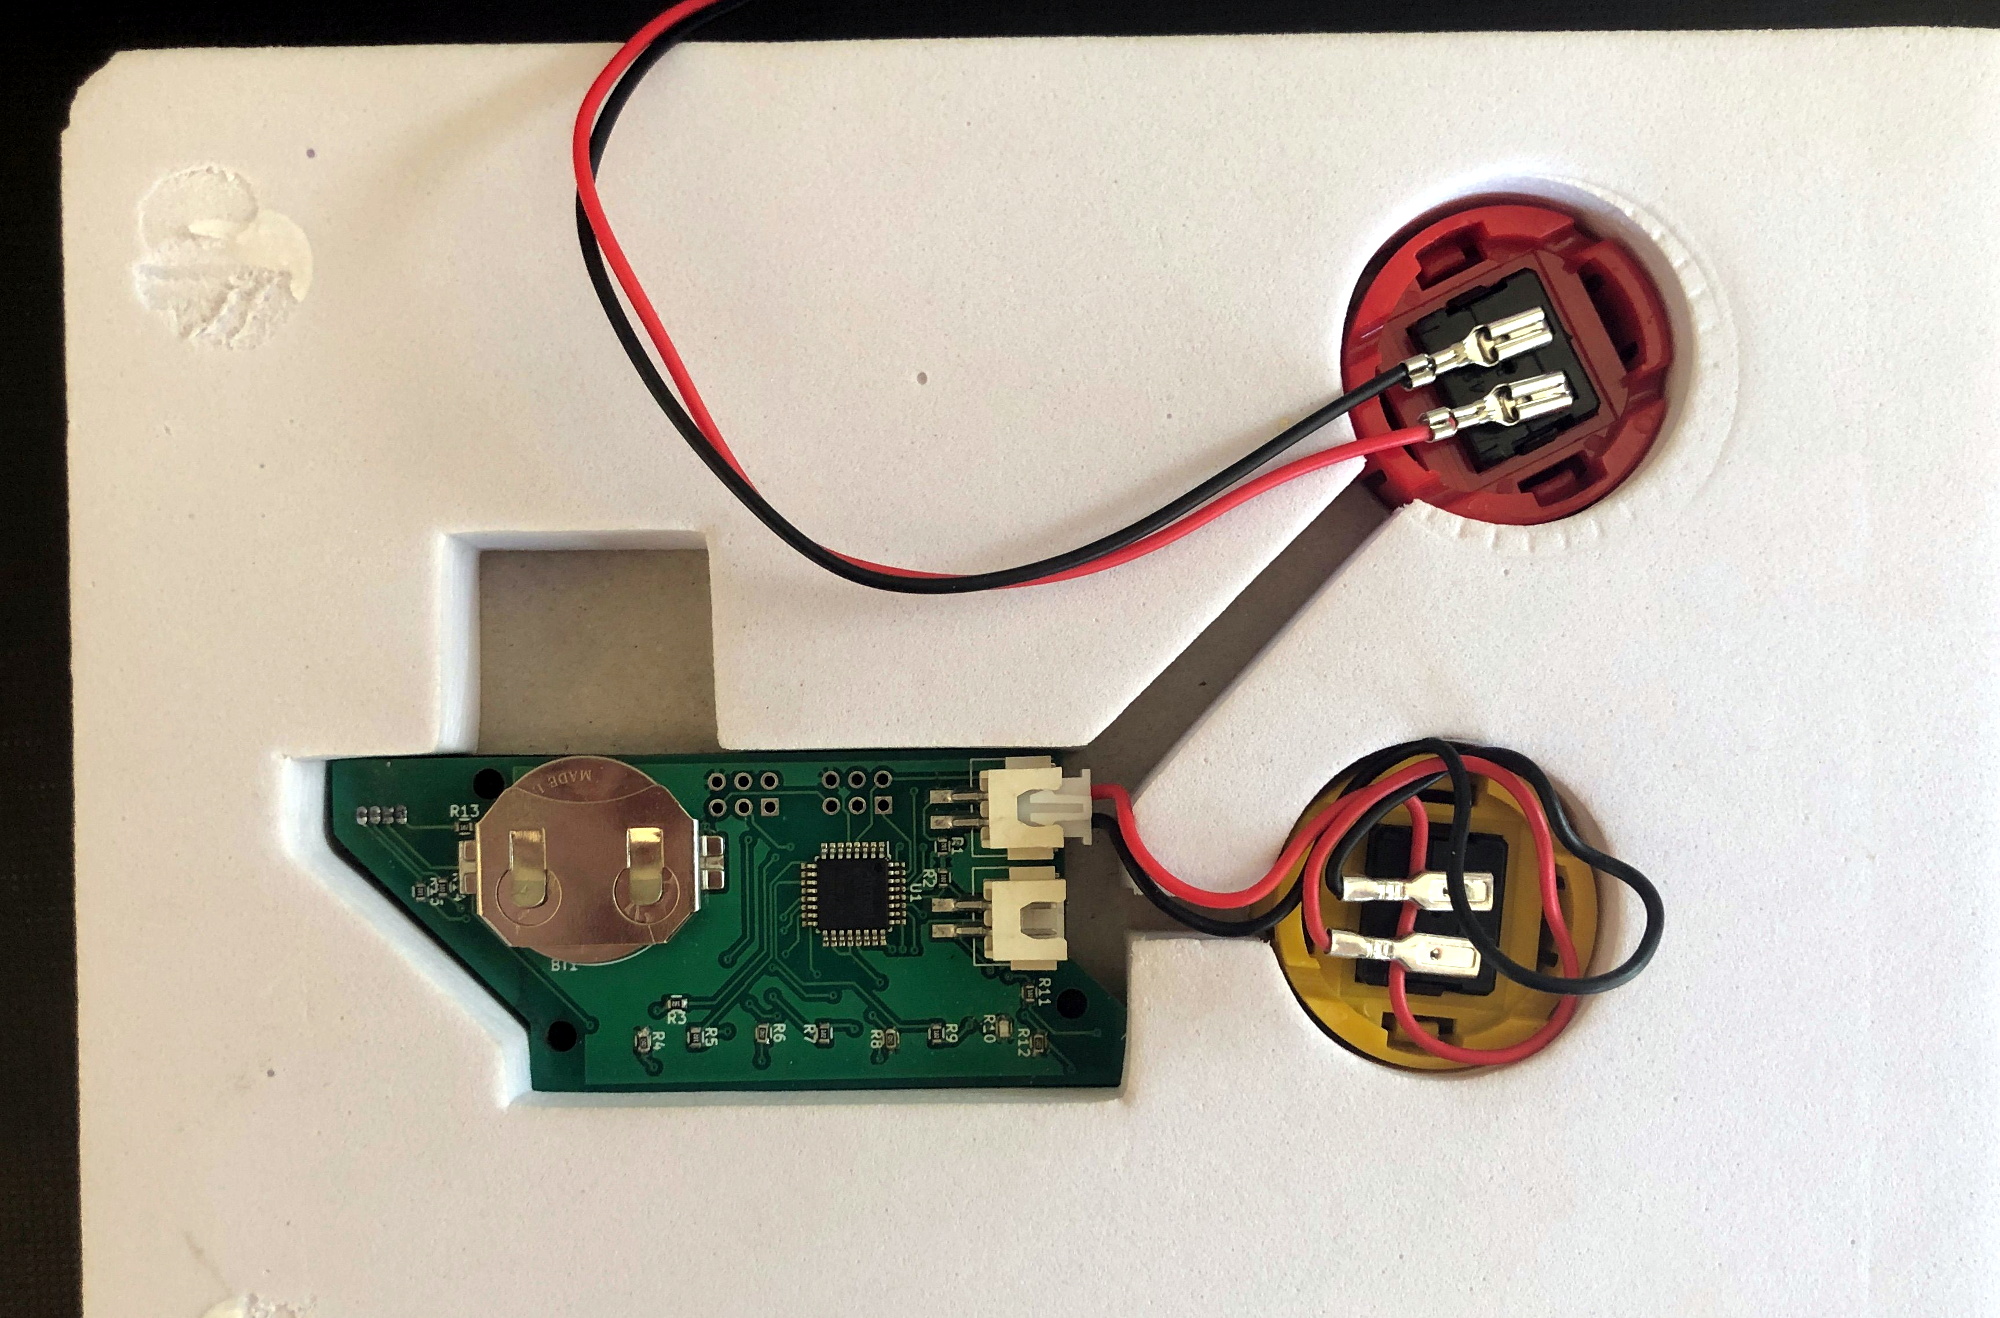
The electronics as seen from the rear of the book.
Technical details are light on the Kickstarter page to keep things simple, but [Chase] was happy to talk specifics when we reached out to him. He explained that the original plan was to use discreet components, with early prototypes simply routing the button through the gates specified on the given page. This worked, but wasn’t quite as robust a solution as he’d like. So eventually the decision was made to move the book over to the low-power ATmega328PB microcontroller and leverage the MiniCore project so the books could be programmed with the Arduino IDE.
Obviously battery life was a major concern with the project, as a book that would go dead after sitting on the shelf for a couple weeks simply wouldn’t do. To that end, [Chase] says his code makes extensive use of the Arduino LowPower library. Essentially the firmware wakes up the ATmega every 15 ms to see if a button has been pressed or the page turned, and updates the LED state accordingly. If no changes have been observed after roughly two minutes, the chip will go into a deep sleep and won’t wake up again until an interrupt has been fired by the yellow button being pressed. He says there are some edge cases where this setup might misbehave, but in general, the book should be able to run for about a year on a coin cell.
[Chase] tells us the biggest problem was finding a reliable way to determine which page the book was currently turned to. In fact, he expects to keep tinkering with this aspect of the design until the books actually ship. The current solution uses five phototransistors attached to the the MCU’s ADC pins, which receive progressively more light as fewer pages are laying on top of them. The first sensor is exposed when the second page of the book is opened, so for example, if three of the sensors are seeing elevated light levels the code would assume the user is on page four.
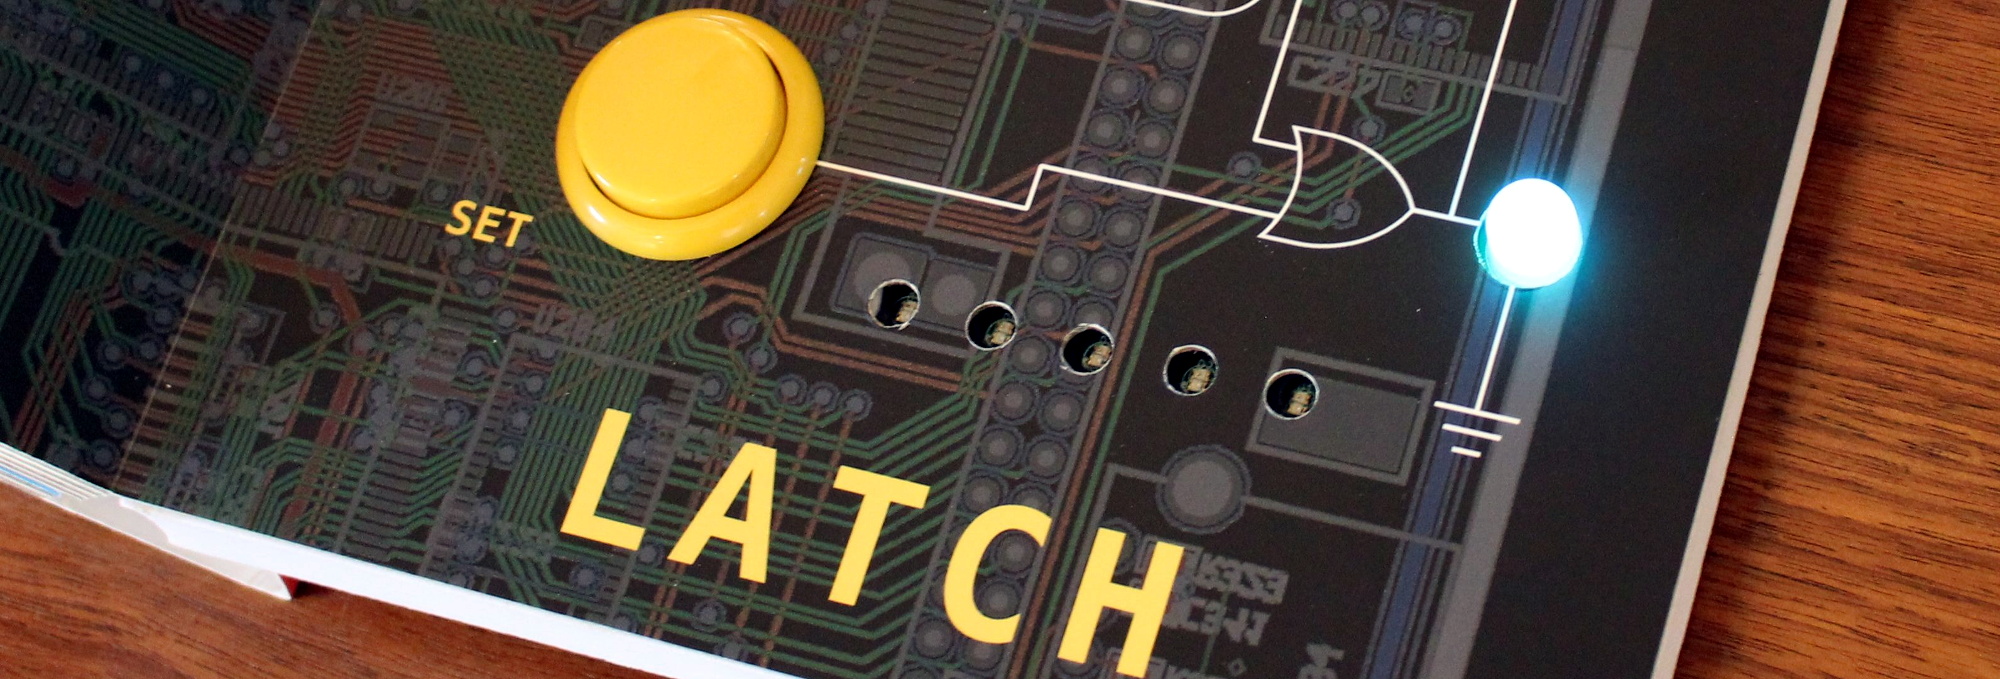
Opening to the last page exposes all five light sensors.
The books and PCBs are being manufactured separately, since as you might expect, finding a single company that had experience with both proved difficult. [Chase] plans on doing the final assembly and programming of each copy in-house with the help of family members; given how many have already been sold this early in the campaign, we hope he’s got a lot of cousins.
So what do you do with an Arduino-compatible book when Junior gets tired of it? That’s what we’re particularly interested in finding out. [Chase] says he’s open to releasing the firmware as an open source project after the dust settles from the Kickstarter campaign, which would give owners a base to build from should they want to roll their own custom firmware. Obviously the peripheral hardware of the book is fairly limited, but nothing is stopping you from hanging some sensors on the I2C bus or hijacking the unused GPIO pins.
If you end up teaching your copy of Computer Engineering for Babies some new tricks, we’ve love to hear about it.


 [Uri]’s project was